Shitsukan Tools Manual
Photographic tools for DaVinci Resolve, built by a cinematographer and colorist.
Shitsukan Tools for DaVinci Resolve
Photographic tools built by a cinematographer and colorist: white balance like on the camera, zones like Ansel Adams, printer lights like in the lab, diffusion like a filter in front of the lens.
Contents
- How the tools think
- Installation
- Basics
- Workflow and node tree
- Which tool for what
- Camera LUT
- False Color
- HDR
- 11 White Balance – Shiro 白
- 12 Base – Kiso 基礎
- 13 Zones – Sumi 墨
- 14 Day for Night – Yoru 夜
- 15 Highlight Recovery – Mado 窓
- 16 Density – Nōdo 濃度
- 17 Negative – Inga 陰画
- 18 Printer Lights – Yakitsuke 焼付
- 19 Print – Yōga 陽画
- 20 Quick Look – Kantan 簡単
- 21 Look – Utsushi 写し
- 22 Film Looks – Genzō 現像
- 23 Skin – Hada 肌
- 24 Palette – Haishoku 配色
- 25 Black and White – Shirokuro 白黒
- 26 LUT – Hyō 表
- 27 Color Palette – Irodori 彩り
- 31 Texture – Shitsukan 質感
- 32 Diffusion – Kiri 霧
- 33 Lens – Boke ボケ
- 41 Scope – Hakari 計り
- 42 Test Pattern – Kijun 基準
- 51 Finish – Shiage 仕上げ
- License and support
How the tools think
Each tool translates a tool from the set or the lab. If you think in Kelvin, stops, zones and points, you feel at home right away.
Panel Mode puts the eight most important controls on the knobs and the switches on the buttons. The display shows what is on and what is off.
Everything is computed in linear light. Curves never invert, black and white stay protected, and no tool clamps the image at 1.0.
Installation
- System
- macOS 13 or later, Apple Silicon (M1 or later). Processing runs on the GPU with Metal.
- Host
- DaVinci Resolve or DaVinci Resolve Studio on the Mac. Tested with DaVinci Resolve 21 and Resolve Studio 21.
- Install
- Open the installer
Shitsukan-Tools-1.66.pkgand click through. The plugins go to/Library/OFX/Plugins. Then restart Resolve. - Activate
- Without a key all tools run in trial mode: full function, but diagonal hatched bands across the image. In any tool open the License group at the very bottom, paste the key from your order e-mail and press Activate (needs internet once). The tools of the package are then unlocked on this Mac in every project, see the License chapter.
- Find
- On the Color page in the effects library under Open FX → Shitsukan. Drag a tool onto a node.
- Remove
- Delete the folder
ShTools.ofx.bundlein/Library/OFX/Plugins.
Basics
Names
The tools carry Japanese names, in keeping with Shitsukan (質感, the feel of a material). The name starts with what the tool does, followed by the Japanese name, for example “15 Day for Night – Yoru 夜”. That keeps the node readable too, where Resolve shows only the first characters. The number in front keeps the order in the effects library: the tens digit is the family (1 Exposure, 2 Color, 3 Texture, 4 Measure, 5 Finish), the units digit the order within the grade. Each family has a main tool ending in 1 or 2 that gathers the most important moves in one node: Kiso 基礎 for exposure, Utsushi 写し for color, Shitsukan 質感 for texture. The other tools of the family are specialists you place in parallel or after it when you need them. The character is part of the name, just as Resolve shows it in the effects library. In this manual every mention carries character and function, for example Kiso 基礎 (Base), so nobody has to look it up.
- Shiro
- 白, white · White Balance
- Kiso
- 基礎, foundation · Base
- Sumi
- 墨, ink and its grey gradations · Zones
- Yakitsuke
- 焼付, printing photographs · Printer Lights
- Yoru
- 夜, the night · Day for Night
- Utsushi
- 写し, a faithful copy of a model · Look
- Genzō
- 現像, developing in the lab · Film Looks
- Hada
- 肌, skin · Skin
- Haishoku
- 配色, color scheme · Palette
- Shirokuro
- 白黒, white and black · Black and White
- Hyō
- 表, the table · LUT
- Shitsukan
- 質感, the feel of a material · Texture
- Kiri
- 霧, mist · Diffusion
- Boke
- ボケ, blur, known internationally as bokeh · Lens
- Hakari
- 計り, to measure · Scope
- Kijun
- 基準, reference · Test Pattern
- Shiage
- 仕上げ, the finishing · Finish
Intensity
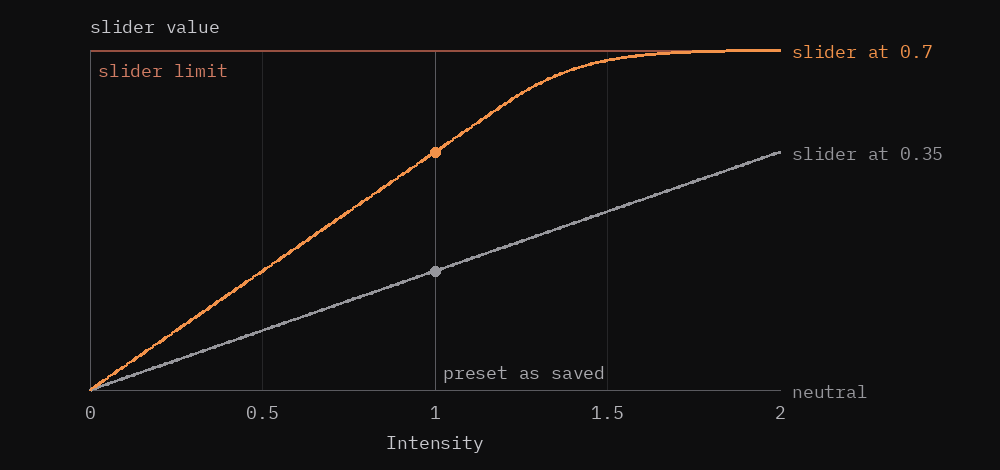
Right below Preset sits Intensity, on the first knob in Panel Mode. It scales everything set in the tool, whether by preset or by hand: 0 is neutral, 1 exactly as set, 2 twice as strong. Near the limits of a control the increase runs out softly; nothing hits a hard stop. Positions, sizes, hues and mix stay as they are. One hand pulls a look back or pushes it further.

Focus
Next to Intensity sits Focus, on the second knob in Panel Mode. Intensity says how much a tool does, Focus says how wide. 0 leaves everything as set. Positive makes the effect narrower and more targeted, negative wider and softer. At +1 the width shrinks to about a third, at −1 it grows to almost three times, always within the control limits. The controls themselves keep their values; Focus only works on top of them.

| Tool | Focus changes |
|---|---|
| Sumi | Band Width and Softness of the zones |
| Hada | Skin Width, Skin Softness and Smoothness. Narrower here also means fewer tones count as skin |
| Haishoku | Softness: how far a color is pulled towards its palette color |
| Kiri | Radius and Softness of the scatter |
| Boke | Falloff Transition. The edge stays equally strong; the transition starts further in or further out |
Shiro, Kiso, Yakitsuke, Yoru, Utsushi, Genzō, Shirokuro, Hyō, Shitsukan and Shiage have no single width and therefore no Focus. Utsushi sets its ranges directly with Range Width.
Working Space
At the very bottom of every tool sits the Working Space menu: DWG Linear, DWG Intermediate (default), LogC3 or ACEScct. It tells the tool how the image is encoded when it arrives at this very node. Usually that is the timeline color space, but not always: Resolve can switch any node to its own Node Gamma with a right-click, converting the image before the node and back after it. So the node decides, not the timeline.
| Timeline | Node Gamma | Working Space in the tool |
|---|---|---|
| DaVinci Wide Gamut / Intermediate | same as timeline (default) | DWG Intermediate |
| DaVinci Wide Gamut / Intermediate | Linear | DWG Linear |
| ARRI Wide Gamut 3 / LogC3 | same as timeline | LogC3 |
| ACES / ACEScct | same as timeline | ACEScct |
Auto: Mado, Irodori, Inga and Yōga also offer Auto (their default). The tool samples the image and detects by itself whether it arrives linear or in DaVinci Intermediate. On LogC3 or ACEScct timelines and with very dark linear images, set the menu by hand.
Leave Node Color Space on the timeline. Internally all tools work in linear light and encode the result back, so node Linear with DWG Linear gives practically the same result as the default node with DWG Intermediate, as long as menu and node match. If the menu is wrong, the tool works with wrong light values: stops, kelvin and zones no longer add up, and the image turns too bright and hard or too flat. Typical symptom with a linear node and the tool on Intermediate: black patches in the brightest spots (sun, windows, welding light). Then change Working Space or Node Gamma.
Presets, My Presets and Reset All
A preset writes its values into the controls; after that you keep adjusting freely. My Presets stores your own setups in eight slots, available in all projects. Reset All sets all controls, switches and the preset menu back to default; the working space stays.
Film and filter names
Negative and print stocks carry the names cinematographers and colorists know them by. The presets are approximations of the character of these stocks, built from published curves, data sheets and our own comparisons. They are not exact replicas or licensed emulations, and the result always depends on camera, exposure and grade. The names are trademarks of their respective owners; Shitsukan is not affiliated with them. The glass filters in Kiso and Kiri carry descriptive names and approximate typical filter effects in the same way.
Panel Mode
Button 1 on the Mini Panel toggles Panel Mode. Only the most important controls and switches stay active and sit on the eight knobs and the buttons. More controls are on the following pages. The display shows active switches with ON, inactive ones with off. The buttons follow the same scheme in every tool: button 1 Panel Mode, button 2 the main function of the tool (such as Exposure On, Zones On, Look On), then the other switches, the second to last button Reset All, the last one the best display of the tool (usually Curve Box). If a tool has fewer switches, Split View, Show in Render and Curve Full fill up. In the grading tools the first knob is Intensity, the second Focus when the tool has one; Hakari, Kijun and Irodori start with their own controls.
Displays and overlays
Curve Box shows a tool’s display as a box in its corner, Curve Full over the whole image. Each box carries a frame and pictogram in its family color; measuring boxes are yellow. For the displays to appear in the viewer, the viewer must be set to Open FX Overlay: the menu at the bottom left below the viewer (or View → Viewer Overlay → Open FX Overlay). Resolve switches it by itself, for example to Qualifier, as soon as you use a picker or a window. If the Curve Box does not appear, the viewer is almost always in another mode. Along the bottom of the tone curve box a faint histogram shows the input image in stops. If it sits in a narrow hump around middle grey or piles up at one edge, the tool’s working space probably does not match the footage. The overlay appears only in the Resolve viewer, not on the video output. Show in Render (Display group; on the panel right before Curve Box on most tools) renders the displays into the image: then you also see them on the external monitor and in screenshots, but also in the export.
Above the Curve Box sits a status line: what the tool does to middle grey (MID, in stops), to the shadows three stops below and the highlights three stops above (SHADOWS, HIGHS), and how it changes saturation (SAT in percent, 100 % = unchanged). That way you read the effect of a preset in numbers without measuring the curve.
Before rendering
Resolve does not tell a plugin whether it is rendering for the viewer or for the Deliver page. So everything rendered into the image also ends up in the export: split view, scopes, spot readout, test patterns and masks. Turn them off before rendering, fastest with the Split View, Scopes, Pattern and Show Mask switches. Only the OpenFX overlays (Curve Box and Curve Full without Show in Render) always stay in the viewer. Tip: don’t put Hakari on every clip, put it once on the timeline node graph. It then applies to all clips, and before export you flip exactly one switch.
Color dots
The groups in the inspector carry the color dot of their family: blue for Exposure, orange for Color, violet for Texture, green for Measure, red for Finish.
Split View
Every tool that changes the image has a Compare group with Split View at the bottom. The original is on the left, the result on the right, with a white line in between whose position Split Position sets. Turn it off before rendering.
Detail Protect
Sumi and Haishoku have Detail Protect. The tool then works only on the large areas; grain, skin and fine structures stay as they were. The value is the radius in percent of the image height.
Workflow and node tree
Why the tools make you faster
Kiso puts exposure, contrast, balance and saturation into one node, Utsushi a whole look. The tree stays short, every correction has its fixed place, and copying to other clips means copying one node.
Stops, kelvin, zones and printer points. "Half a stop darker, 300 K warmer" is something you type in, it acts the same on every clip, and you can discuss it with camera and director.
Exposure and white balance work in linear light like on the camera. Skin, saturation and contrast stay put when you re-expose. You don't have to chase the rest.
Intensity doses the whole tool, Focus makes its effect narrower or wider, Panel Mode puts the key controls on the Mini Panel, and the display in the image shows what the tool is doing without a look at the scopes.
Black, white and skin are protected, curves never invert, nothing is clipped at 1.0. What you don't have to fix costs no time.
Recommended node tree
A fixed tree saves the most time, because every correction sits in the same place in every clip. This is how we use the tools:
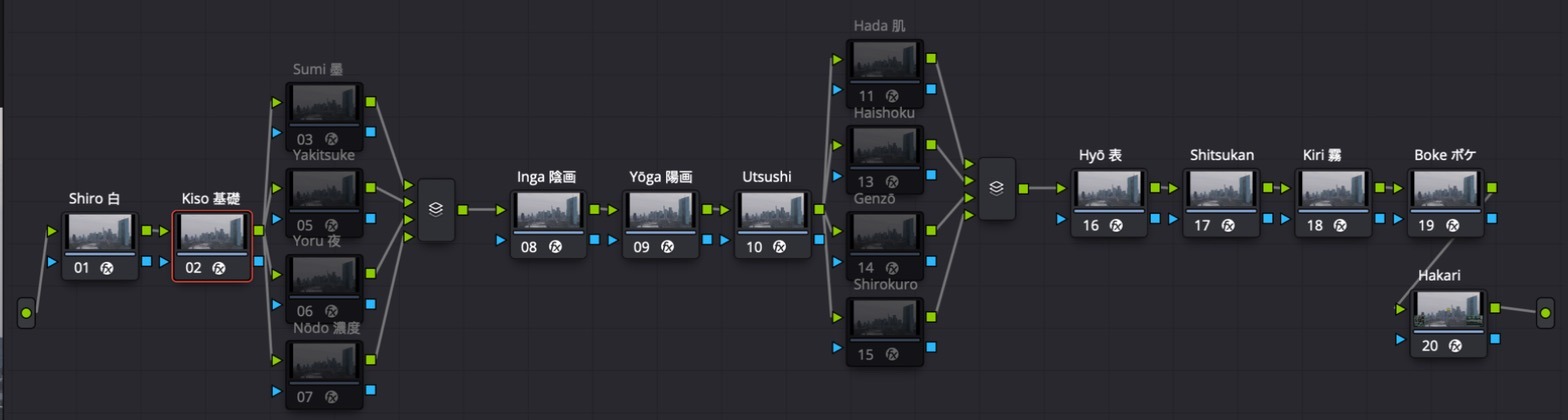
- One main tool per family, the specialised tools in parallel below it. Kiso 基礎 (exposure), Utsushi 写し (color) and Shitsukan 質感 (texture) sit serially in the main chain; in Panel Mode they show only their most important controls. The smaller tools of the same family hang below as a parallel node and start switched off: the tree begins neutral, and you switch on what the shot needs.
- Recover highlights (clip, right at the front): Mado 窓 needs the untouched log. So as a parallel branch straight from the source: source → Mado and source → the rest of the tree, both into a Layer Mixer; on the Mado node Use OFX Alpha, then the mixer lays only the recovered highlights over the grade. For simple cases Mado also works serially as the first node before Shiro.
- Exposure (clip): Shiro 白 first, on a node with Node Gamma Linear and Working Space DWG Linear, or in the default DWG Intermediate. Then Kiso 基礎 as the main tool. Below it in parallel Sumi 墨 (zones), Yakitsuke 焼付 (matching in points), Yoru 夜 (day for night) and Nōdo 濃度 (colour density): all four work pixel by pixel in DWG Intermediate, the parallel mixer adds their changes.
- Film path (clip, optional): Inga 陰画 after Kiso as the negative (stock, exposure, halation, grain), behind it Yōga 陽画 as the print (printer lights, print stock, bleach). Both stay scene-referred; the output transform stays with Resolve. If you use the film path, leave Genzō and the grain in Shitsukan out, otherwise the image is developed twice.
- Color (clip or group): Utsushi 写し as the main tool for the look. Below it in parallel Hada 肌 (skin), Haishoku 配色 (palette), Genzō 現像 (lab looks) and Shirokuro 白黒 (black and white). After that Hyō 表 for a look LUT. Whatever is the same for all clips belongs in a group's post-clip graph or on the timeline.
- Texture (group or timeline): Shitsukan 質感 as the main tool (grain, halation, diffusion, micro contrast), then serially Kiri 霧 for veil and Mist and Boke ボケ for the lens edge. These three read neighbouring pixels; in parallel, grain and scatter would add up twice, so they stay serial. Hakari 計り as the last node before the output transform, switched off before rendering. Shiage 仕上げ is the only tool after the output transform, on the finished display signal.
- Limits of the parallel mixer: it feeds every parallel node the same input image and sums their changes. Two tools that change the same quantity (two saturation moves, two tone curves) add up differently than one after the other. For strong moves, put the second node serially behind.
- Palette (at the very end): Irodori 彩り renders the palette sheet from the display image, so it goes last, after the output transform. Grab a still, switch the node off before rendering.
- Resolve's own nodes such as noise reduction, windows, qualifiers and tracking go wherever you need them, noise reduction ideally first, before Shiro. The output transform stays in color management or as the last node of the timeline, as usual.
Planned: the tree as a PowerGrade to load into the Gallery, apply once and start grading.
Which tool for what
The most common jobs in a grade and the tool built for them. Often there are two routes: one shapes in light, before the output transform, the other works on the finished signal.
| Job | Tool | How |
|---|---|---|
| Correct exposure | Kiso 基礎 (Base) | Exposure in stops, photometric like the aperture. Switch on False Color first and read it |
| Pull highlights back | Kiso, Sumi 墨 (Zones), Shiage 仕上げ (Finish) | Softly over the whole shoulder: Kiso White and Shoulder Rolloff. One zone precisely: Sumi Zone VIII to X. At the very end on the signal: Shiage White Point |
| Open or deepen shadows | Kiso, Sumi | Kiso Flare lifts like stray light, Black and Toe Rolloff shape the toe. Sumi Zone I to III for single zones, negative Amount for softer shadows |
| More or less contrast | Kiso, Sumi | Kiso Contrast around the pivot. Sumi Amount stretches the whole band like N+1, the middle stays |
| White balance and mixed light | Shiro 白 (White Balance) | Kelvin and Tint as on the camera, box on a neutral area. Glass Filter for conversion filters |
| Protect skin, change surroundings | Hada 肌 (Skin) | Select and protect skin softly, shift the six color sectors of the surroundings |
| One color world for the scene | Haishoku 配色 (Palette), Utsushi 写し (Look) | Haishoku pulls all colors to a palette, Utsushi tints shadows, midtones and highlights separately and with split toning |
| Turn day into night | Yoru 夜 (Day for Night) | Underexpose, darker highlights and sky, night vision, blue tint with neutral highlights, light sources protected |
| Bleach bypass and other lab looks | Genzō 現像 (Film Looks) | Pick a look, raise Amount, Character for the details. Place after Utsushi |
| A complete look in one node | Utsushi 写し (Look) | Genre preset or match from a reference image, then dose Tone, Tint and Sat Amount separately |
| Match shots to each other | Yakitsuke 焼付 (Printer Lights) | Master, R, G, B in points; copy to every clip and adjust only the points |
| Use a camera or print LUT | Hyō 表 (LUT) | Load the LUT, Look Only on: color and character of the LUT, the tone curve stays with the output transform. Resolve's print LUTs (Kodak 2383, Fujifilm 3513) directly via Resolve Film Look, as the last node |
| Black and white | Shirokuro 白黒 (Black and White) | Filter and stock character as when shooting, tone in stops, toning as in the lab |
| Grain, halation, film texture | Shitsukan 質感 (Texture) | Preset by film gauge, grain before the diffusion by default, as with film. After the look |
| Veil, Mist, lens character | Kiri 霧 (Diffusion), Boke ボケ (Lens) | After the look, before Hakari. Both read neighbouring pixels and stay serial |
| Check exposure and signal | Hakari 計り (Scope), Kijun 基準 (Test Pattern) | Hakari as the last node before the output transform, Kijun for monitor and pipeline |
| Final touch on the display signal | Shiage | After the output transform: set black and white in percent, desaturate and tint the ends |
Camera LUT for the monitor on set
Workspace › Scripts › Shitsukan Camera LUT turns your grade into a LUT for the camera, with one click. Put the playhead on the clip and run the script: a lattice image in the encoding of your footage goes through Resolve itself, through your clip grade with all nodes and Shitsukan tools, and comes back as a 33 point .cube. What you see in the viewer is in the LUT. It lands in Movies › Shitsukan Camera LUTs, named after the clip. Afterwards the script removes everything temporary.
For the LUT to be right on the camera, the node tree has to start from the camera log, the way the camera records and feeds the monitor, and end in Rec.709 (output CST or a color managed project). First switch off everything that draws into the image (Curve Box with Show in Render, scopes, split view) or works spatially (grain, diffusion, sharpening, noise reduction): a LUT can only hold color. The script warns when the LUT has jumps. Nodes on the timeline level are not included.
| Camera | LUT |
|---|---|
| Sony (Venice, Burano, FX) | .cube 33, load directly |
| Canon (C series) | .cube 33 (older models 17) |
| RED | .cube 33 |
| Blackmagic | .cube 33 |
| Panasonic, DJI | .cube 33, 17 on some models |
| ARRI | convert the .cube to an ARRI Look File with ARRI Reference Tool |
False Color
Kiso 基礎, Sumi 墨, Shiro 白 and Shiage 仕上げ have a False Color menu in the Display group, Hakari 計り has it under Signal. Three displays are available: ARRI with the six classic camera colors (purple black clip, blue shadows, green middle grey, pink one stop above as the skin range, yellow highlights, red white clip), EL Zone after Ed Lachman with 15 zones in whole and half stops around middle grey, each in its color from the official chart, and Sweet Spot, which colors only the skin range and the two ends and leaves everything else grey. In the scene-referred tools the stops count around 18 percent grey in linear light. Shiage reads the display signal as Rec709 with gamma 2.4, where middle grey sits at 41 percent signal, as on the camera monitor.
The display is computed at its place in the node tree. It does not see what comes after: further nodes, the timeline grade, the output transform. In Kiso, False Color therefore shows the exposure after Kiso, not the finished image. For the finished image put Hakari as the last node on the timeline level, or Shiage after the output transform, whose False Color reads the display signal. The display is rendered into the image while it is on: switch it off before rendering.
HDR
The tools work scene-referred in linear light and never clamp the image at 1.0. In an HDR project with DaVinci Wide Gamut and Intermediate they belong in front of the output transform, like any other scene-referred node.
Tested with a grey wedge and six saturated color wedges from −12 to +9 stops around 18 percent, i.e. up to about 92 times reference white, in DWG Linear and DWG Intermediate, for every tool with every preset: no hard clipping, no invalid values, the tone curve stays smooth. In Resolve, values above 1.0 pass through the tools unchanged.
What to watch out for
- The timeline must be scene-referred (DaVinci Wide Gamut, ACES or LogC). In a display-referred PQ or HLG timeline the tools read the values wrongly. For HDR only the output transform changes.
- Kiso 基礎 has presets with a shoulder (Print contrast, Hard shoulder). They limit the highlights at about +3.5 to +4.5 stops, which is meant for SDR. For HDR masters use Soft negative or Flat, or raise White and turn down Shoulder Rolloff. The same goes for Highlight Rolloff in Shirokuro 白黒.
- Shiage 仕上げ works on the SDR display signal (Rec709, sRGB, P3). Do not use it in a PQ or HLG output; an HDR mode will follow.
- Kiri acts more strongly on very bright HDR highlights, which is physically correct. That is what the threshold is for.
- With Signal PQ, Hakari shows the nits scale (203 nits as reference white); with HLG the HLG scale. Kijun has PQ reference and PQ ramp for checking monitor and pipeline.
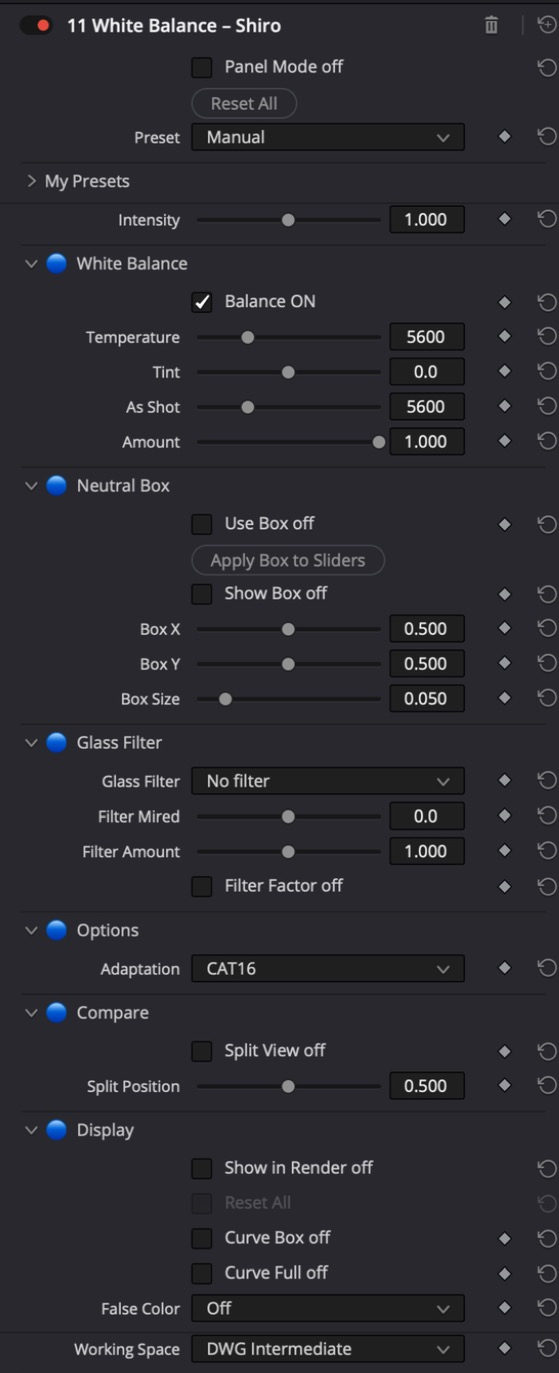
11 White Balance – Shiro 白
White balance in Kelvin and Tint, just like on the camera.
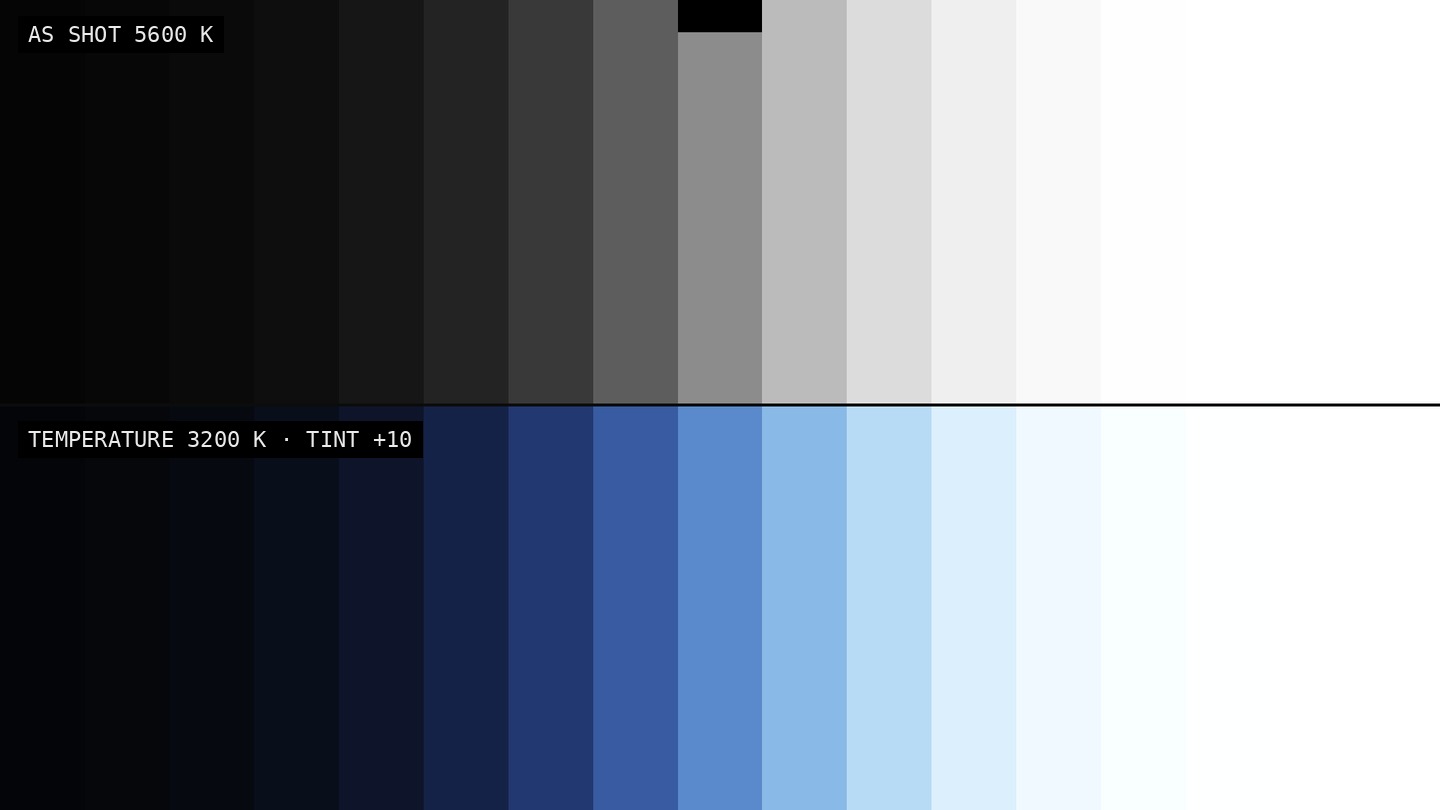
Shiro thinks like the camera: you tell it which white balance the footage was shot with (As Shot) and which light color should become neutral (Temperature, Tint). It works as a chromatic adaptation in linear light, not as a simple RGB gain. Skin and mixed light shift less towards odd colors, and strong colors stay what they are.
How to use it
- Add Shiro as the first node of your base grade. Ideally set the node itself to Linear (right-click the node, Node Gamma, Linear) and Working Space to DWG Linear. Without that: Working Space to match the timeline.
- Set As Shot to the camera white balance (often 5600 or 3200 K). As long as Temperature has the same value and Tint is at 0, the image stays exactly unchanged.
- Turn Temperature: lower than As Shot makes the image cooler, higher makes it warmer. Tint balances green and magenta.
- Or faster: turn on Use Box and drag the yellow box in the viewer onto an area that should be neutral. Apply Box to Sliders copies the measured values to the sliders.
- Use Amount to neutralize only partly when some of the light color should remain.
- Glass Filter puts a conversion or correction glass in front of the lens: 85 turns daylight into tungsten, 80A the reverse, the 81 series slightly warm, the 82 series slightly cool. Filter Factor includes the light loss of the glass, Filter Amount doses it (0.5 like a half CTO).
Display
The display is a plane of Kelvin (horizontal, warm on the left) and Tint (vertical, green at the top), colored with the light color as it appears in the image. Grey marks As Shot, white the setting, yellow the box measurement. False Color (Display group) shows exposure as ARRI, EL Zone or Sweet Spot.
Tips
- Coral 1/4, 1/2 and 1 in the Glass Filter menu: the warm pink of a coral filter, approximated as light color.
- With the node on Linear, Resolve's own wheels in the same node behave like the camera too. The Gain wheel makes the image photometrically brighter and darker like the aperture: gain 2.0 is one stop up, 0.5 one stop down. The Gain ball shifts temperature and green-magenta in light like a white balance, instead of mostly tinting the highlights as in log. This lets you fine-tune Shiro and exposure in one node.
- CAT16 is the modern standard. Bradford behaves slightly differently on very large corrections; compare them on tungsten against daylight.
- The box measures the average in linear light. Put it on a real grey card or a neutral wall, not on skin.
Node structure
Mini Panel in Panel Mode
Presets
Highlighted: presets in the OFX version only.
In Resolve
All controls
General
| Control | Range · Default | Effect |
|---|---|---|
| Intensity | 0 … 2 · 1 | Overall strength: 0 = neutral, 1 = as set, 2 = double. Runs out softly near the control limits (OFX only) |
White Balance
| Control | Range · Default | Effect |
|---|---|---|
| Balance On | Switch · on | Turns the white balance on or off, for comparison |
| Temperature | 2000 … 15000 · 5600 | Color temperature of the light that should become neutral, in Kelvin. Lower than As Shot = cooler image, higher = warmer |
| Tint | −50 … 50 · 0 | Green-magenta perpendicular to the Planckian locus. Plus = more magenta (green light becomes neutral), minus = greener |
| As Shot | 2000 … 15000 · 5600 | White balance the footage was shot with. With Temperature at the same value and Tint at 0 the image stays unchanged |
| Amount | 0 … 1 · 1 | How strongly the balance is applied. 0.6, for example, neutralizes only partly and keeps some of the light color |
Neutral Box
| Control | Range · Default | Effect |
|---|---|---|
| Use Box | Switch · off | Balances automatically so that the area inside the box becomes neutral. Temperature, Tint and As Shot are then ignored |
| Apply Box to Sliders | Button | Copies the values measured in the box to Temperature and Tint and turns Use Box off (OFX only) |
| Show Box | Switch · off | Shows the measuring box as a yellow frame |
| Box X | 0 … 1 · 0.5 | Center of the measuring box, 0 = left, 1 = right |
| Box Y | 0 … 1 · 0.5 | Center of the measuring box, 0 = top, 1 = bottom |
| Box Size | 0.005 … 0.3 · 0.05 | Edge length of the measuring box relative to the image width |
Glass Filter
| Control | Range · Default | Effect |
|---|---|---|
| Glass Filter | No filter / Custom / 85 (daylight to 3400 K) / 85B (daylight to 3200 K) / 85C (slightly warm) / 81A (warm 1) / 81B (warm 2) / 81C (warm 3) / 81EF (warm 4) / 80A (tungsten to 5500 K) / 80B (3400 K to daylight) / 80C (cool 3) / 80D (cool 2) / 82A (cool 1) / 82B (cool 1.5) / 82C (cool 2) / Coral 1-4 (warm pink) / Coral 1-2 / Coral 1 | Conversion and correction filters (Wratten) in front of the lens, computed as light color: 85 turns daylight into tungsten (warm, +112 mired), 80A the reverse (cool, -131), 81 series slightly warm, 82 series slightly cool. Custom uses Filter Mired. The shift starts from As Shot |
| Filter Mired | −200 … 200 · 0 | Custom filter in mired: plus = warmer (like 85/81), minus = cooler (like 80/82). One mired is about 31 K at 5600 K and about 10 K at 3200 K |
| Filter Amount | 0 … 2 · 1 | Strength of the filter: 1 = like the glass, 0.5 = half (like a half CTO), 2 = double |
| Filter Factor | Switch · off | Includes the light loss of the filter (85: 2/3 stop, 80A: 2 stops, 81A: 1/3). Off = color only, as on set after compensating the aperture |
Options
| Control | Range · Default | Effect |
|---|---|---|
| Adaptation | CAT16 / Bradford | CAT16 (modern, default) or Bradford (classic). The difference shows mainly with strong colors and large corrections |
Compare
| Control | Range · Default | Effect |
|---|---|---|
| Split View | Switch · off | Before and after side by side: original on the left, result on the right, a white line in between. Turn off before rendering (OFX only) |
| Split Position | 0 … 1 · 0.5 | Position of the split line, 0 = left, 1 = right (OFX only) |
Display
| Control | Range · Default | Effect |
|---|---|---|
| Curve Box | Switch · off | Shows the light color as a plane of Kelvin (horizontal) and Tint (vertical), top left. Grey = As Shot, white = setting, yellow = measuring box |
| Curve Full | Switch · off | Like Curve Box, but over the whole image (Curve Box takes priority) |
| False Color | Off / ARRI / EL Zone / Sweet Spot | Exposure aid on the result, in stops of scene luminance around 18 percent grey: ARRI (six colors: purple black clip, blue, green 18 percent, pink skin +1, yellow, red white clip, rest grey), EL Zone (Ed Lachman: one color per stop as in the original chart, violet to pink, +-1/2 around grey, black and white = clipping), Sweet Spot (Cullen Kelly: -1/2 to +1 stop around grey stays image, the rest falls off grey). Rendered while on. Note: shows the image at this point of the node tree. Anything after it (further nodes, timeline grade, output transform) is not seen. For the finished image put Hakari as the last node on the timeline level |
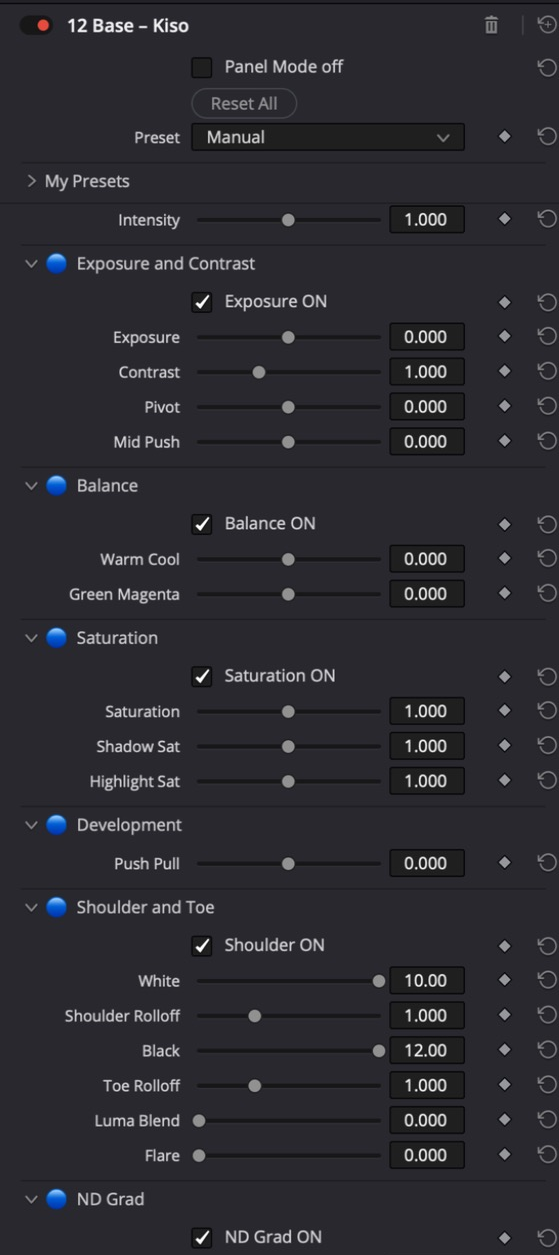
12 Base – Kiso 基礎
The photographic base grade in one node: exposure, contrast, balance, saturation, development, grad filter and the filter set in front of the lens.
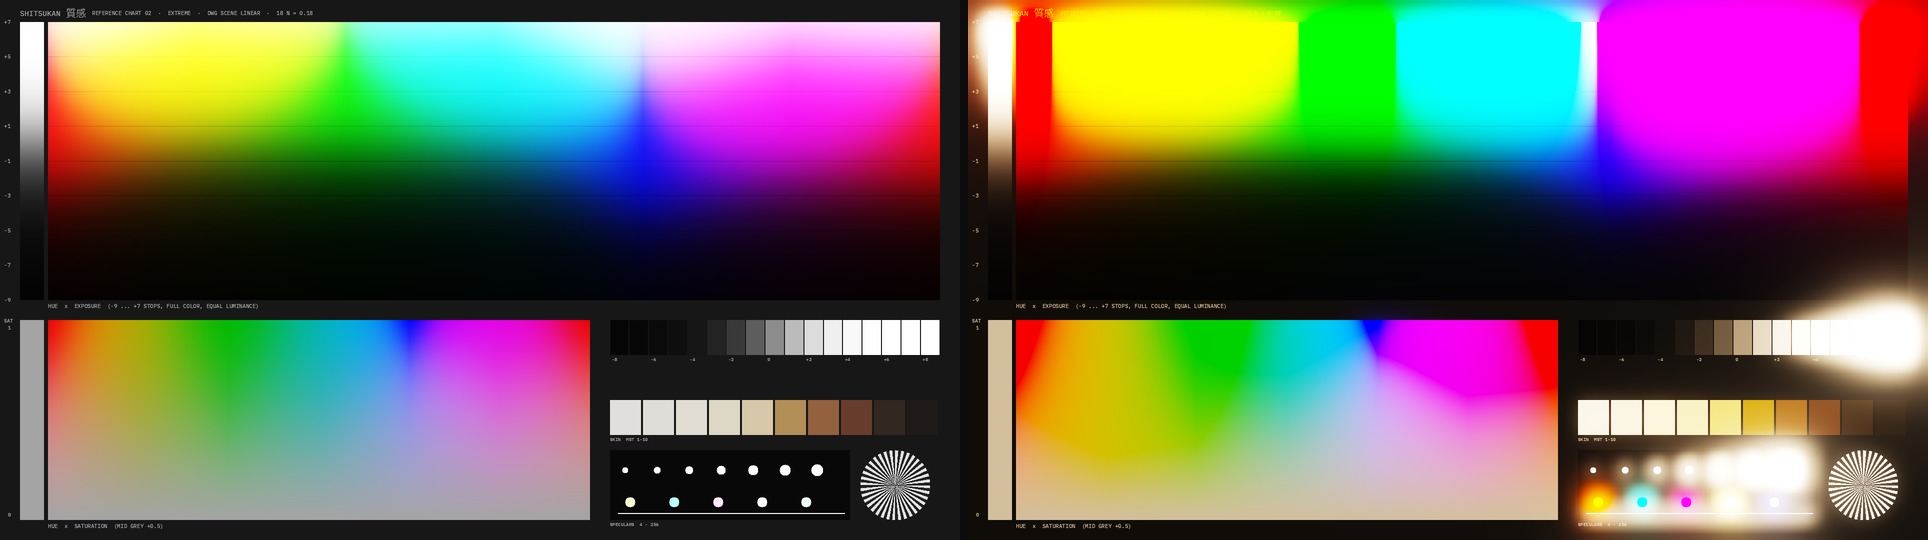
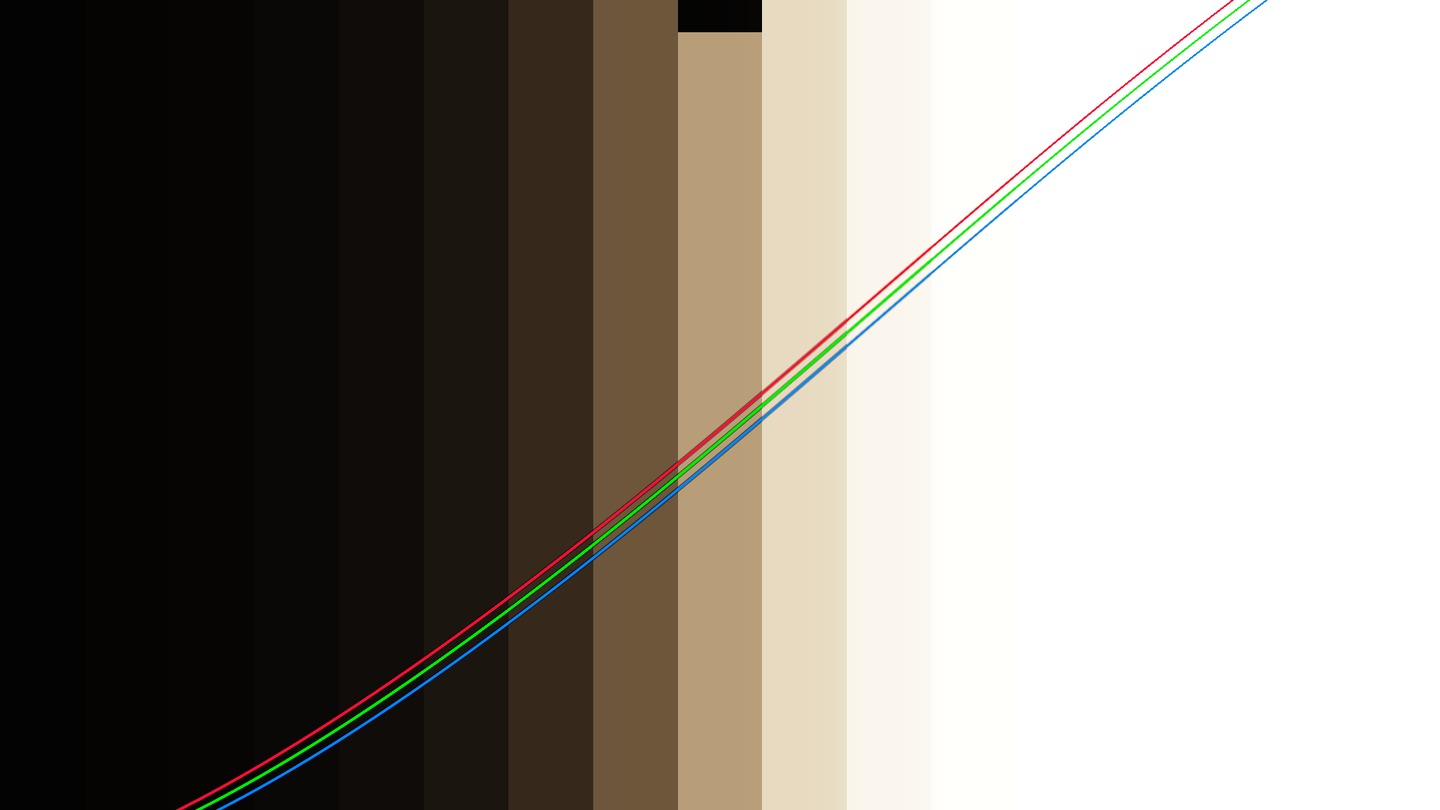
Kiso (基礎, foundation) is the first node after white balance. Exposure works in stops, Contrast pivots around a point in stops (default 18 % grey) and acts on brightness, so the color of each pixel stays in proportion. Towards black and white the contrast runs out softly: black does not tip over and highlights do not explode. Warm Cool and Green Magenta are a quick creative balance at constant brightness; Saturation raises or lowers saturation and stops softly before a color leaves the gamut. Shadow Sat and Highlight Sat weight shadows and highlights separately. On top come the shoulder and toe of the tone curve, Push Pull like development in the lab, and an ND grad in stops that takes light away photometrically before everything else, like the glass in front of the lens. The filter set adds the rest of the glass in front of the lens: ND filters with IR pollution, conversion filters of the 85, 81, 80 and 82 series as a mired shift of the light, a polarizer (approximation), colour grads (Sunset, Blue, Tobacco, Coral, Magenta, Straw) and diffusion filters (Black Mist, Glimmer, Pearl Glow, Bollywood Black Magic).
How to use it
- Add Kiso 基礎 (Base) right after Shiro 白 (White Balance), Working Space to match the timeline.
- Set Exposure until the midtones sit right.
- Set Contrast, and move the pivot if needed, for example onto the face.
- Balance and Saturation; Shadow Sat and Highlight Sat for the ends.
- Shoulder and Toe: set White and Black when highlights and shadows should roll off softly (10 and 12 mean off). Push Pull develops like the lab: plus brings an underexposure back and adds contrast, minus softens.
- ND Grad for a sky: strength in stops, edge, softness and angle as on the grad filter, with Grad Color for a coloured grad.
- Filter set as needed: Color Filter 85 warms daylight, 80A cools tungsten; ND Filter with ND Compensate shows only what a strong ND without IR cut does to the blacks (IR Pollution); Diffusion with type and size like a filter in front of the lens.
- Intensity pulls everything back together or pushes it further.
Display
Curve Box shows the tone curve bottom left, input against output in stops around middle grey. False Color (Display group) lays ARRI, EL Zone or Sweet Spot over the image, see the False Color chapter. For the effect in the image, use Hakari 計り (Scope) with Zones and Waveform.
Tips
- Everything at neutral means the image stays exactly unchanged.
- Contrast on brightness does not shift hues. If you want the filmic saturation that comes with contrast, add a little Saturation or set Luma Blend to 0: the shoulder then works per channel, like film.
- In Panel Mode, Exposure, Contrast, Warm Cool, Saturation and Push Pull sit on the first knobs: the quick base grade with one hand.
- The diffusion in Kiso is the single filter in front of the lens. For more control with its own presets and Show Bloom, Kiri 霧 remains.
- Filter Set On switches all filters off and on together – the quick comparison with and without glass.
Node structure
Mini Panel in Panel Mode
Presets
Highlighted: presets in the OFX version only.
In Resolve
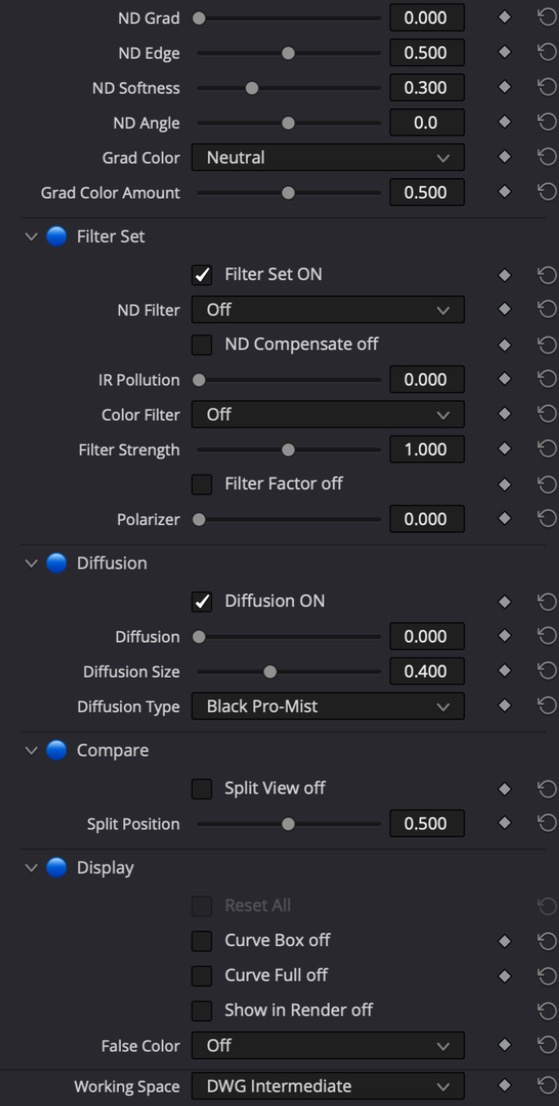
All controls
General
| Control | Range · Default | Effect |
|---|---|---|
| Intensity | 0 … 2 · 1 | Overall strength: 0 = neutral, 1 = as set, 2 = double. Runs out softly near the control limits (OFX only) |
Exposure and Contrast
| Control | Range · Default | Effect |
|---|---|---|
| Exposure On | Switch · on | Turns Exposure, Contrast and Mid Push on or off, for comparison. Balance, saturation and shoulder have their own switches |
| Exposure | −4 … 4 · 0 | Exposure in stops, like the aperture on the lens |
| Contrast | 0.25 … 2.5 · 1 | Slope around the pivot: 1 = neutral, higher = more contrast. Runs out softly towards black and white. Works on brightness; the color of each pixel stays in proportion |
| Pivot | −3 … 3 · 0 | Pivot of the contrast in stops around 18 percent grey. Brightness stays the same there |
| Mid Push | −1 … 1 · 0 | Raises or lowers the midtones by up to one stop, black and white stay |
Balance
| Control | Range · Default | Effect |
|---|---|---|
| Balance On | Switch · on | Turns Warm Cool and Green Magenta on or off, for comparison |
| Warm Cool | −1 … 1 · 0 | Balance between amber and blue: positive warmer, negative cooler. Brightness stays |
| Green Magenta | −1 … 1 · 0 | Balance between green and magenta: positive more magenta, negative greener. Brightness stays |
Saturation
| Control | Range · Default | Effect |
|---|---|---|
| Saturation On | Switch · on | Turns the saturation controls on or off, for comparison |
| Saturation | 0 … 2 · 1 | Saturation of all colors at the same brightness, 1 = neutral. More saturation stops softly before a color leaves the gamut |
| Shadow Sat | 0 … 2 · 1 | Additional saturation in the shadows, increasing from about one stop below the pivot |
| Highlight Sat | 0 … 2 · 1 | Additional saturation in the highlights, increasing from about one stop above the pivot |
Development
| Control | Range · Default | Effect |
|---|---|---|
| Push Pull | −2 … 2 · 0 | Lab development in stops: plus = push (underexposed, developed longer: exposure comes back, more contrast, a bit more saturation, shadows slightly fogged), minus = pull (less contrast, softer). Works on top of Exposure and Contrast |
Shoulder and Toe
| Control | Range · Default | Effect |
|---|---|---|
| Shoulder On | Switch · on | Turns shoulder, toe, Luma Blend and Flare on or off, for comparison |
| White | 1 … 10 · 10 | Where the shoulder sits, in stops above middle grey (10 = off). With a large rolloff the brightest white lies a little above; middle grey stays fixed |
| Shoulder Rolloff | 0.1 … 3 · 1 | Softness of the transition to white, in stops |
| Black | 2 … 12 · 12 | Where the toe sits, in stops below middle grey (12 = off) |
| Toe Rolloff | 0.1 … 3 · 1 | Softness of the transition to black, in stops |
| Luma Blend | 0 … 1 · 0 | Shoulder, toe and mid push: 0 = per channel like film (highlights run to white), 1 = luminance only (color ratios stay) |
| Flare | 0 … 1 · 0 | Lifts the deepest shadows like stray light |
ND Grad
| Control | Range · Default | Effect |
|---|---|---|
| ND Grad On | Switch · on | Turns the graduated filter on or off |
| ND Grad | 0 … 4 · 0 | Graduated filter in stops: the dark side loses that much light, photometrically (before everything else) |
| ND Edge | 0 … 1 · 0.5 | Position of the filter edge, 0 = top, 1 = bottom (at 0 degrees) |
| ND Softness | 0 … 1 · 0.3 | Width of the transition as a fraction of the image height: 0 = hard edge, 1 = soft gradient over the whole image |
| ND Angle | −180 … 180 · 0 | Rotation of the edge in degrees: 0 = dark on top, 90 = dark on the right, 180 or -180 = dark at the bottom, -90 = dark on the left |
| Grad Color | Neutral / Sunset / Blue / Tobacco / Coral / Magenta / Straw | Colour of the grad on its dark side (neutral = plain ND grad) |
| Grad Color Amount | 0 … 1 · 0.5 | How much colour the grad carries at full density |
Filter Set
| Control | Range · Default | Effect |
|---|---|---|
| Filter Set On | Switch · on | Switches the whole filter set (ND, colour filter, polarizer, diffusion); the grad keeps running |
| ND Filter | Off / ND 0.3 (1 stop) / ND 0.6 (2 stops) / ND 0.9 (3 stops) / ND 1.2 (4 stops) / ND 1.5 (5 stops) / ND 1.8 (6 stops) / ND 2.1 (7 stops) | Neutral density in front of the lens, ND 0.3 = one stop. Shows what the stop loss does; with ND Compensate the exposure is restored and only IR pollution remains |
| ND Compensate | Switch · off | Opens up by the ND value again (as the camera would), the image keeps its brightness |
| IR Pollution | 0 … 1 · 0 | IR pollution of strong NDs without IR cut: blacks turn red-magenta, dark fabrics shift. Grows with the ND density |
| Color Filter | Off / 85 (daylight to tungsten) / 85B / 85C / 81A / 81B / 81C / 81EF / 80A (tungsten to daylight) / 80B / 80C / 82A / 82B / 82C | Colour conversion filter as a mired shift of the light (85 series warms daylight to tungsten, 80 series cools tungsten to daylight, 81/82 series are the light versions) |
| Filter Strength | 0 … 2 · 1 | Strength of the colour filter, 1 = the nominal filter, 2 = doubled |
| Filter Factor | Switch · off | Also applies the filter factor (light loss) of the colour filter, e.g. 85 = 2/3 stop |
| Polarizer | 0 … 1 · 0 | Polarizer approximation: blue sky up to one stop denser, glare lower, colours slightly more saturated. A real polarizer depends on the sun angle; this is an estimate |
Diffusion
| Control | Range · Default | Effect |
|---|---|---|
| Diffusion On | Switch · on | Switches the diffusion |
| Diffusion | 0 … 1 · 0 | Diffusion filter in front of the lens: highlights glow, blacks lift a little, contrast softens. 1 is about a strength 1 filter |
| Diffusion Size | 0 … 1 · 0.4 | Radius of the glow, 0 = fine (1/8), 1 = wide (2) |
| Diffusion Type | Black Mist / Glimmer / Pearl Glow / Bollywood Black Magic | Black Mist: neutral glow and lift; Glimmer: more lift, less halo; Pearl Glow: warm glow; Bollywood Black Magic: soft glow with a little warmth |
Compare
| Control | Range · Default | Effect |
|---|---|---|
| Split View | Switch · off | Before and after side by side: original on the left, result on the right, a white line in between. Turn off before rendering (OFX only) |
| Split Position | 0 … 1 · 0.5 | Position of the split line, 0 = left, 1 = right (OFX only) |
Display
| Control | Range · Default | Effect |
|---|---|---|
| Curve Box | Switch · off | Curve display as a box bottom left, image darkened inside |
| Curve Full | Switch · off | Curve display over the whole image (Curve Box takes priority) |
| False Color | Off / ARRI / EL Zone / Sweet Spot | Exposure aid on the result, in stops of scene luminance around 18 percent grey: ARRI (six colors: purple black clip, blue, green 18 percent, pink skin +1, yellow, red white clip, rest grey), EL Zone (Ed Lachman: one color per stop as in the original chart, violet to pink, +-1/2 around grey, black and white = clipping), Sweet Spot (Cullen Kelly: -1/2 to +1 stop around grey stays image, the rest falls off grey). Rendered while on. Note: shows the image at this point of the node tree. Anything after it (further nodes, timeline grade, output transform) is not seen. For the finished image put Hakari as the last node on the timeline level |
13 Zones – Sumi 墨
Ansel Adams’ Zone System for Resolve.
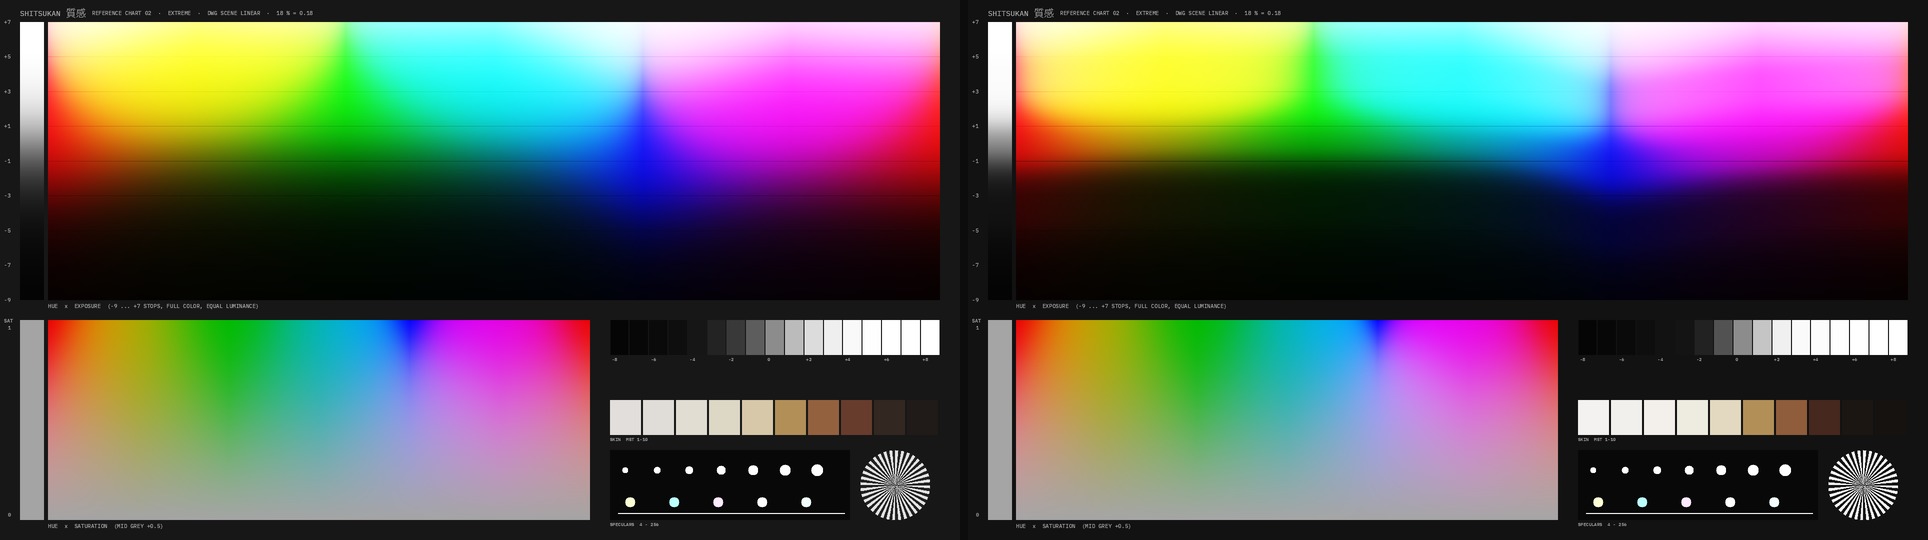
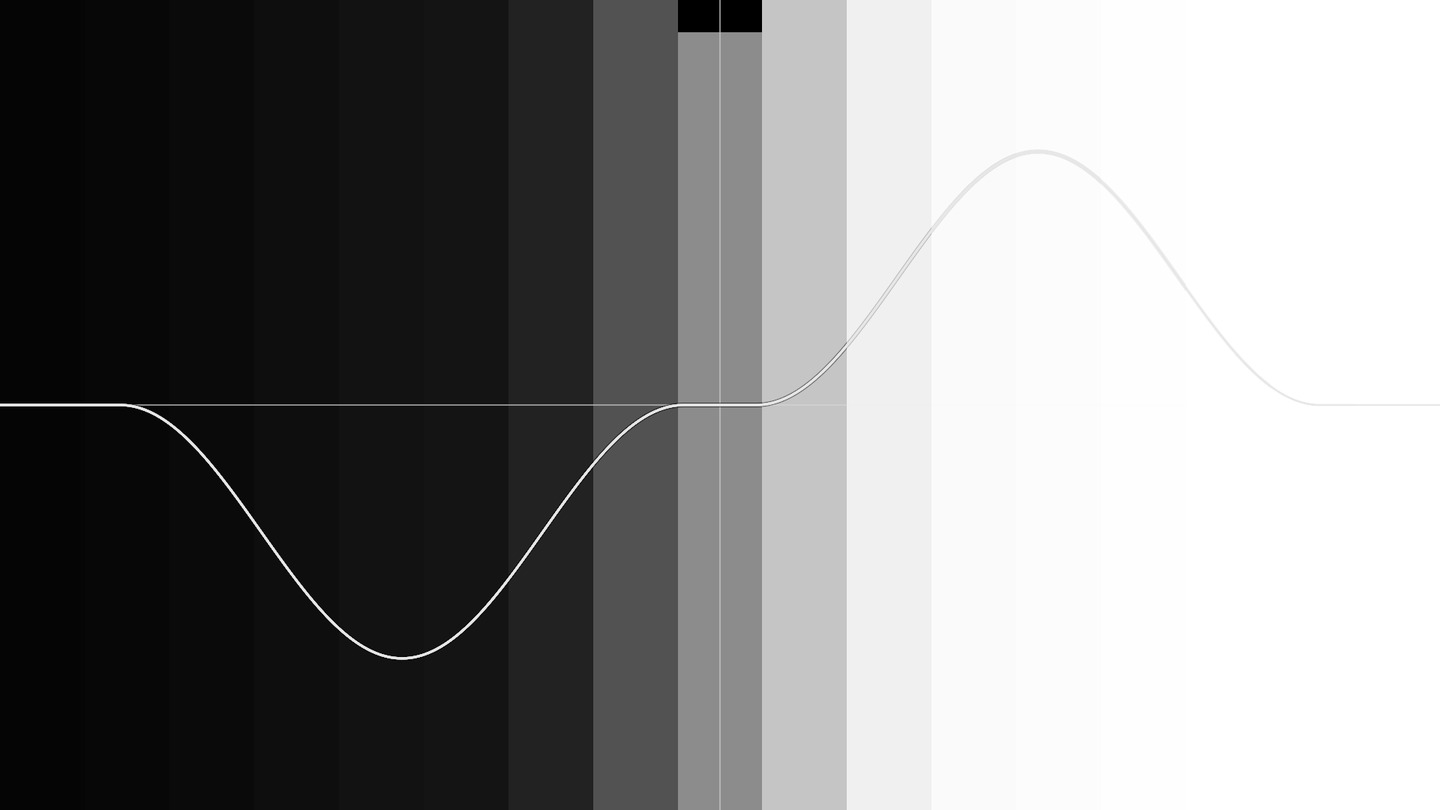
Sumi works in stops around 18 % grey, one zone per stop, Zone V is middle grey. A band around the middle is stretched or compressed: shadows darker, highlights correspondingly brighter, the middle stays linear. Below and above the band the change runs out softly to zero. Black, noise floor and white stay untouched, nothing gets crushed and nothing clips additionally. The strength is limited internally so the tone curve never inverts, whatever the settings.
How to use it
- Turn on Zone View and read which zones the face, background and shadows sit in. Zone Colors shows the eleven zones in colors (0 black, I violet, II blue, III cyan, IV green, V grey, VI yellow-green, VII yellow, VIII orange, IX red, X white), Soft Zones blends them smoothly.
- Turn up Amount (or pick a preset such as N+1). Negative Amount compresses like N−1.
- Band Width sets how far the band reaches out, Mid Protect how wide the neutral middle stays.
- Balance shifts the effect: −1 shadows only, +1 highlights only, ±2 the other side in the opposite direction.
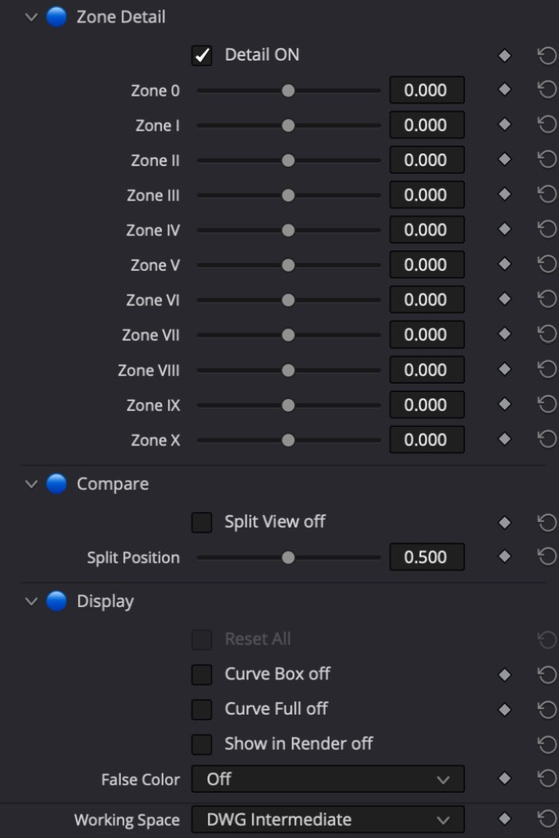
- For fine work open the Zone Detail group: raise or lower each zone from 0 to X individually.
Display
The curve display shows the change per zone in stops, not input against output. Tinted areas mark the shadow and highlight bands. The overlay shows the zone numerals and the largest change as a number. False Color (Display group) lays ARRI, EL Zone or Sweet Spot over the result.
Tips
- Center moves Zone V, for example for under- or overexposed footage. All zones and the Zone View move with it.
- Keep Color on works on luminance, color and saturation stay. Off works per channel, so darker shadows get richer, like film.
- Detail Protect leaves fine structures untouched and only shapes the large areas.
- Zone Detail goes to ±2 stops per zone. Lowering a single zone a lot pulls the darker neighbors along, a lift pulls the brighter ones: the curve never inverts, the dip gets wider rather than shallower. A lot of Amount needs a wide band: Band Width high, Mid Protect small.
Node structure
Mini Panel in Panel Mode
Presets
Highlighted: presets in the OFX version only.
In Resolve
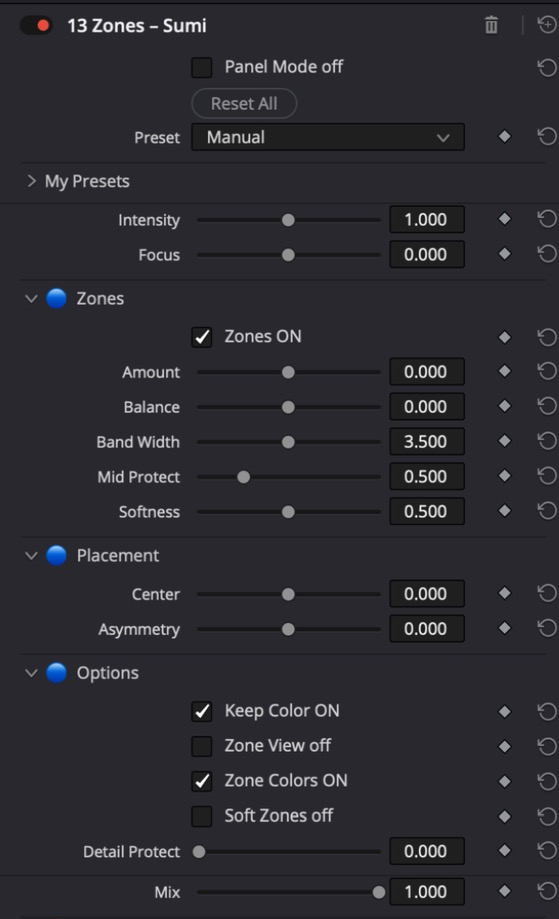
All controls
General
| Control | Range · Default | Effect |
|---|---|---|
| Intensity | 0 … 2 · 1 | Overall strength: 0 = neutral, 1 = as set, 2 = double. Runs out softly near the control limits (OFX only) |
| Focus | −1 … 1 · 0 | Width of the effect: 0 = as set, positive = narrower and more targeted, negative = wider and softer (OFX only) |
Zones
| Control | Range · Default | Effect |
|---|---|---|
| Zones On | Switch · on | Turns the zone band on or off, for comparison |
| Amount | −3 … 3 · 0 | How far Zone III gets darker and Zone VII brighter, in stops. Negative compresses the band (softer). Limited internally so the tone curve never inverts: a lot of Amount needs a wide band (Band Width high, Mid Protect small), otherwise it is capped |
| Balance | −2 … 2 · 0 | 0 = shadows and highlights equal. -1 = shadows only, +1 = highlights only. -2 = deeper shadows and compressed highlights, +2 the other way round |
| Band Width | 1 … 6 · 3.5 | How far the band reaches out from Zone V, in stops. Outside it nothing changes |
| Mid Protect | 0 … 2 · 0.5 | Half width of the neutral middle around Zone V, in stops |
| Softness | 0 … 1 · 0.5 | High = short rise and long, soft run-out towards black and white. Low = long rise and short run-out |
Placement
| Control | Range · Default | Effect |
|---|---|---|
| Center | −3 … 3 · 0 | Moves Zone V in stops, for example for under- or overexposed footage |
| Asymmetry | −1 … 1 · 0 | Positive = band wider at the bottom than at the top, negative the other way round |
Options
| Control | Range · Default | Effect |
|---|---|---|
| Keep Color | Switch · on | On = applied to luminance, color and saturation stay. Off = per RGB channel, more filmic (darker shadows get richer) |
| Zone View | Switch · off | Shows the result as Zones 0 to X (Zone V = Center), in zone colours with Zone Colors, otherwise greyscale (then blue tint = shadow band, amber = highlight band) |
| Zone Colors | Switch · on | Zone View in zone colours: 0 black, I violet, II blue, III cyan, IV green, V grey, VI yellow-green, VII yellow, VIII orange, IX red, X white. Brightness rises with the zone (half a stop per zone so bright zones stay readable in colour) |
| Soft Zones | Switch · off | Soft Zone View: colours and brightness run smoothly between the zones. Off = hard steps, one area per zone |
| Detail Protect | 0 … 1 · 0 | Works only on the large image areas, detail and grain stay as they are. Value = radius (1 = 1 percent of the image height), 0 = off (OFX only) |
General
| Control | Range · Default | Effect |
|---|---|---|
| Mix | 0 … 1 · 1 | Mix with the original image |
Zone Detail
| Control | Range · Default | Effect |
|---|---|---|
| Detail On | Switch · on | Turns the individual zone sliders (Zone 0 to X) on or off. Below Zone 0 the value of Zone 0 continues, above X that of Zone X. If the curve drops by more than half a stop between neighboring zones, the neighbors are pulled along: a lift widens upwards, a dip downwards, the value you set stays. So the tone curve never inverts |
| Zone 0 | −2 … 2 · 0 | Raises or lowers Zone 0 in stops (Zone V = middle grey, one zone per stop, Center moves all zones), soft transition to the neighboring zones |
| Zone I | −2 … 2 · 0 | Raises or lowers Zone I in stops (Zone V = middle grey, one zone per stop, Center moves all zones), soft transition to the neighboring zones |
| Zone II | −2 … 2 · 0 | Raises or lowers Zone II in stops (Zone V = middle grey, one zone per stop, Center moves all zones), soft transition to the neighboring zones |
| Zone III | −2 … 2 · 0 | Raises or lowers Zone III in stops (Zone V = middle grey, one zone per stop, Center moves all zones), soft transition to the neighboring zones |
| Zone IV | −2 … 2 · 0 | Raises or lowers Zone IV in stops (Zone V = middle grey, one zone per stop, Center moves all zones), soft transition to the neighboring zones |
| Zone V | −2 … 2 · 0 | Raises or lowers Zone V in stops (Zone V = middle grey, one zone per stop, Center moves all zones), soft transition to the neighboring zones |
| Zone VI | −2 … 2 · 0 | Raises or lowers Zone VI in stops (Zone V = middle grey, one zone per stop, Center moves all zones), soft transition to the neighboring zones |
| Zone VII | −2 … 2 · 0 | Raises or lowers Zone VII in stops (Zone V = middle grey, one zone per stop, Center moves all zones), soft transition to the neighboring zones |
| Zone VIII | −2 … 2 · 0 | Raises or lowers Zone VIII in stops (Zone V = middle grey, one zone per stop, Center moves all zones), soft transition to the neighboring zones |
| Zone IX | −2 … 2 · 0 | Raises or lowers Zone IX in stops (Zone V = middle grey, one zone per stop, Center moves all zones), soft transition to the neighboring zones |
| Zone X | −2 … 2 · 0 | Raises or lowers Zone X in stops (Zone V = middle grey, one zone per stop, Center moves all zones), soft transition to the neighboring zones |
Compare
| Control | Range · Default | Effect |
|---|---|---|
| Split View | Switch · off | Before and after side by side: original on the left, result on the right, a white line in between. Turn off before rendering (OFX only) |
| Split Position | 0 … 1 · 0.5 | Position of the split line, 0 = left, 1 = right (OFX only) |
Display
| Control | Range · Default | Effect |
|---|---|---|
| Curve Box | Switch · off | Shows the change per zone as a box top right, image darkened inside |
| Curve Full | Switch · off | Shows the change per zone over the whole image (Curve Box takes priority) |
| False Color | Off / ARRI / EL Zone / Sweet Spot | Exposure aid on the result, in stops of scene luminance around 18 percent grey: ARRI (six colors: purple black clip, blue, green 18 percent, pink skin +1, yellow, red white clip, rest grey), EL Zone (Ed Lachman: one color per stop as in the original chart, violet to pink, +-1/2 around grey, black and white = clipping), Sweet Spot (Cullen Kelly: -1/2 to +1 stop around grey stays image, the rest falls off grey). Rendered while on. Note: shows the image at this point of the node tree. Anything after it (further nodes, timeline grade, output transform) is not seen. For the finished image put Hakari as the last node on the timeline level |
14 Day for Night – Yoru 夜
Day for night in one node: a day shot turns into night.
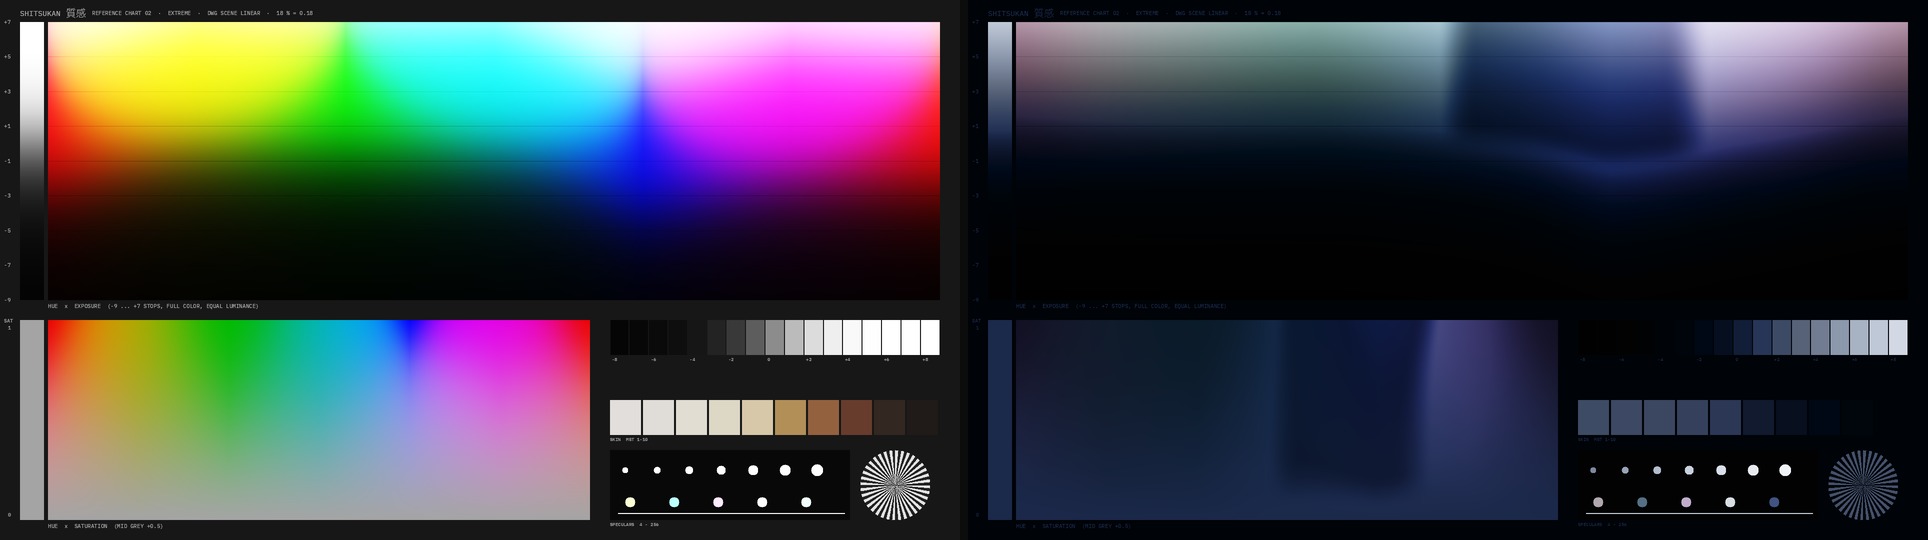
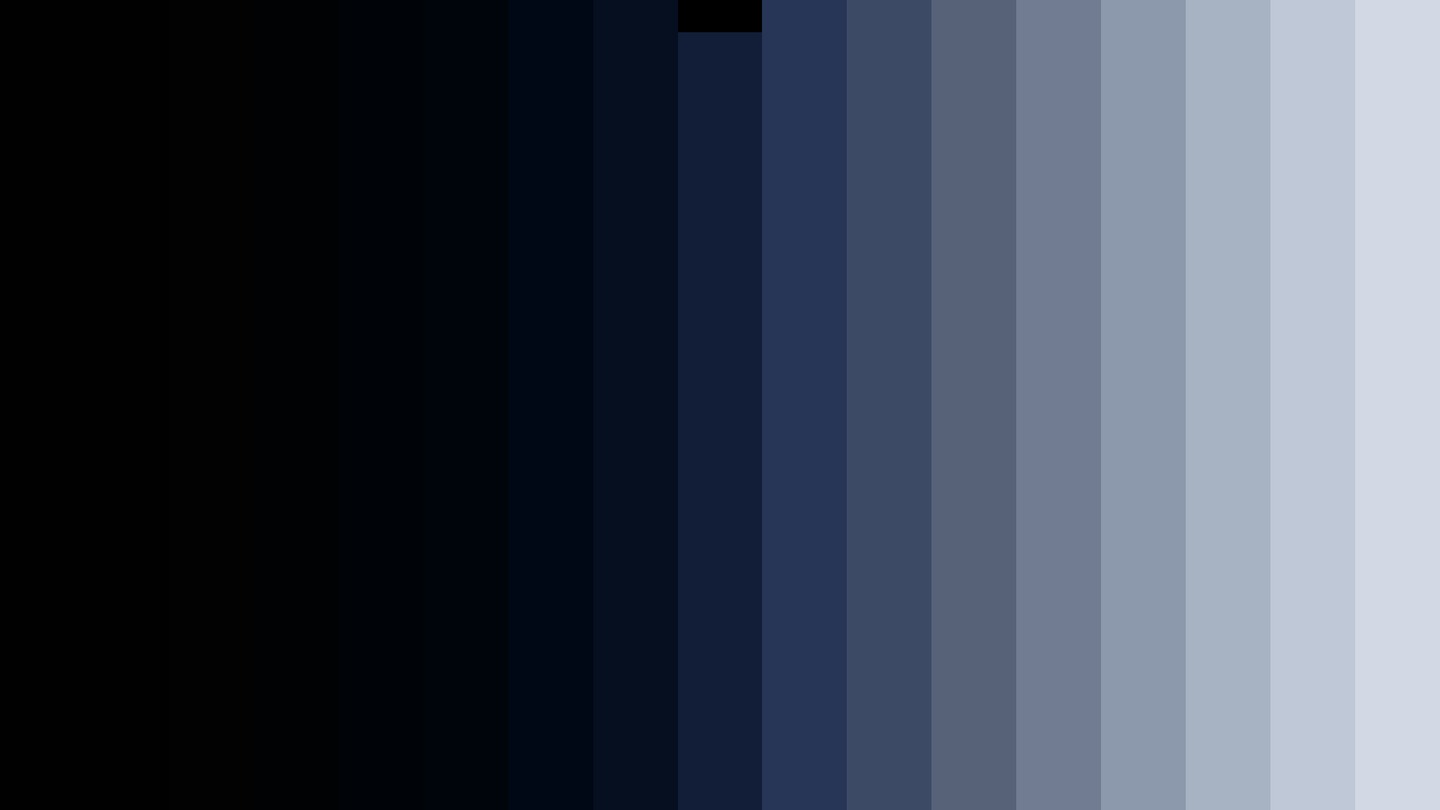
Yoru turns daylight into a believable night, the way cinematographers do it with underexposure and filters, but scene-referred in stops. The highlights lose their daylight sparkle, the bright sky gets extra dark, red darkens as in night vision (Purkinje), color drops away mainly in the shadows, and a blue tint lies on mids and shadows while the highlights stay neutral like moonlight. Warm, bright light sources such as street lamps and windows can keep their color and brightness.
How to use it
- Pick a preset: Moonlight, Street light, Blue hour, Classic Hollywood or Neutral night.
- Exposure for the base level, Highlight Compress and Sky Darken take the day out of the highlights. Show Sky shows the sky detection.
- Purkinje, Saturation and Shadow Desat for night vision, Night Tint and Hue for the color of the night.
- Raise Practicals when lamps and windows in the frame should glow.
Display
Curve Box shows the tone curve in stops with the input histogram. Red, green and blue split when tinting.
Tips
- Day for night works best with footage shot against the light or under an overcast sky: hard sun shadows give the day away.
- Neutral Highlights 1 keeps white white. Set it to 0 for an all-blue night.
- Follow with Shitsukan and a little grain and halation: night footage on film is grainier.
Node structure
Mini Panel in Panel Mode
Presets
Highlighted: presets in the OFX version only.
In Resolve
All controls
General
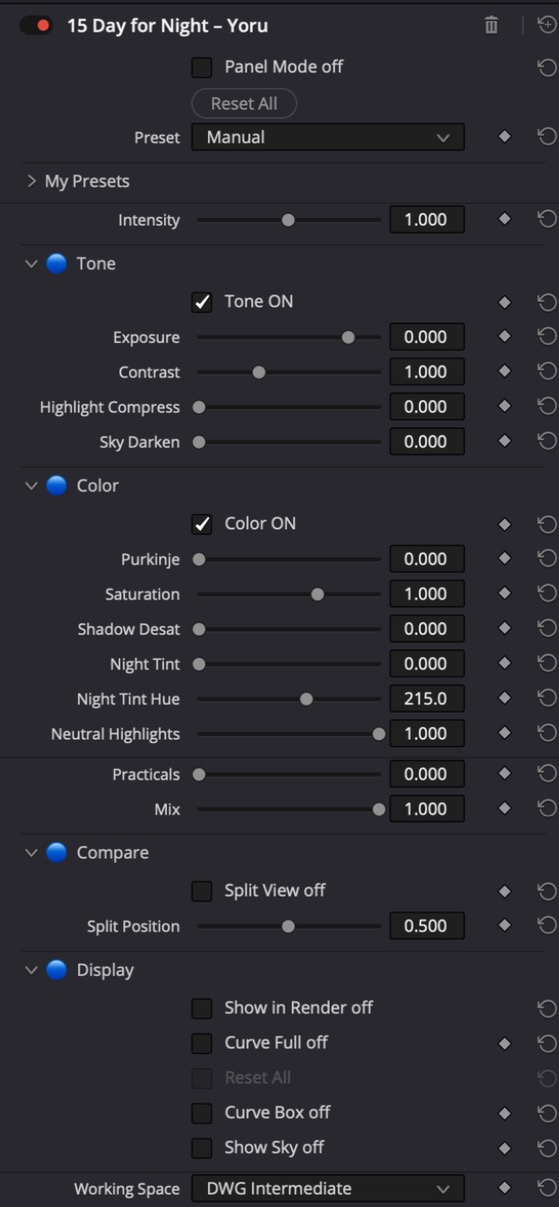
| Control | Range · Default | Effect |
|---|---|---|
| Intensity | 0 … 2 · 1 | Overall strength: 0 = neutral, 1 = as set, 2 = double. Runs out softly near the control limits (OFX only) |
Tone
| Control | Range · Default | Effect |
|---|---|---|
| Tone On | Switch · on | Switches exposure, contrast, highlights and sky |
| Exposure | −5 … 1 · 0 | Underexposure in stops. Day for night usually sits at -1.5 to -3 |
| Contrast | 0.5 … 2 · 1 | Contrast around middle grey in stops, before the underexposure: above 1 harder, like moonlight |
| Highlight Compress | 0 … 1 · 0 | Compresses everything above +1 stop: sunlit highlights and bright surfaces lose their daylight sparkle |
| Sky Darken | 0 … 3 · 0 | Darkens the bright blue sky additionally, in stops. Show Sky shows what is detected as sky |
Color
| Control | Range · Default | Effect |
|---|---|---|
| Color On | Switch · on | Switches Purkinje, saturation and tint |
| Purkinje | 0 … 1 · 0 | Night vision: red gets darker, blue and green stay bright (the rods in the eye do not see red) |
| Saturation | 0 … 1.5 · 1 | Overall saturation. At night the eye sees little color |
| Shadow Desat | 0 … 1 · 0 | Removes extra color in the shadows, increasingly below -1 stop |
| Night Tint | 0 … 1 · 0 | Tint of the mids and shadows, 1 = strong. Luminance stays |
| Night Tint Hue | 0 … 360 · 215 | Hue of the night (HSV degrees): 215 moon blue, 190 cyan, 240 deep blue |
| Neutral Highlights | 0 … 1 · 1 | Keeps the highlights free of the tint: 1 = neutral highlights (the moon is white), 0 = tint into the white |
General
| Control | Range · Default | Effect |
|---|---|---|
| Practicals | 0 … 1 · 0 | Light sources in the frame (warm, bright areas like street lamps and windows) keep their color and most of their brightness |
| Mix | 0 … 1 · 1 | Mix with the original |
Compare
| Control | Range · Default | Effect |
|---|---|---|
| Split View | Switch · off | Before and after side by side: original on the left, result on the right, a white line in between. Turn off before rendering (OFX only) |
| Split Position | 0 … 1 · 0.5 | Position of the split line, 0 = left, 1 = right (OFX only) |
Display
| Control | Range · Default | Effect |
|---|---|---|
| Curve Box | Switch · off | Tone curve in stops bottom left, red, green and blue separately, with the input histogram |
| Curve Full | Switch · off | Tone curve over the whole image (Curve Box takes priority) |
| Show Sky | Switch · off | Shows the sky detection white on black. Turn off before rendering |
15 Highlight Recovery – Mado 窓
Recover highlights from the source: sky and windows like a second, tighter exposure, with the mask as alpha.
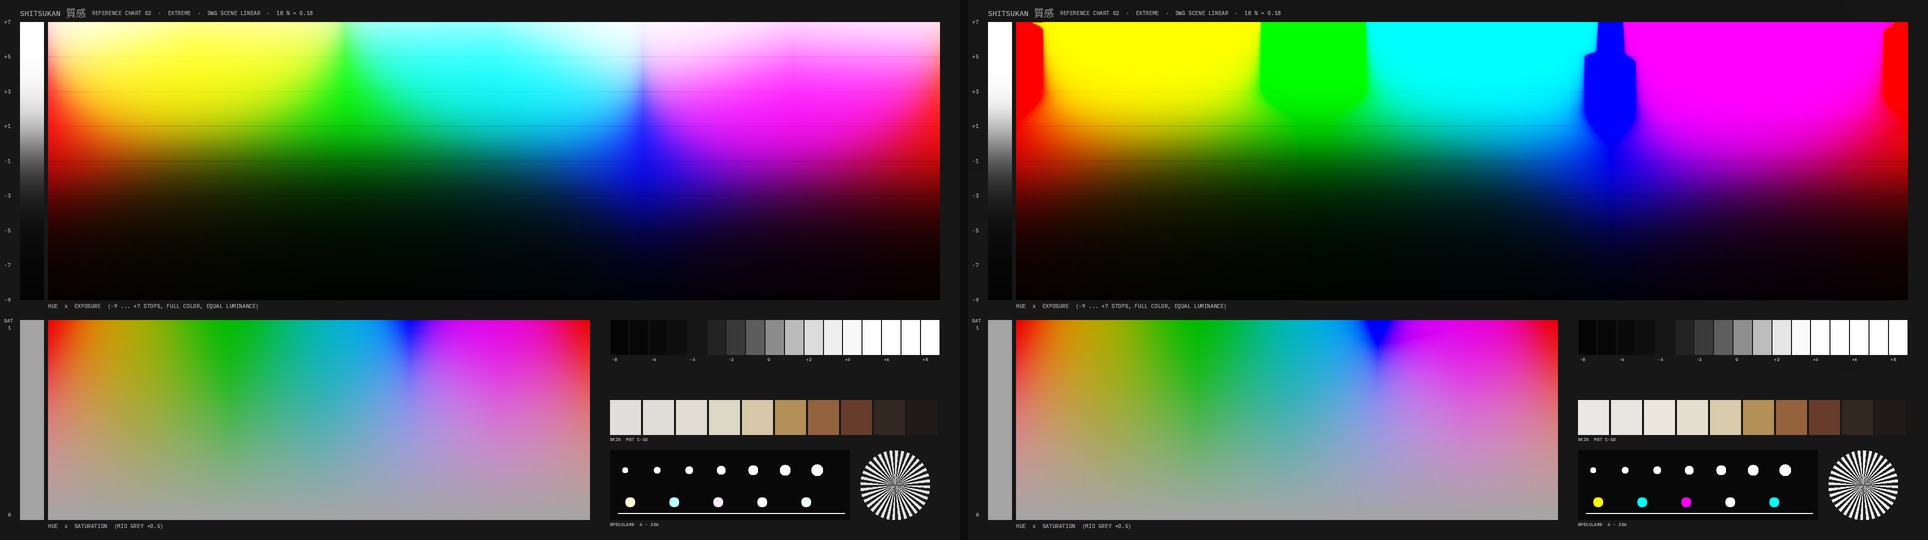
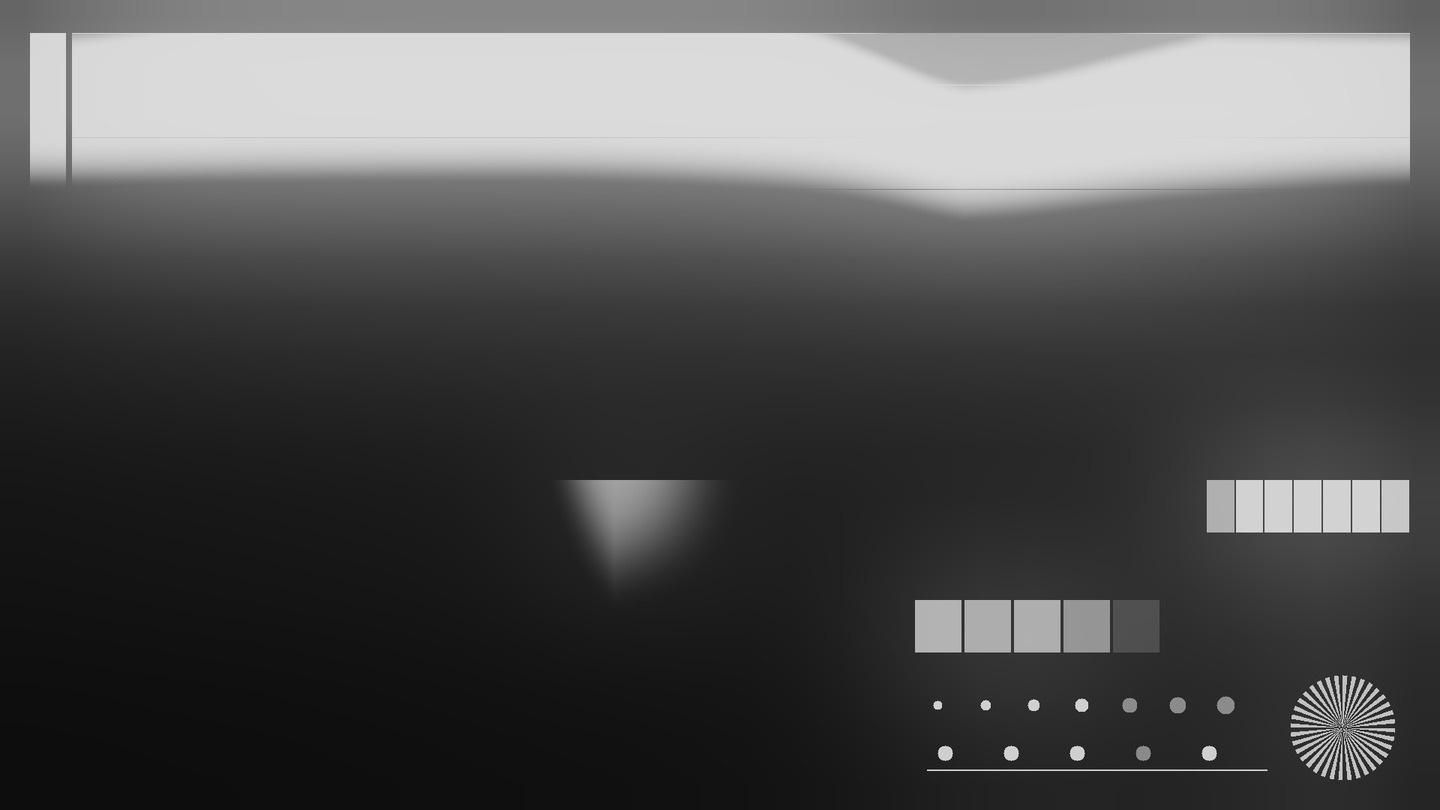
Mado (窓, the window) brings back what the camera still has in the log but the grade has already pushed away: the sky behind the interview, the window in the interior. A mask from brightness (stops above middle grey, soft knee) and optionally hue finds the highlights, then the exposure is pulled down there with a soft, multi-scale blurred mask. That keeps the local contrast: clouds and window frames become visible instead of grey, like an exposure fusion of two takes. Where the camera really clipped, the recovery fades out so no grey patches appear. In Target mode the strength adapts to every shot: the highlights land at a fixed brightness above middle grey. Mado outputs its mask as alpha so the Layer Mixer can lay the recovered highlights over the finished grade.
How to use it
- Put Mado right at the source, before any grade: the recovery needs the untouched log. Easiest as a parallel branch: source → Mado and source → grade, both into a Layer Mixer.
- Pick a preset: Sky gentle, Sky strong, Sky extra strong, Sky super strong, Windows (small radius, closer to edges), Sky automatic (Target mode with sky hue), Fusion strong, Fusion extreme or Mask only.
- Turn on Show Mask and place the mask with Threshold and Knee on the highlights you want back. Keep bright shirts and walls out with Sky Hue On and the sky hue.
- Recover (or Target in Target mode) until the detail is there; Detail emphasises clouds and window frames, Color Back brings color into the often grey highlights.
- Right-click the Mado node, OFX Alpha → Enable (not just Use For Mixing). In the plugin turn Alpha Out On. Only then does the Layer Mixer take the mask as alpha; without Enable, Mado covers the grade branch completely and the grade node seems to do nothing. Without a Layer Mixer leave Alpha Out off (default), otherwise the alpha changes the image.
Display
Show Mask shows the mask white on black, exactly as it is output as alpha. Mask Softness shows how far the mask is blurred.
Tips
- Radius is the main control against fringes: large keeps the detail in the sky (the pull is even), small follows edges more closely. Focus moves exactly this control.
- What is white in the log stays white. Mado invents no detail; for a clipped sky Resolve's Sky Replacement remains, and Mado's mask limits it to the parts that are really burnt out.
- Working Space defaults to Auto: per frame Mado detects whether the timeline is linear (values above 1.0 or many dark values, e.g. Genesis with DWG Linear) and otherwise assumes DaVinci Intermediate. Switch manually for LogC3 or ACEScct; a wrong setting makes Mado recover nothing or the wrong thing.
- Clip Level refers to the code value (in Intermediate units for a linear timeline). With log footage clipping usually sits at 0.9 to 1.0; camera EXR often has none, set Clip Fade to 0 then.
- Fusion mode works like a bracketed exposure: Mado computes nine virtual exposures down to Recover stops and blends them per image area, weighted by which exposure there is closest to Target. Midtones stay, the order of brightness never flips. Fusion strong brings +8 stops back to about +4.6, Fusion extreme to about +1.6, already a clear HDR look.
- Target mode is for series with changing skies: every shot is pulled to the same sky brightness without adjusting per shot.
- All neutral means: the image stays exactly unchanged, only the mask is output as alpha (preset Mask only).
Node structure
Mini Panel in Panel Mode
Presets
Highlighted: presets in the OFX version only.
In Resolve
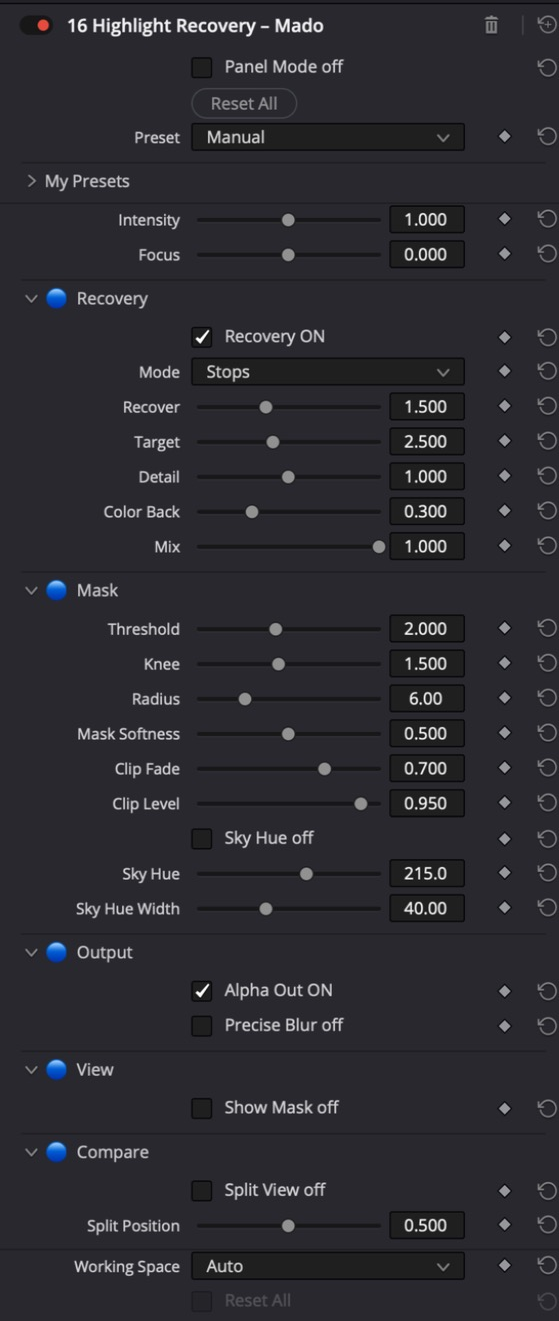
All controls
General
| Control | Range · Default | Effect |
|---|---|---|
| Intensity | 0 … 2 · 1 | Overall strength: 0 = neutral, 1 = as set, 2 = double. Runs out softly near the control limits (OFX only) |
| Focus | −1 … 1 · 0 | Width of the effect: 0 = as set, positive = narrower and more targeted, negative = wider and softer (OFX only) |
Recovery
| Control | Range · Default | Effect |
|---|---|---|
| Recovery On | Switch · on | Switches the recovery; off = only the mask as alpha |
| Mode | Stops / Target / Fusion | Stops: fixed pull. Target: pulls until the highlights sit at Target, adapts to every shot. Fusion: builds an exposure bracket from the image (0 to Recover stops below) and fuses it by the soft base brightness: every area takes the exposure that brings it near Target. No tonal inversion, detail stays (Detail), Mask Softness = how local |
| Recover | 0 … 8 · 1.5 | Mode Stops: the highlights in the mask are pulled down by this many stops. Mode Fusion: range of the virtual exposure bracket in stops (up to 8) |
| Target | 0 … 6 · 2.5 | Mode Target: the highlights are pulled down until their base brightness sits at this value (stops above middle grey). Adapts to the shot |
| Detail | 0 … 2 · 1 | Structure in the recovered highlights: 1 = as in the original, above 1 emphasises clouds and window frames, 0 = smooth |
| Color Back | 0 … 1 · 0.3 | Recovered highlights are often grey: lifts their saturation inside the mask |
| Mix | 0 … 1 · 1 | Mix with the original |
Mask
| Control | Range · Default | Effect |
|---|---|---|
| Threshold | −1 … 6 · 2 | Where the mask starts, in stops above middle grey. Sky and windows usually sit at +2 to +5 |
| Knee | 0.3 … 3 · 1.5 | Width of the transition in stops: the mask ramps from Threshold to Threshold + Knee |
| Radius | 1 … 20 · 6 | Softness of the mask and of the base brightness, in percent of the frame height. Large = no fringes and the detail stays; small = closer to edges |
| Mask Softness | 0 … 1 · 0.5 | 0 = pixel-exact mask (harder, may show edges), 1 = fully blurred (soft, may run over edges) |
| Clip Fade | 0 … 1 · 0.7 | Where the camera clipped (all channels at the limit) the recovery fades out, otherwise grey patches appear. 1 = nothing there |
| Clip Level | 0.5 … 1 · 0.95 | Code value in the working space from which a channel counts as clipped |
| Sky Hue On | Switch · off | Limits the mask to the sky hue as well, against bright shirts and walls |
| Sky Hue | 0 … 360 · 215 | With Sky Hue On: hue of the sky (HSV degrees), 215 = sky blue. Neutral pixels (grey sky) always count |
| Sky Hue Width | 10 … 90 · 40 | Width around the sky hue in degrees |
Output
| Control | Range · Default | Effect |
|---|---|---|
| Alpha Out On | Switch · off | Only for the Layer Mixer: outputs the mask as alpha and multiplies the image by it (black outside the mask). Right-click the node, OFX Alpha > Enable. Leave off when the node sits in series, otherwise the image goes dark |
| Precise Blur | Switch · off | Precise blur instead of fast (default fast, hardly distinguishable in the image) |
View
| Control | Range · Default | Effect |
|---|---|---|
| Show Mask | Switch · off | Shows the mask white on black. Turn off before rendering |
Compare
| Control | Range · Default | Effect |
|---|---|---|
| Split View | Switch · off | Before and after side by side: original on the left, result on the right, a white line in between. Turn off before rendering (OFX only) |
| Split Position | 0 … 1 · 0.5 | Position of the split line, 0 = left, 1 = right (OFX only) |
16 Density – Nōdo 濃度
Subtractive colour density after film: saturated colours get denser and darker, neutrals stay exact.
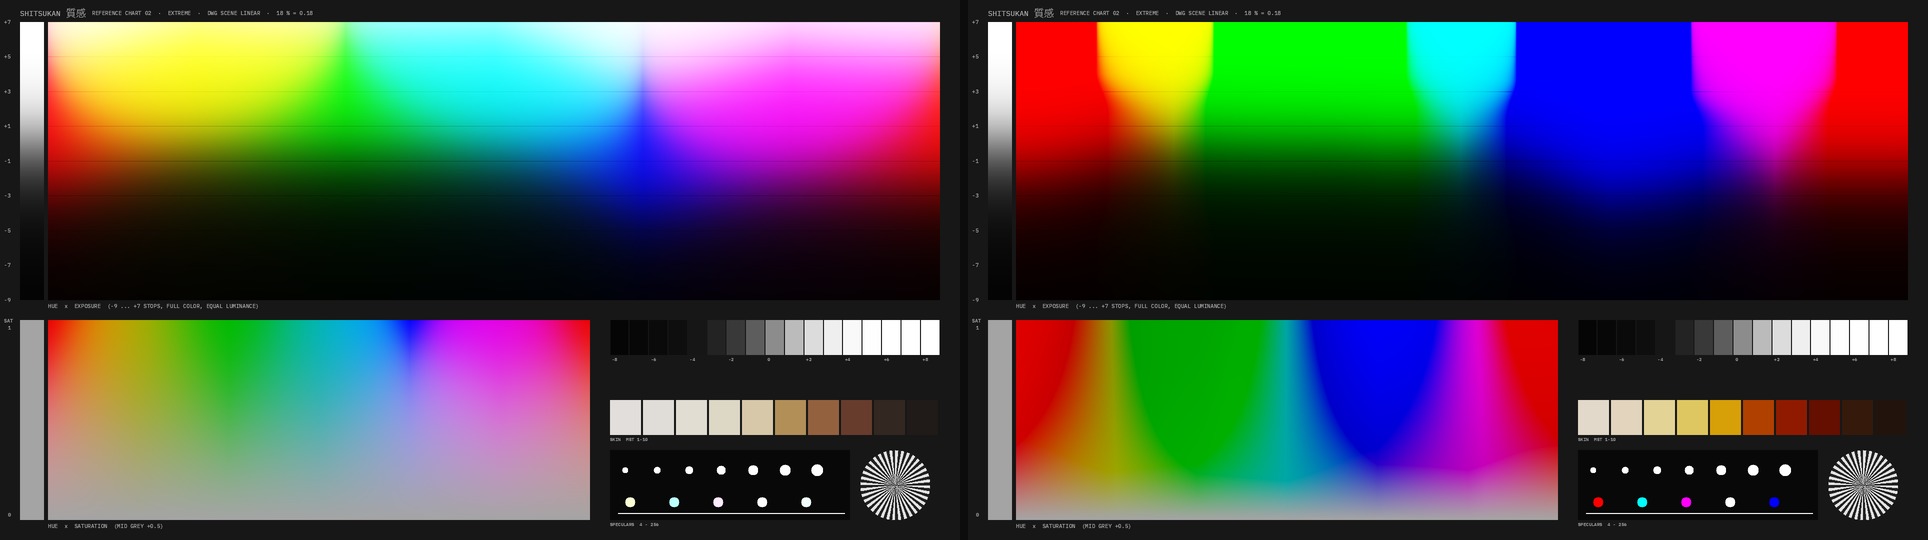
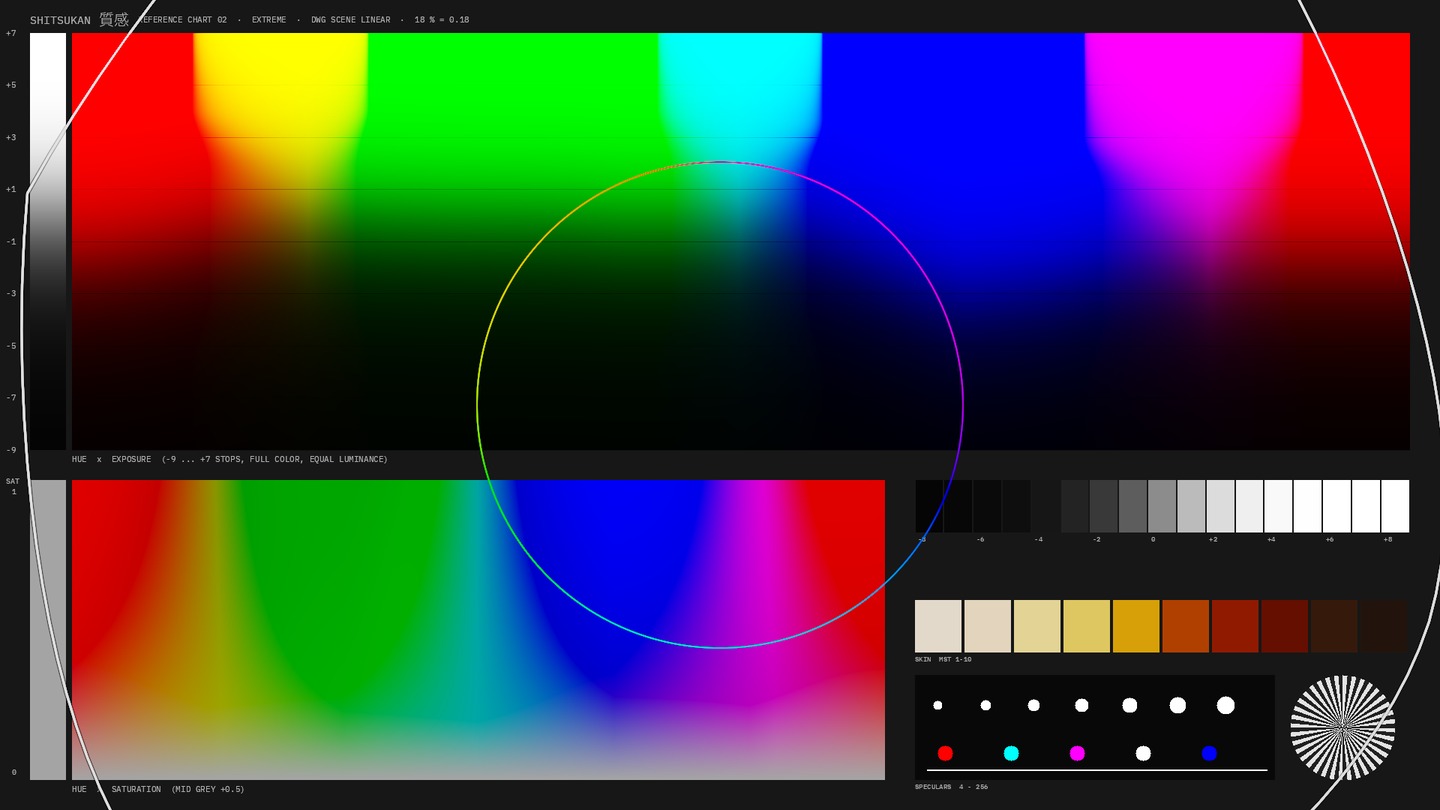
Nōdo (濃度, density) computes saturation the way film does. On film a colour does not get richer by making its main channel brighter, but because the other dye layers receive more dye and swallow light: red gets richer because green and blue get denser. Nōdo works in density (stops): the brightest channel of a pixel is the anchor and stays, the minor channels are spread by Density with a soft limit (Limit) so nothing sinks into black. Saturated colours get darker and denser, grey steps stay unchanged to the code value. Darken adds pigment weight on top of saturation. The spread pulls hues slightly towards the primaries, as film does; Keep Hue removes that drift. Utsushi has an additive density inside the look; Nōdo is the stand-alone exposure sub-tool for it, independent of the look, for the parallel branch under Kiso.
How to use it
- Nōdo in the parallel branch under Kiso (next to Sumi, Yakitsuke, Yoru) or serially after Kiso, before the look.
- Choose a preset: Gentle, Film, Strong, Print (denser, hue kept) or Skin protected.
- Density sets the spread, Darken the pigment weight; Limit caps the added density per channel in stops.
- Protect Highlights and Protect Shadows reduce the effect at the ends; Skin Protect leaves skin tones out.
- Curve Box shows the colour wheel: ring before, line after, so you see how far the colours move inwards and darker.
Display
Curve Box and Curve Full show the colour wheel as in a vectorscope: coloured ring before, white line after.
Tips
- Subtractive means: the brightness of saturated areas drops. To keep brightness, set Darken to 0 and compensate slightly with Kiso Exposure; the grey steps were never touched by Nōdo anyway.
- Keep Hue off is the film character: yellow drifts slightly towards orange, cyan towards blue. For product colours and logos, Keep Hue on.
- Density above 2 with Limit below 3 gives a print look: saturated colours become flat, as if the colour were applied.
- Against noise in dark saturated areas raise Protect Shadows: noise would otherwise add density there.
Node structure
Mini Panel in Panel Mode
Presets
Highlighted: presets in the OFX version only.
In Resolve
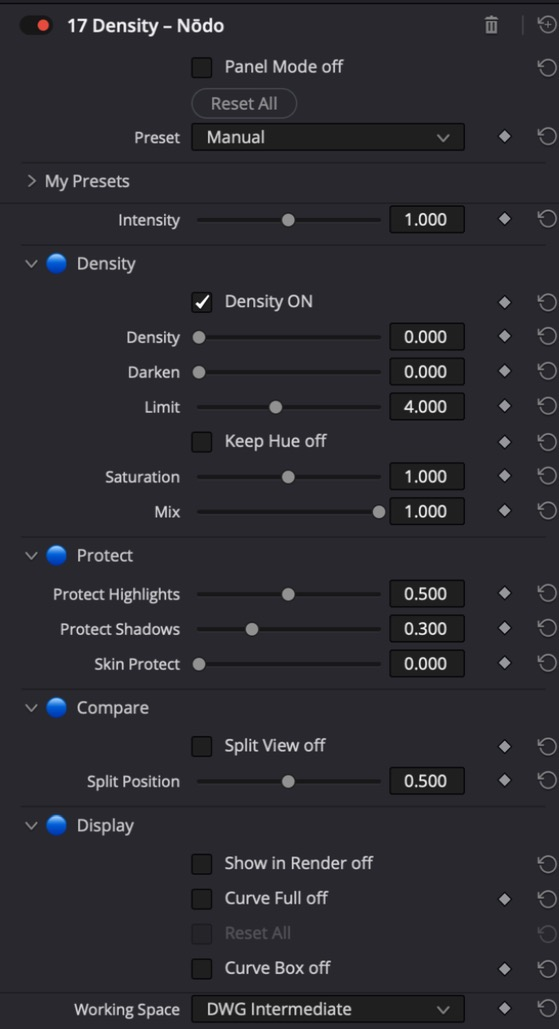
All controls
General
| Control | Range · Default | Effect |
|---|---|---|
| Intensity | 0 … 2 · 1 | Overall strength: 0 = neutral, 1 = as set, 2 = double. Runs out softly near the control limits (OFX only) |
Density
| Control | Range · Default | Effect |
|---|---|---|
| Density On | Switch · on | Switches the density on or off |
| Density | 0 … 4 · 0 | Spread of the colour density: the minor channels get denser, the brightest channel stays. Saturated colours get darker and richer, neutrals stay |
| Darken | 0 … 2 · 0 | Additionally pulls brightness down with saturation, in stops at full saturation (pigment weight) |
| Limit | 1 … 8 · 4 | At most this many stops of added density per channel, softly limited so saturated colours do not sink into black |
| Keep Hue | Switch · off | Keeps the hue of the original; off = slight drift towards the primaries as with film |
| Saturation | 0 … 2 · 1 | Saturation after the density, 1 = unchanged |
| Mix | 0 … 1 · 1 | Mix with the original |
Protect
| Control | Range · Default | Effect |
|---|---|---|
| Protect Highlights | 0 … 1 · 0.5 | Reduces the effect in the highlights (from +1.5 stops above middle grey) |
| Protect Shadows | 0 … 1 · 0.3 | Reduces the effect in the shadows (below -3 stops), against noise and blocked shadows |
| Skin Protect | 0 … 1 · 0 | Takes skin tones out of the density |
Compare
| Control | Range · Default | Effect |
|---|---|---|
| Split View | Switch · off | Before and after side by side: original on the left, result on the right, a white line in between. Turn off before rendering (OFX only) |
| Split Position | 0 … 1 · 0.5 | Position of the split line, 0 = left, 1 = right (OFX only) |
Display
| Control | Range · Default | Effect |
|---|---|---|
| Curve Box | Switch · off | Colour wheel bottom left: ring before, line after |
| Curve Full | Switch · off | Colour wheel over the whole image |
17 Negative – Inga 陰画
First half of the film path: camera input, exposure, negative stock with characteristic curve, development, colour character, density, halation, aura, acutance and grain.
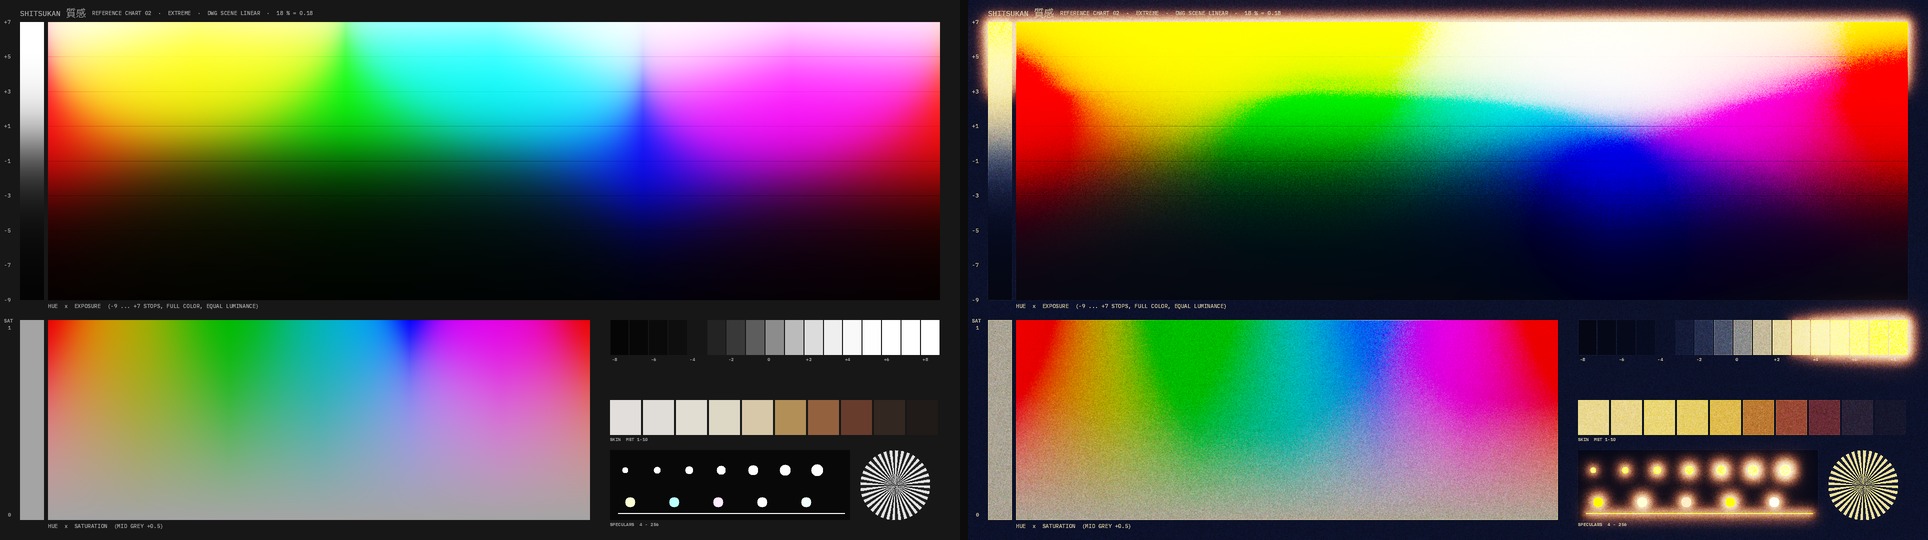
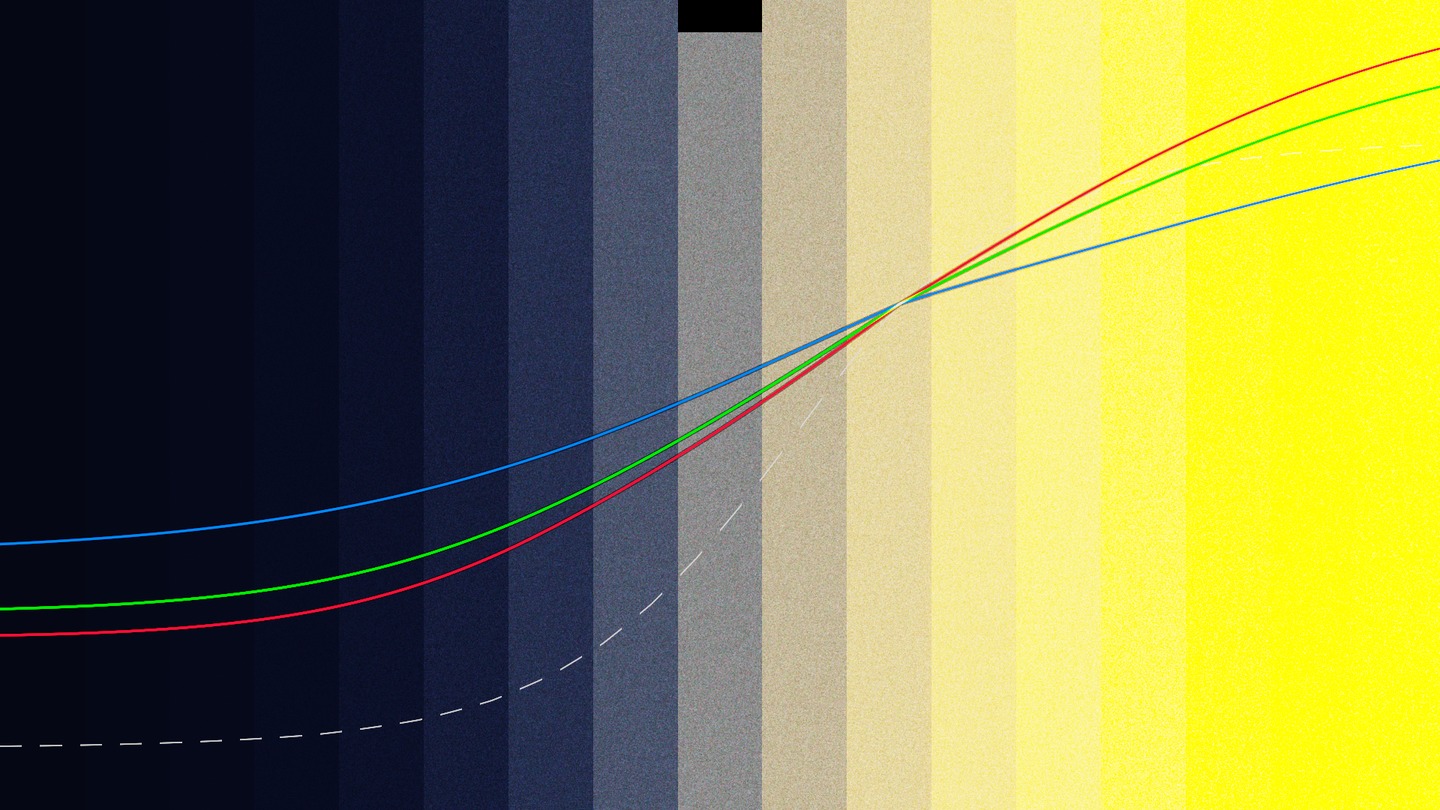
Inga (陰画, the “shadow picture”) is the negative. The chain follows camera and lab: exposure in stops, then the stock with its characteristic curve – gamma around middle grey, toe in the shadows (base density), shoulder in the highlights (maximum density, latitude) – with its own slope per colour layer, the colour of the stock in shadows and highlights (warmth and green/magenta), the interlayer effect as subtractive density (as in Nōdo), halation at the film base, a soft glow around highlights (aura), the adjacency effect of development at edges (acutance) and grain per dye cloud. Push and pull change the development: more contrast, fog in the blacks, more grain. Expired stock gets base fog and stronger colour casts (Cast Strength). Inga can read the camera log of the source directly (Sony, ARRI, RED, Canon, Panasonic, Blackmagic): curve and gamut are converted into the working space without tone mapping, no CST in front. Everything is computed in stops around middle grey, middle grey stays fixed; stock “Neutral” leaves the image untouched. The result stays scene-referred (no inverted negative): Yōga takes over the print. The Kodak Vision3 stocks and Fuji Eterna are measured against Genesis, T-MAX, Vista, Superia, Velvia, Instax and the expired stocks against Filmbox (test chart with grey wedge and colour ring), the rest is modelled from published curves. Grain is measured too: strength by film speed, size by film format.
How to use it
- Inga on the clip, after Shiro and Kiso, before the look: the negative sees the exposed scene. If the clip is still in camera log, set Input to the camera – then no CST is needed in front.
- Working Space is on Auto: Inga detects from the image whether the node arrives linear or in DaVinci Intermediate. On a linear timeline with a camera input, choose by hand.
- Choose the stock: Kodak Vision3 50D, 200T, 250D, 500T, 500T Push, Fuji Eterna 400T and Eterna Vivid 500T for cinema; Double-X, T-MAX 400, ORWO UN54 and Plus-X for black and white; Agfa Vista, Fuji Superia, ORWO NC500, Velvia, Ektachrome and Instax for stills and slide film; plus the expired Elite Chrome, Reala and Plus-X.
- Exposure in stops, Push Pull for development. Curve Box shows the characteristic curve in stops, three channels when the stock has colour.
- Grain: Grain Speed (50 to 800 ASA) and Grain Format (8, 16, 35, 65 mm) set Grain and Grain Size to measured values, then adjust freely. Grain Color 0.3 matches Genesis, 0.9 to 1 the more colourful dye clouds of Filmbox.
- Halation, aura and acutance to taste; everything scales with the image height and is the same size in 4K as in HD.
- Yōga with the print stock behind it; printer lights live there, not here.
Display
Curve Box and Curve Full show the characteristic curve of the negative in stops: input −10 to +6, red, green and blue separately when layers or tint differ.
Tips
- Film Contrast and Film Color (right below Focus) split the film into curve and colour: Film Color at 0 puts only the curve of the negative on normal footage, colours stay as shot. Film Contrast at 0 takes only the colour character, contrast stays. Exposure always applies.
- The stocks approximate the character of the film, they are not exact replicas (see “Film and filter names” in the basics).
- Film path in the Curve Box: the dashed line shows the whole way to the screen, your negative followed by a standard Kodak 2383 print. That way you see in the negative where black and white of the print will land.
- Mix with Preset and Preset Mix blend the settings with a second preset. The negative stock is a menu and changes at 50 %; the sliders blend steplessly.
- Inga and Yōga together are the film path; Kiso before it stays the digital camera (exposure, filters, white balance), Utsushi behind it the look. For film character without a look, leave Utsushi out.
- Stock Manual: gamma below 1 with a high shoulder gives a flat, soft negative like Eterna; gamma above 1 with toe a contrasty one like Vivid.
- Expired film lives on three controls: Base Fog lifts the black, Shadow Tint and Highlight Tint push green or magenta, Cast Strength boosts all casts together.
- Acutance is not sharpening: it only accentuates edges where the exposure changes, with no halo in flat areas. Aura is the soft, almost neutral glow, halation the red rim close to the highlights.
- Intensity scales the whole stock between Neutral and the setting, Exposure and Push Pull are not scaled – a gentle way to dose a stock.
- Halation and aura need the scatter pyramid (two passes). With both off, Inga is as fast as Kiso.
Node structure
Mini Panel in Panel Mode
Presets
Highlighted: presets in the OFX version only.
In Resolve
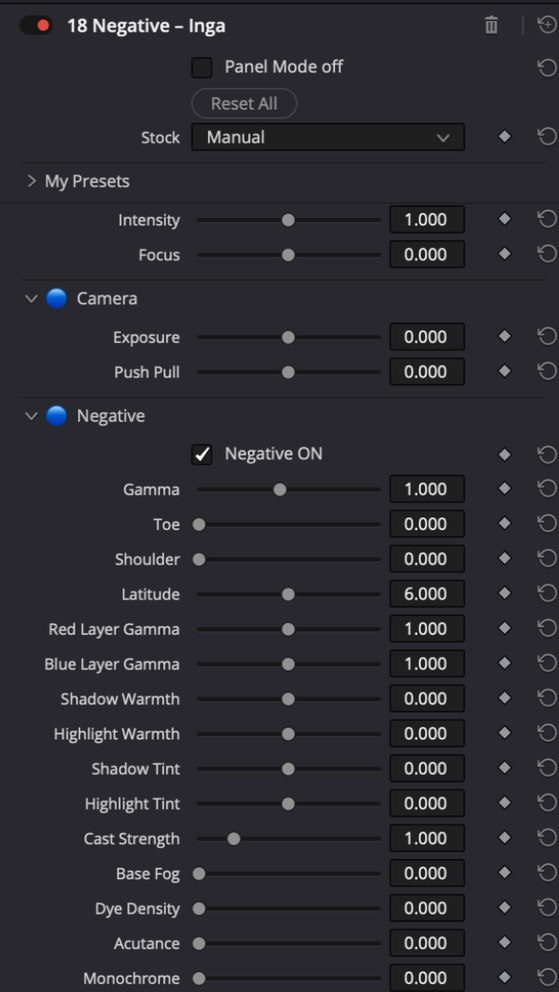
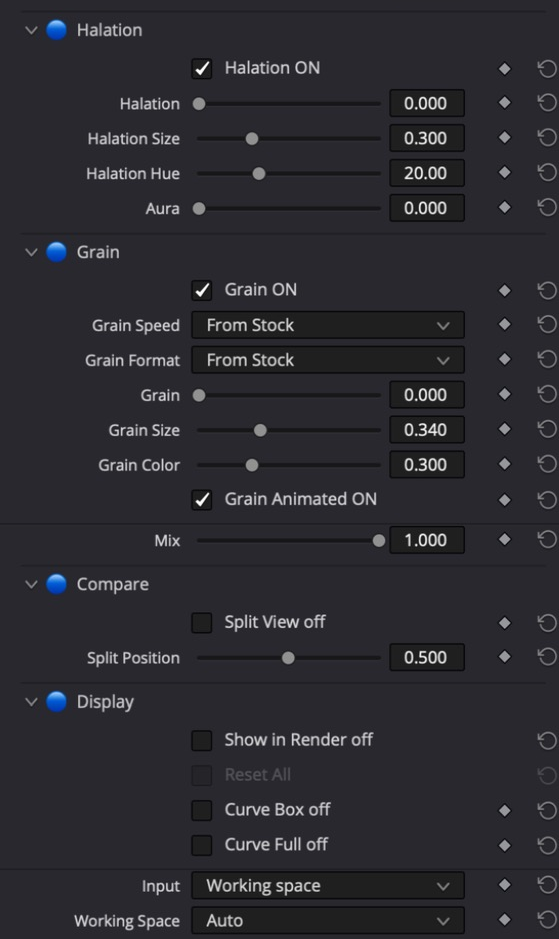
All controls
General
| Control | Range · Default | Effect |
|---|---|---|
| Mix with Preset | Off / presets | Second preset for blending (OFX only) |
| Preset Mix | 0 … 1 · 0 | 0 = the controls as set, 1 = fully the second preset. Sliders blend smoothly, menus and switches change at 50 percent (OFX only) |
| Intensity | 0 … 2 · 1 | Overall strength: 0 = neutral, 1 = as set, 2 = double. Runs out softly near the control limits (OFX only) |
| Focus | −1 … 1 · 0 | Width of the effect: 0 = as set, positive = narrower and more targeted, negative = wider and softer (OFX only) |
| Film Contrast | 0 … 1.5 · 1 | Film Contrast: how much of the curve of the negative is used (grey of the same brightness through the same stock). 0 = contrast as shot, 1 = full, 1.5 = more. Exposure stays |
| Film Color | 0 … 1.5 · 1 | Film Color: how much of the colour character of the negative is used (layers, casts, crosstalk). 0 = colours as shot, only the curve, 1 = full, 1.5 = more |
| Input | Working space / Sony S-Log3 S-Gamut3.Cine / Sony S-Log3 S-Gamut3 / ARRI LogC3 AWG3 / ARRI LogC4 AWG4 / RED Log3G10 RWG / Canon Log 3 Cinema Gamut / Panasonic V-Log V-Gamut / BMD Film Gen5 / DaVinci Intermediate DWG | Camera log of the source. Working Space = the clip is already in the working space. With a camera log Inga converts directly (curve and gamut, no tone mapping), no CST needed in front; the output is in the Working Space |
Camera
| Control | Range · Default | Effect |
|---|---|---|
| Exposure | −4 … 4 · 0 | Exposure of the negative in stops |
| Push Pull | −2 … 2 · 0 | Development: push (+) developed longer, more contrast, fog in the shadows, more grain; pull (-) shorter, softer |
Negative
| Control | Range · Default | Effect |
|---|---|---|
| Negative On | Switch · on | Switches curve, colour character and density of the negative; Exposure, halation and grain stay |
| Gamma | 0.5 … 1.6 · 1 | Slope of the characteristic curve around middle grey, 1 = as the scene |
| Toe | 0 … 2 · 0 | Toe of the curve: shadows run softly into the base density, 0 = straight |
| Shoulder | 0 … 2 · 0 | Shoulder of the curve: highlights run softly into maximum density, 0 = straight |
| Latitude | 3 … 9 · 6 | Stops above middle grey where the shoulder takes hold; the toe sits about as deep below middle grey |
| Red Layer Gamma | 0.8 … 1.2 · 1 | Slope of the red-sensitive layer against the green |
| Blue Layer Gamma | 0.8 … 1.2 · 1 | Slope of the blue-sensitive layer against the green: above 1 cooler highlights, warmer shadows |
| Shadow Warmth | −1 … 1 · 0 | Colour of the stock in the shadows: warm (+) or cold (-) |
| Highlight Warmth | −1 … 1 · 0 | Colour of the stock in the highlights: warm (+) or cold (-) |
| Shadow Tint | −1 … 1 · 0 | Green (-) or magenta (+) in the shadows |
| Highlight Tint | −1 … 1 · 0 | Green (-) or magenta (+) in the highlights |
| Cast Strength | 0 … 5 · 1 | Strength of the colour casts (warmth and tint), 1 = normal, higher for expired or cross-processed stocks |
| Base Fog | 0 … 1 · 0 | Base fog of expired stock: lifts the shadows evenly |
| Dye Density | 0 … 4 · 0 | Interlayer effect: saturated colours get denser and darker (subtractive, as Nodo) |
| Acutance | 0 … 1 · 0 | Acutance: adjacency effect of development, edges get crisper in exposure (about 2 px at UHD), no sharpening halo in flat areas |
| Monochrome | 0 … 1 · 0 | Black-and-white negative: panchromatic sensitivity (red 0.3, green 0.5, blue 0.2), 1 = no colour at all |
Halation
| Control | Range · Default | Effect |
|---|---|---|
| Halation On | Switch · on | Switches the halation |
| Halation | 0 … 1 · 0 | Red halos around bright lights, scatter at the film base |
| Halation Size | 0 … 1 · 0.3 | Radius of the halos |
| Halation Hue | 0 … 60 · 20 | Colour of the halos: 0 = red, 60 = orange |
| Aura | 0 … 1 · 0 | Aura: soft, almost neutral glow around highlights (scatter in emulsion and lens), uses the halation radius |
Grain
| Control | Range · Default | Effect |
|---|---|---|
| Grain On | Switch · on | Switches the grain |
| Grain Speed | 0 … 5 · 0 | Coarse grid for the grain strength by film speed, sets Grain; then fine-tune freely. Measured on Filmbox, 250 ASA matches Genesis. Choosing a stock resets it to From Stock (OFX only) |
| Grain Format | 0 … 4 · 0 | Coarse grid for the grain size by film gauge, sets Grain Size; then fine-tune freely. 16, 35 and 65 mm measured on Genesis, 8 mm on Filmbox (OFX only) |
| Grain | 0 … 2 · 0 | Grain of the negative, per dye cloud. 0.3 = Genesis at strength 1 (about 250 ASA). Grain Speed sets a starting value |
| Grain Size | 0 … 1 · 0.34 | Grain size, relative to the frame height: 65 mm 0.12, 35 mm 0.34, 16 mm 0.60, 8 mm 0.75. Grain Format sets a starting value |
| Grain Color | 0 … 1 · 0.3 | Colour grain: 0 = black-and-white grain, 0.3 = like Genesis, 1 = clearly coloured dye clouds like Filmbox |
| Grain Animated | Switch · on | New grain every frame, off = static grain |
General
| Control | Range · Default | Effect |
|---|---|---|
| Mix | 0 … 1 · 1 | Mix with the original |
Compare
| Control | Range · Default | Effect |
|---|---|---|
| Split View | Switch · off | Before and after side by side: original on the left, result on the right, a white line in between. Turn off before rendering (OFX only) |
| Split Position | 0 … 1 · 0.5 | Position of the split line, 0 = left, 1 = right (OFX only) |
Display
| Control | Range · Default | Effect |
|---|---|---|
| Curve Box | Switch · off | Characteristic curve in stops bottom left, red, green and blue separately |
| Curve Full | Switch · off | Characteristic curve over the whole image |
18 Printer Lights – Yakitsuke 焼付
Printer lights in points, like in the film lab.
Yakitsuke works in the points of film timing: master plus R, G and B, each point a fixed step of density. If you learned at a lab, you correct in the same language here.
How to use it
- Ideally add it in a Cineon Printing Density tree.
- Master for brightness, R, G and B for color. 25 is neutral.
- Whole Points snaps to whole points.
Display
The curve display shows the effect per channel, with the current points as numbers above.
Tips
- Points per Stop sets how many points make one stop (default 7.2). Lab Direction reverses the direction, as some labs do.
Node structure
Mini Panel in Panel Mode
Presets
Highlighted: presets in the OFX version only.
In Resolve
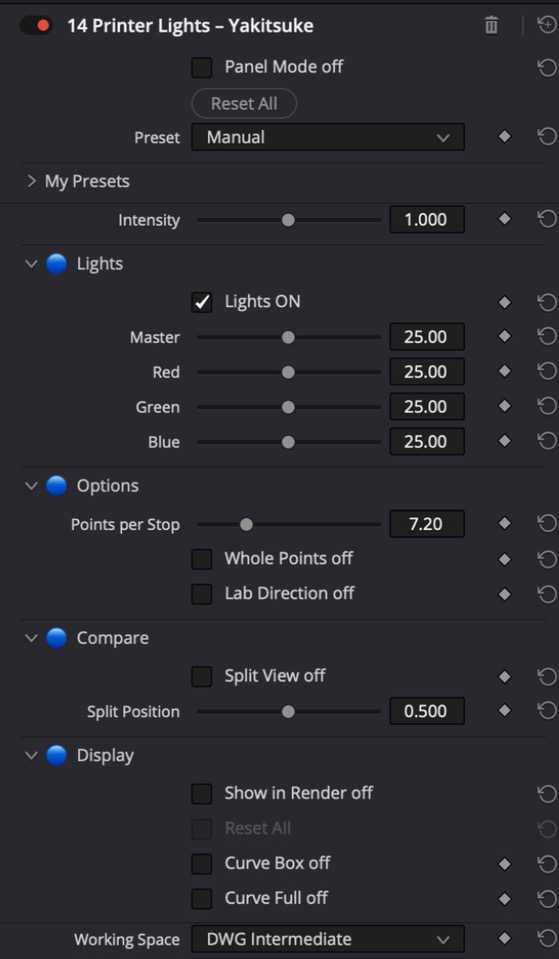
All controls
General
| Control | Range · Default | Effect |
|---|---|---|
| Intensity | 0 … 2 · 1 | Overall strength: 0 = neutral, 1 = as set, 2 = double. Runs out softly near the control limits (OFX only) |
Lights
| Control | Range · Default | Effect |
|---|---|---|
| Lights On | Switch · on | Off: node has no effect, for comparison |
| Master | 0 … 50 · 25 | All three channels together, 25 = neutral |
| Red | 0 … 50 · 25 | Red points, 25 = neutral. More points = more red, reversed like in the lab with Lab Direction |
| Green | 0 … 50 · 25 | Green points, 25 = neutral. More points = more green, reversed like in the lab with Lab Direction |
| Blue | 0 … 50 · 25 | Blue points, 25 = neutral. More points = more blue, reversed like in the lab with Lab Direction |
Options
| Control | Range · Default | Effect |
|---|---|---|
| Points per Stop | 4 … 16 · 7.2 | How many points make one stop. 7.2 = Kodak standard (0.025 density per point) |
| Whole Points | Switch · off | Rounds to whole points like on a printer |
| Lab Direction | Switch · off | Lab logic: more points = denser print |
Compare
| Control | Range · Default | Effect |
|---|---|---|
| Split View | Switch · off | Before and after side by side: original on the left, result on the right, a white line in between. Turn off before rendering (OFX only) |
| Split Position | 0 … 1 · 0.5 | Position of the split line, 0 = left, 1 = right (OFX only) |
Display
| Control | Range · Default | Effect |
|---|---|---|
| Curve Box | Switch · off | Curves and point bars as a box center left |
| Curve Full | Switch · off | Curves over the whole image (Curve Box takes priority) |
19 Print – Yōga 陽画
Second half of the film path: printer lights, print stock with film curve and dyes, bleach bypass, cross process, split toning, print grain and, if wanted, the output to the display.
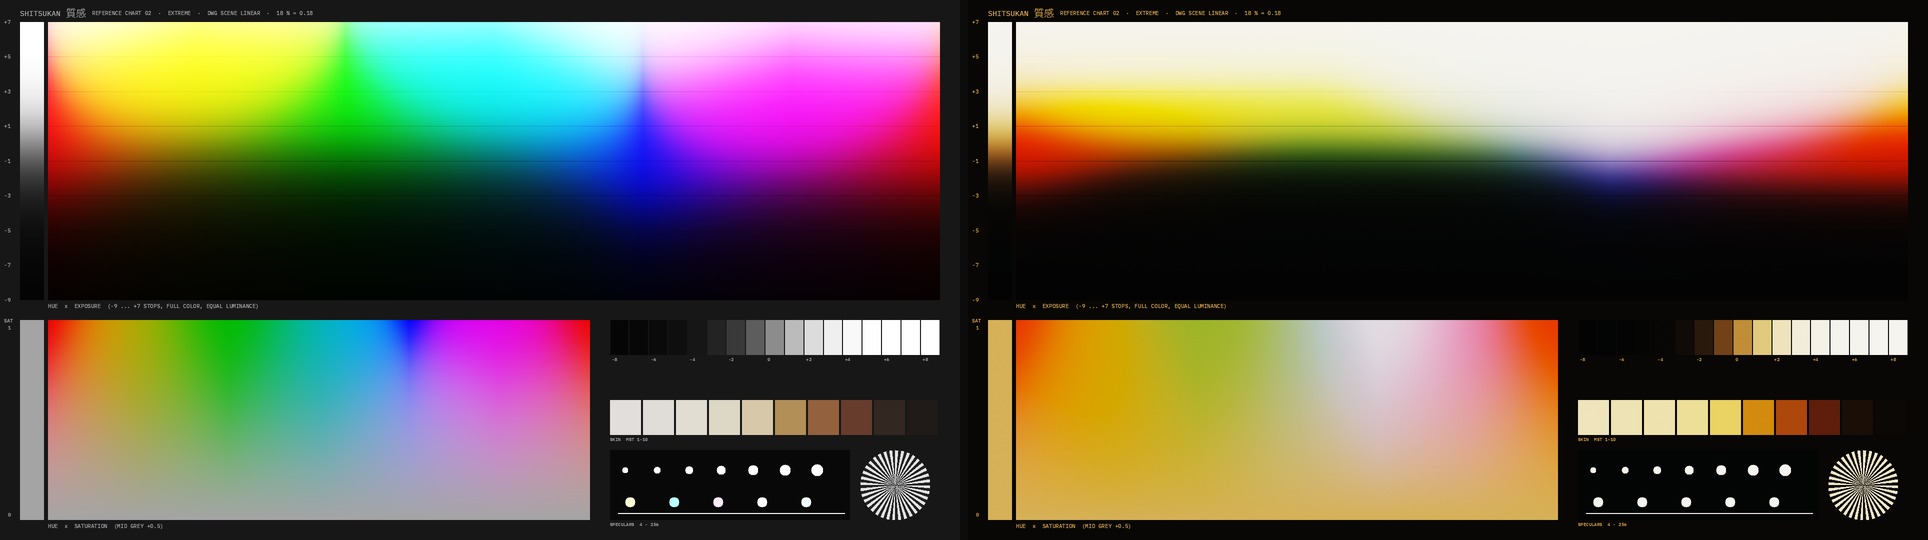
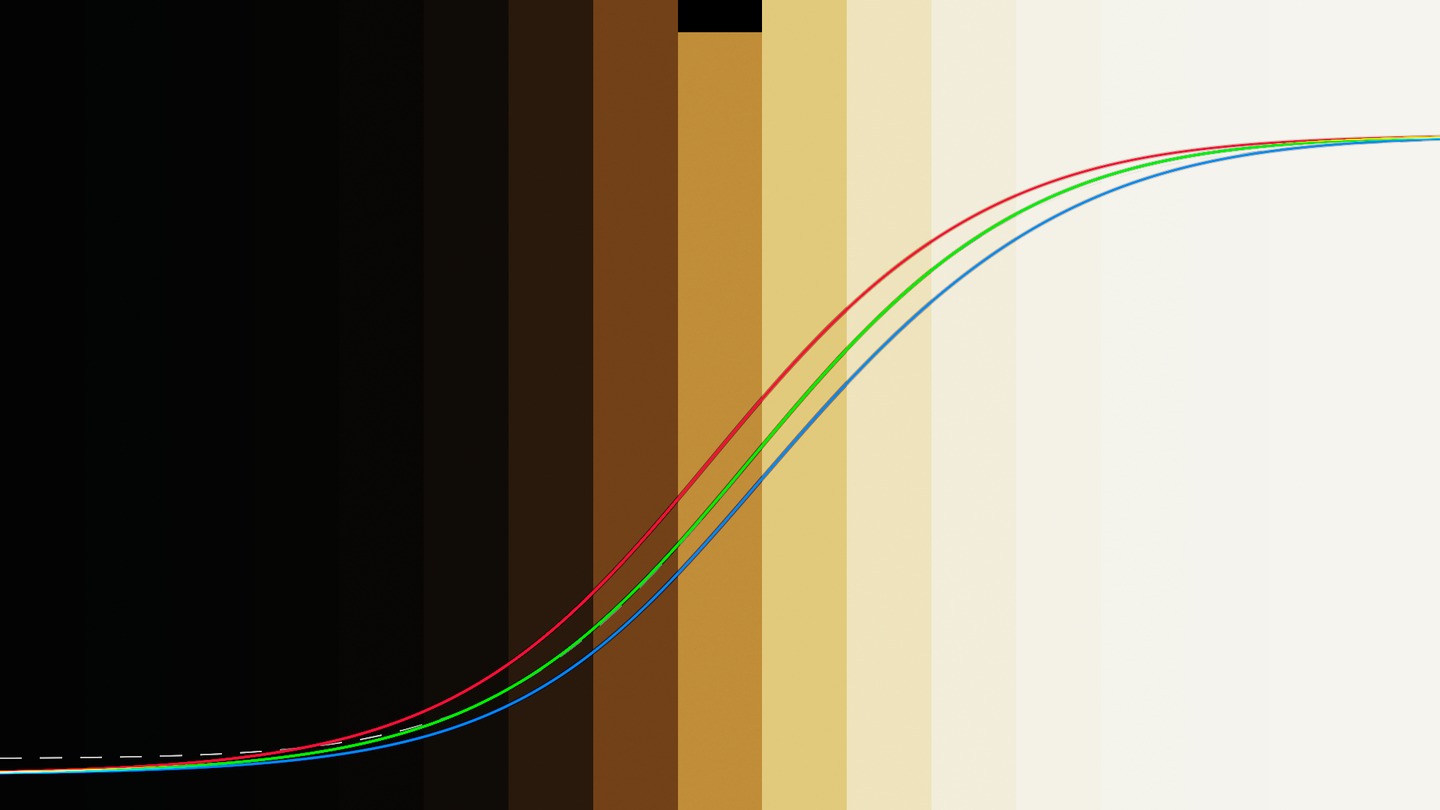
Yōga (陽画, the “light picture”) is the print. First the printer lights as in the lab: 25/25/25 is neutral, 7.2 points are one stop, Lab Direction reverses the direction as on the machine. Then the print stock: Film Curve 1 is the density curve of a print between the black (Black Depth) and the white of the projector lamp (Projector White), Contrast is its slope at grey. Print Dyes add the colour rendering of the dyes – skin and orange more golden, blue and violet calmer – matched to Genesis. On top, optionally, the skipped bleach (silver stays: contrast up, colour down), cross processing, the dye density of the print (subtractive), saturation and vibrance, split toning for shadows and highlights, a base tint and the print grain with size and colour. Skin Protect keeps skin tones out of the colour moves. With Output Working Space the result stays scene-referred; with Rec.709, sRGB, P3 or Rec.2020 PQ Yōga itself is the projector and delivers the finished display signal. Stock “Neutral” leaves the image untouched.
How to use it
- Yōga behind Inga, on the clip or as a group or timeline node: print stock and printer lights usually apply to the scene or the film. Working Space Auto detects the input.
- Choose the stock: Kodak 2383 (default), 2393 (more contrast, deeper black), Fuji 3513 (cooler), Fuji 3521 Premier (hard), Low Contrast (TV print) or Bleach Bypass ENR. The Kodak stocks are measured against Genesis.
- Printer lights: Master for all channels, red, green, blue individually. One point is a visible step, five points are obvious.
- Choose the output: Output Working Space with a CST to the display behind it, tone mapping None – or Output directly to Rec.709 Gamma 2.4 (or sRGB, P3-D65, Rec.2020 PQ). Then the chain ends here: no CST after it, and with Resolve Color Management set output tone mapping to None.
- Fine-tuning: bleach bypass, cross process, vibrance, split toning (Shadow Hue/Tone, Highlight Hue/Tone); Skin Protect when the skin tips over.
- Curve Box shows the print curve in stops, three channels as soon as the highlights separate.
Display
Curve Box and Curve Full show the print curve in stops: input −10 to +6, red, green and blue separately when printer lights, toning or cross process separate the channels.
Tips
- Only the film curve on normal footage: Film Color at 0 gives only the print curve, colours stay as shot. The other way round, Film Contrast at 0: only the colours of the print (channel curves, dyes, base), contrast stays. Printer Lights always apply.
- The stocks approximate the character of the film, they are not exact replicas (see “Film and filter names” in the basics).
- Film path in the Curve Box: the dashed line shows your print behind a standard Kodak 5219 negative, the whole way from scene to screen.
- Printer lights belong here, not in the negative: in the lab the negative is developed as is, only the print is timed. Yakitsuke stays for timing outside the film path.
- Projector White sets how many stops above middle grey white sits: 2.5 matches a CST without tone mapping, the Kodak stocks sit at about 3.3 and keep more detail in the highlights.
- Black Depth is the depth of the print: Kodak 2383 sits about 9 stops below middle grey, 2393 about 2 stops deeper. For web or TV a bit higher, then the blacks keep detail.
- Print Dyes 0 is the purely mathematical print without dye character. Older nodes stay at 0 until a stock is chosen again.
- Intensity scales stock and printer lights together against Neutral; Mix blends with the input.
- ENR and bleach bypass are print properties here; Genzō has the same moves as a look with more variants (Faded Print, Dye Transfer).
Node structure
Mini Panel in Panel Mode
Presets
Highlighted: presets in the OFX version only.
In Resolve
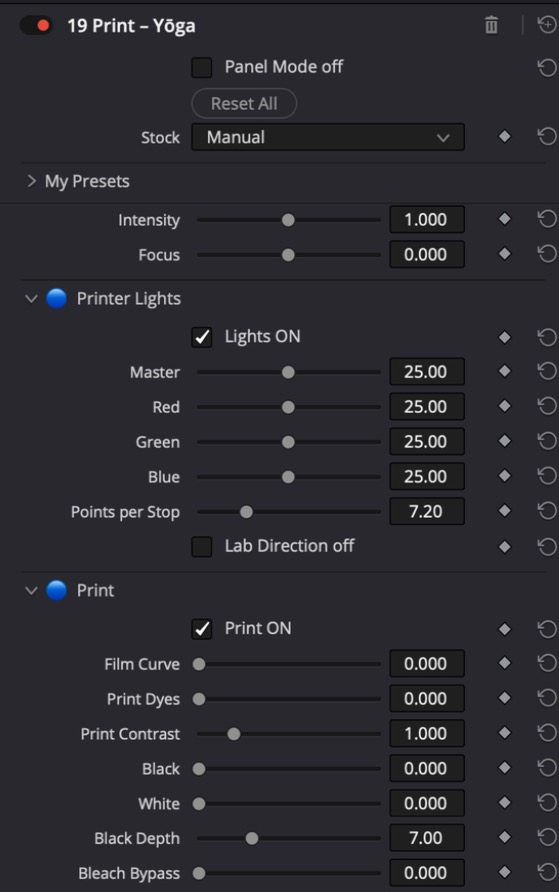
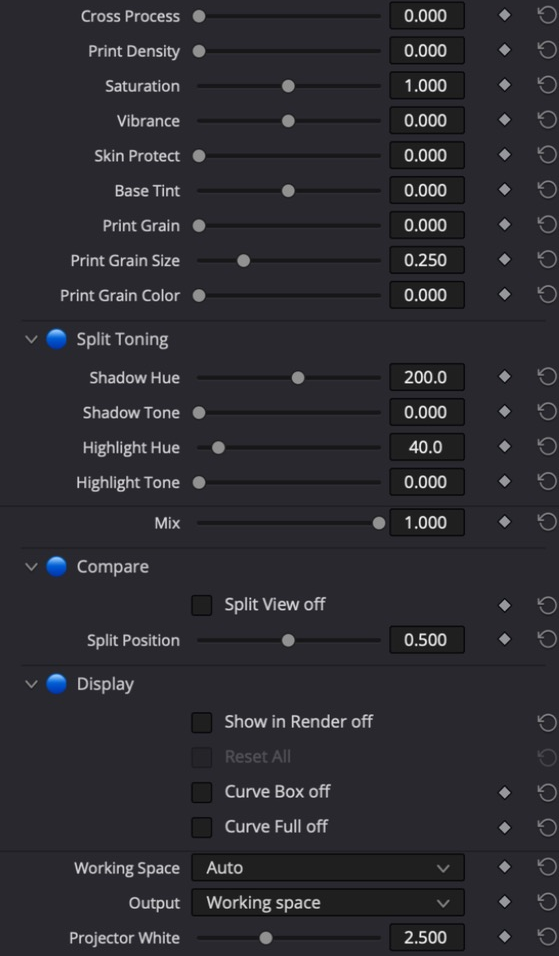
All controls
General
| Control | Range · Default | Effect |
|---|---|---|
| Intensity | 0 … 2 · 1 | Overall strength: 0 = neutral, 1 = as set, 2 = double. Runs out softly near the control limits (OFX only) |
| Focus | −1 … 1 · 0 | Width of the effect: 0 = as set, positive = narrower and more targeted, negative = wider and softer (OFX only) |
| Film Contrast | 0 … 1.5 · 1 | Film Contrast: how much of the print curve is used (grey of the same brightness through the same print). 0 = contrast as shot, only the film colours, 1 = full, 1.5 = more. Printer Lights stay |
| Film Color | 0 … 1.5 · 1 | Film Color: how much of the colour of the print is used (per-channel curves, dyes, base, saturation). 0 = only the print curve on normal footage, colours as shot, 1 = full, 1.5 = more |
Printer Lights
| Control | Range · Default | Effect |
|---|---|---|
| Lights On | Switch · on | Switches the printer lights |
| Master | 0 … 50 · 25 | Printer light for all three channels, 25 = neutral, 7.2 points = one stop |
| Red | 0 … 50 · 25 | Red points, 25 = neutral. More points = more red, reversed with Lab Direction as in the lab |
| Green | 0 … 50 · 25 | Green points, 25 = neutral |
| Blue | 0 … 50 · 25 | Blue points, 25 = neutral |
| Points per Stop | 4 … 16 · 7.2 | How many points make one stop, 7.2 = Kodak standard |
| Lab Direction | Switch · off | Lab logic: more points = denser print (darker, complementary colour) |
| Control | Range · Default | Effect |
|---|---|---|
| Print On | Switch · on | Switches curve, bleach, density and saturation of the print |
| Film Curve | 0 … 1 · 0 | Shape of the print curve: 0 = straight line with soft toe and shoulder (neutral at default), 1 = film print (density curve between Black Depth and Projector White, Contrast = slope at grey) |
| Print Dyes | 0 … 1 · 0 | Dye rendering of the print: hue-dependent hue and saturation as on film (skin and orange more golden, blue and violet calmer). Matched to Genesis, 1 = full. Brightness and greys stay |
| Print Contrast | 0.5 … 3 · 1 | Slope of the print curve around middle grey, 1 = as the negative |
| Black | 0 … 2 · 0 | Toe of the print: shadows run softly into the black of the print (Black Depth), 0 = straight |
| White | 0 … 2 · 0 | Shoulder of the print: highlights run softly into the white of the base, 0 = straight |
| Black Depth | 4 … 14 · 7 | Stops below middle grey where the print turns black |
| Bleach Bypass | 0 … 1 · 0 | Bleach bypass: silver stays in the print, colour goes back, contrast rises |
| Cross Process | 0 … 1 · 0 | Cross process: red steeper, blue flatter, cold shadows, yellow-green highlights, more colour |
| Print Density | 0 … 4 · 0 | Colour density of the print: saturated colours get denser and darker (subtractive) |
| Saturation | 0 … 2 · 1 | Saturation of the print, 1 = unchanged |
| Vibrance | −1 … 1 · 0 | Vibrance: weakly saturated colours gain (or lose) more than saturated ones |
| Skin Protect | 0 … 1 · 0 | Skin protect: skin tones of the input keep the colour of a print without saturation, vibrance, split toning and cross process |
| Base Tint | −1 … 1 · 0 | Tint of the base in the shadows: warm (+) or cold (-) |
Print Grain
| Control | Range · Default | Effect |
|---|---|---|
| Print Grain | 0 … 1 · 0 | Fine grain of the print, strongest in the mids |
| Print Grain Size | 0 … 1 · 0.25 | Size of the print grain: 0.25 = default (one grain cell per pixel at UHD), higher = coarser |
| Print Grain Color | 0 … 1 · 0 | Colour of the print grain: 0 = monochrome, 1 = coloured dye clouds |
Split Toning
| Control | Range · Default | Effect |
|---|---|---|
| Shadow Hue | 0 … 360 · 200 | Hue of the shadow tone in degrees (0 red, 120 green, 240 blue) |
| Shadow Tone | 0 … 1 · 0 | Strength of the shadow tone |
| Highlight Hue | 0 … 360 · 40 | Hue of the highlight tone in degrees |
| Highlight Tone | 0 … 1 · 0 | Strength of the highlight tone |
General
| Control | Range · Default | Effect |
|---|---|---|
| Mix | 0 … 1 · 1 | Mix with the original |
Compare
| Control | Range · Default | Effect |
|---|---|---|
| Split View | Switch · off | Before and after side by side: original on the left, result on the right, a white line in between. Turn off before rendering (OFX only) |
| Split Position | 0 … 1 · 0.5 | Position of the split line, 0 = left, 1 = right (OFX only) |
Display
| Control | Range · Default | Effect |
|---|---|---|
| Curve Box | Switch · off | Print curve in stops bottom left, red, green and blue separately |
| Curve Full | Switch · off | Print curve over the whole image |
General
| Control | Range · Default | Effect |
|---|---|---|
| Output | Working space / Rec.709 gamma 2.4 / Rec.709 sRGB / P3-D65 gamma 2.6 / Rec.2020 PQ 1000 | Working Space: the print stays scene-referred, a CST to the display follows (tone mapping None). Otherwise Yōga is the projector: the chain ends here, no CST and no output tone mapping after it |
| Projector White | 1 … 5 · 2.5 | White of the print in stops above middle grey; with Output it becomes display white (projector lamp). 2.5 = like a CST without tone mapping |
20 Quick Look – Kantan 簡単
A look with few controls: pick a preset, a reference image or a LUT, then Intensity and Focus, plus Look Contrast and Look Color.
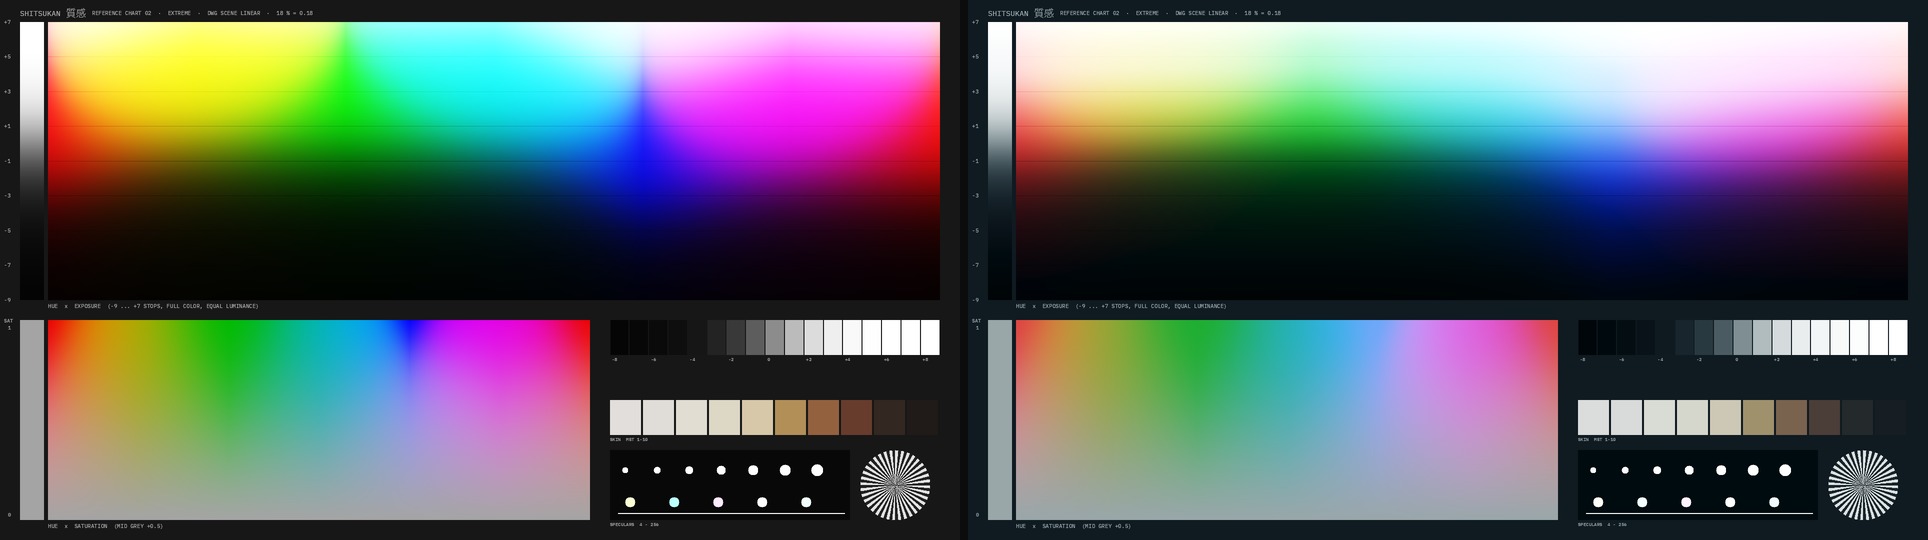
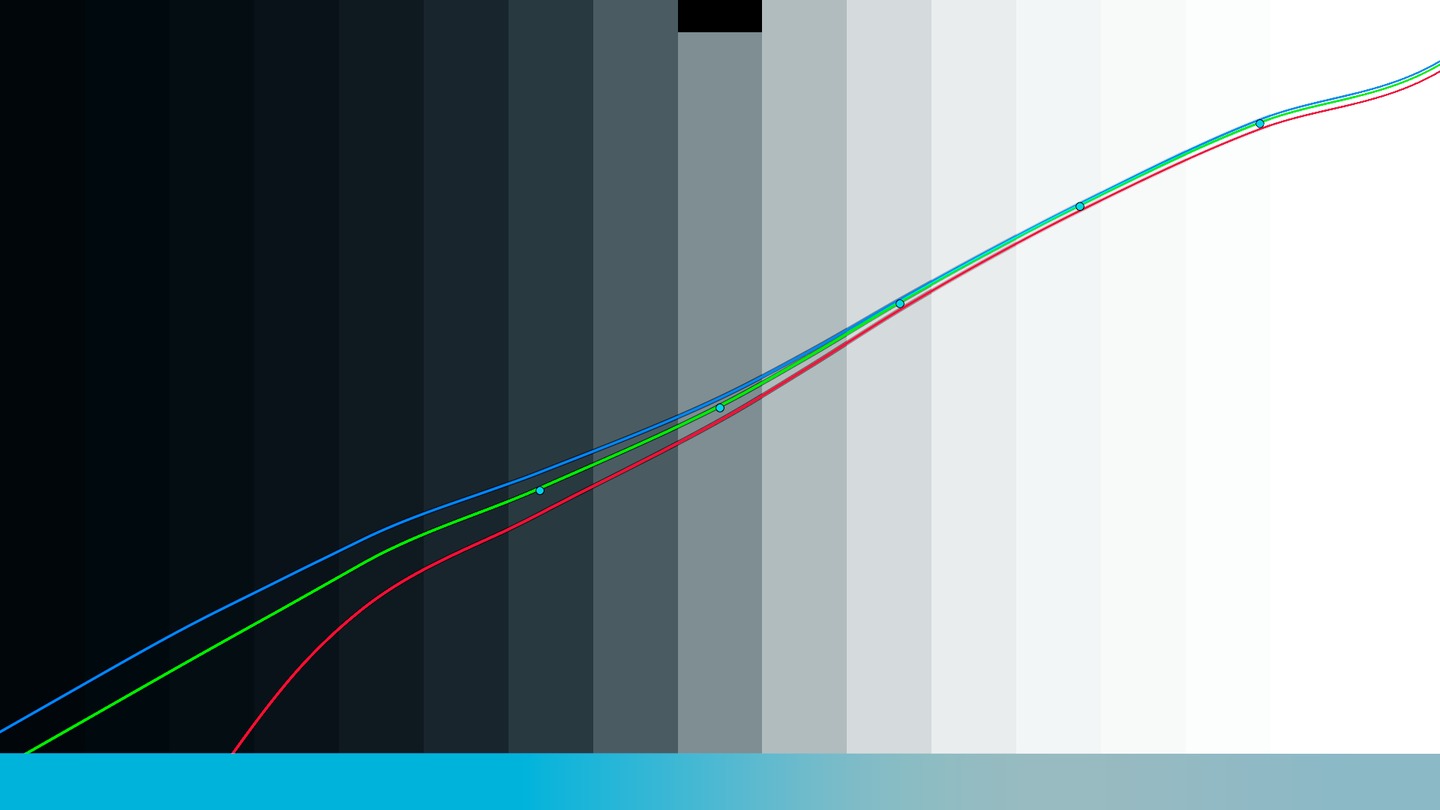
Kantan (簡単, simple) is the quick way to a look. Underneath it runs the same math as Utsushi, but all detail controls are hidden. You pick a preset, a reference image or a LUT, Kantan sets the tone curve, the tint per brightness range and the six color vectors itself, and you only adjust Intensity and Focus. It is the entry point for everyone who wants a result fast, and the tool for the client monitor.
How to use it
- Put Kantan where your look usually sits: in the scene-referred tree before the output transform, Working Space matching the timeline.
- Pick a preset. Mix with Preset and Preset Mix blend in a second preset steplessly.
- Or fetch a look: play or scrub once, then Reference from Frame, Choose Image, Reference from Resolve or Reference from LUT. Match rebuilds the look as controls.
- Intensity sets the strength (0 = neutral, 2 = double), Focus the width of the effect: positive more targeted, negative softer.
Display
Curve Box shows the tone curve in stops with the tint of the five ranges and above it the status line: what the look does to middle grey, shadows and highlights and how it changes saturation.
Tips
- Look Contrast and Look Color (right below Focus): Look Color at 0 takes only the tone curve of the look, colours stay as shot. Look Contrast at 0 takes only tint, saturation and colour vectors, contrast stays. Works for presets, reference image and LUT.
- Color cards: load a color card (a gradient from dark to light with a tint) as the reference image and turn on Match Tint Only. Kantan then takes only the direction of the color per brightness range, e.g. teal in the shadows; curve and saturation stay. Eight cards are included: Teal, Teal Orange, Warm Sepia, Cold Steel, Green, Purple Shadows, Golden Highlights, Moonlight. Intensity sets the strength.
- Reference from LUT takes only the look of a LUT, its colour curve: without the LUT’s contrast (Look Contrast is set to 0 afterwards) and without its colour space conversion, which LUT Space takes out. To add the LUT’s contrast, raise Look Contrast. The LUT itself is not applied, it is an approximation; for the exact LUT use Hyō. LUT Space Auto detects DWG Intermediate, Cineon (Resolve Film Looks) and Rec.709 by name and file header.
- All Utsushi controls are there, only hidden. If you want to go deeper, use Utsushi: same presets, same results.
- Export Look LUT freezes the look as a 33 point LUT for Hyō. For the camera monitor there is the script Shitsukan Camera LUT under Workspace › Scripts.
Node structure
Mini Panel in Panel Mode
Presets
Highlighted: presets in the OFX version only.
All controls
General
| Control | Range · Default | Effect |
|---|---|---|
| Mix with Preset | Off / presets | Second preset for blending (OFX only) |
| Preset Mix | 0 … 1 · 0 | 0 = the controls as set, 1 = fully the second preset. Sliders blend smoothly, menus and switches change at 50 percent (OFX only) |
| Look Contrast | 0 … 1.5 · 1 | Tone curve of the look: 0 = contrast as shot, 1 = full (OFX only) |
| Look Color | 0 … 1.5 · 1 | Colour of the look: 0 = colours as shot, 1 = full (OFX only) |
| Intensity | 0 … 2 · 1 | Overall strength: 0 = neutral, 1 = as set, 2 = double. Runs out softly near the control limits (OFX only) |
| Focus | −1 … 1 · 0 | Width of the effect: 0 = as set, positive = narrower and more targeted, negative = wider and softer (OFX only) |
Look from Reference
| Control | Range · Default | Effect |
|---|---|---|
| Match | Button | Rebuilds the look of the reference as controls |
| Reference from Frame | Button | The current frame becomes the reference (play or scrub once first) |
| Reference from Resolve | Button | Takes the newest still from the Shitsukan Reference scripts |
| Previous / Next Reference | Button | Steps through the reference folder and matches right away |
| Auto Pick Reference | Button | Picks the most similar image of the folder |
| Choose Image... | Button | Reference from an image file (JPG, PNG, TIFF, HEIC, EXR) |
| Reference from LUT... | Button | Sends the frame through a LUT and rebuilds its look as controls (approximation) |
| LUT Space | Auto / DWG Intermediate / Rec.709 (display) / Cineon Log to Rec.709 | Which signal the LUT expects; Auto reads name and file header |
| Reference Type | Graded still (display) / Log or linear frame | How the image file is read |
| Match Exposure | Switch · off | Also moves the brightness toward the reference, at most 1.5 stops |
| Match Tint Only | Switch · off | Only the tint per brightness range, for color cards |
| Narrow | 0 … 1 · 0.5 | How closely Match follows the reference |
| Choose Folder... | Button | Reference folder for Previous, Next and Auto Pick |
| Export Look LUT | Button | Freezes the look as a 33 point LUT for Hyō |
Compare
| Control | Range · Default | Effect |
|---|---|---|
| Split View | Switch · off | Before and after side by side: original on the left, result on the right, a white line in between. Turn off before rendering (OFX only) |
| Split Position | 0 … 1 · 0.5 | Position of the split line, 0 = left, 1 = right (OFX only) |
Display
| Control | Range · Default | Effect |
|---|---|---|
| Curve Box | Switch · off | Tone curve as a box bottom left, input against output in stops around middle grey; dots = tint of the ranges |
| Curve Full | Switch · off | Tone curve over the whole image (Curve Box takes priority) |
21 Look – Utsushi 写し
A look in one node: tone curve, tint and saturation by brightness, genre presets, match from a reference.
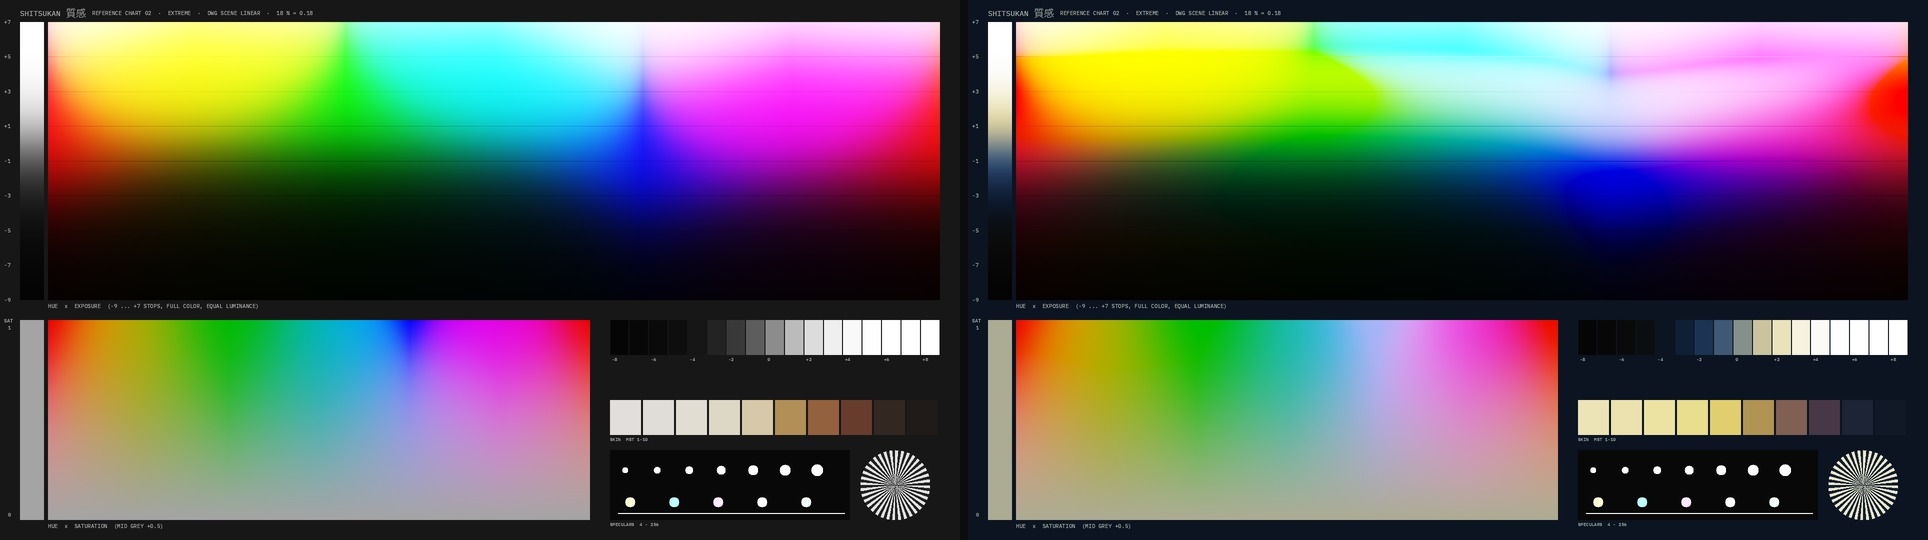
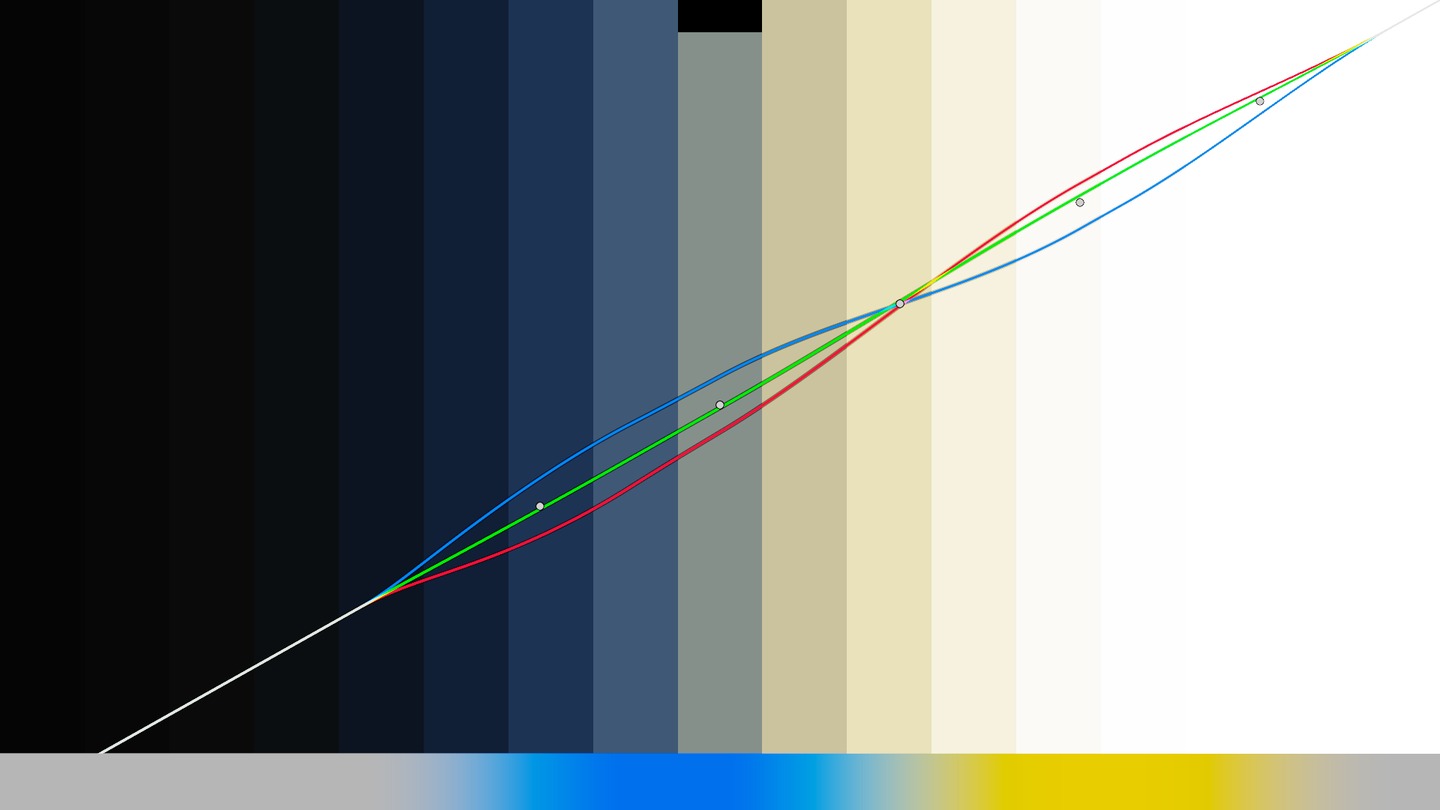
Utsushi (写し, a faithful copy of a model) puts a whole look into one node. The tone curve has nine points from −6 to +6 stops around middle grey, works on brightness and keeps the color ratio of each pixel. It always stays monotonic, so it never inverts, and it does not overshoot. Tint (hue and strength) and saturation come separately for shadows, lower mids, mids, upper mids and highlights, blending softly. Genre presets give a starting point. Match takes over the look of a reference image or another frame: curve, tint and saturation land in the controls and stay there, so they do not flicker from frame to frame.
How to use it
- Place it after the base grade, before the output transform.
- Pick a genre preset, or under Look from Reference load a reference image with Choose Image…. Match runs right away.
- To use another shot as the reference: press Reference from Frame there, copy the node to the new shot and press Match.
- Reference library: put images into a folder and pick it with Choose Folder… (Reference Folder, empty = the default folder of the Resolve scripts, subfolders count). Next Reference and Previous Reference step through and match right away, Auto Pick Reference finds the image most similar to the current shot by contrast, colorfulness and color content. Workspace > Scripts > Shitsukan Reference Album exports a whole gallery album into a subfolder.
- Narrow sets how closely Match follows the reference: 0 contrast, overall balance and saturation only, 0.5 also toe, shoulder and the five brightness ranges, 1 also the six color vectors (skin tones limited). How far the look goes is set with Intensity.
- Dose the three parts separately with Tone Amount, Tint Amount and Sat Amount, everything together with Intensity.
- Fine-tune individual curve points, tints and saturations.
Display
Curve Box shows the tone curve bottom left, input against output in stops around middle grey. The dots on the curve show the tint of the five ranges in their color. In the overlay the red, green and blue curves separate when the image is tinted.
Tips
- Look Contrast and Look Color (right below Focus) set curve and colour of the whole look separately, on top of Tone Amount and Tint Amount in the details.
- Color cards: load a color card (a gradient from dark to light with a tint) as the reference image and turn on Match Tint Only. Kantan then takes only the direction of the color per brightness range, e.g. teal in the shadows; curve and saturation stay. Eight cards are included: Teal, Teal Orange, Warm Sepia, Cold Steel, Green, Purple Shadows, Golden Highlights, Moonlight. Intensity sets the strength.
- Mix with Preset and Preset Mix blend the settings with a second preset, steplessly. Sliders blend smoothly, menus and switches change at 50 %.
- Reference from LUT: choose a LUT, Utsushi sends the current frame through it and rebuilds the look as controls. The LUT itself is not applied; you get its look with Intensity, Look Contrast and Look Color, as an approximation. For the exact LUT use Hyō. LUT Space Auto detects DWG Intermediate LUTs by name, otherwise Rec.709.
- Range Width (Color group) sets how far the tint and saturation of the five brightness ranges run into each other.
- Match Exposure is off: Match then takes only the shape of the curve and the exposure of the mids stays. Turn it on if the brightness of the reference should match too; Match then moves at most 1.5 stops toward it, since film stills are often night scenes.
- Reference Type Graded still for finished images (JPG, PNG, screenshot); the display shoulder is roughly undone. Log or linear frame for EXR or grabs in the space of the footage.
- Match compares the distribution of brightness and color. Similar scenes give the best result; night to day remains a starting point.
- Export Look LUT freezes the current look as a 3D LUT (33 points, DWG Intermediate in and out) into ~/Library/Application Support/Shitsukan/Looks and, if writable, into the Resolve LUT folder under Shitsukan. Loaded in Hyō it is detected as a look LUT. Matching itself runs per shot at the press of a button: an OFX plugin cannot set controls when the clip changes.
- Everything at neutral means the image stays exactly unchanged.
Node structure
Mini Panel in Panel Mode
Presets
Highlighted: presets in the OFX version only.
In Resolve
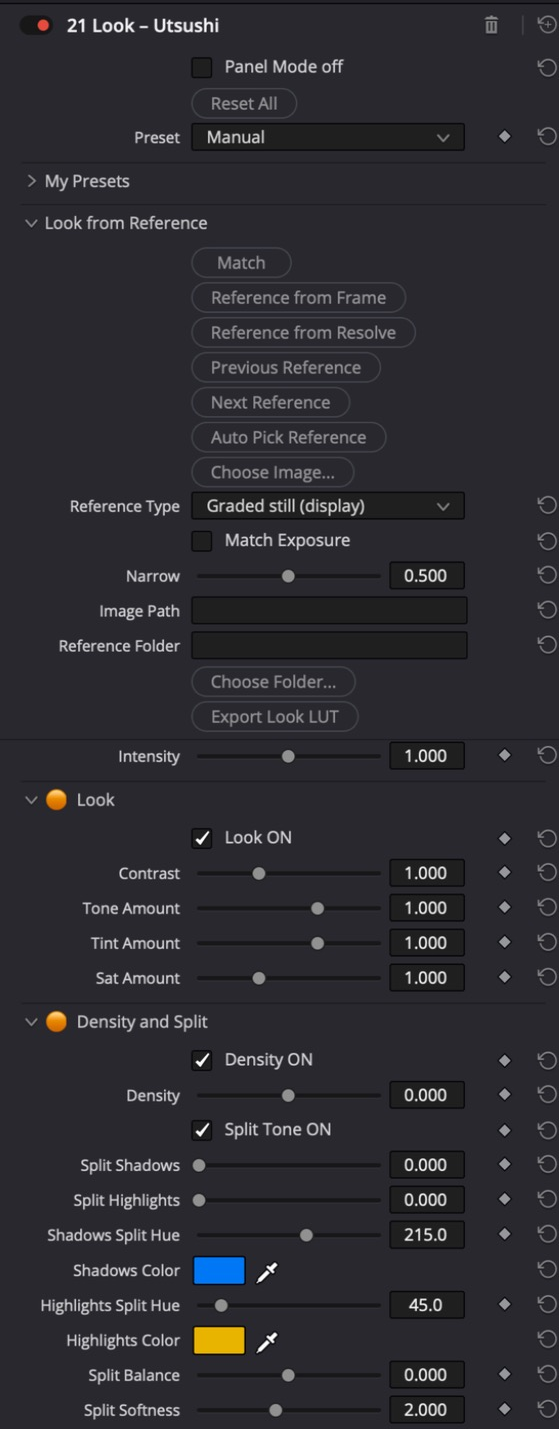
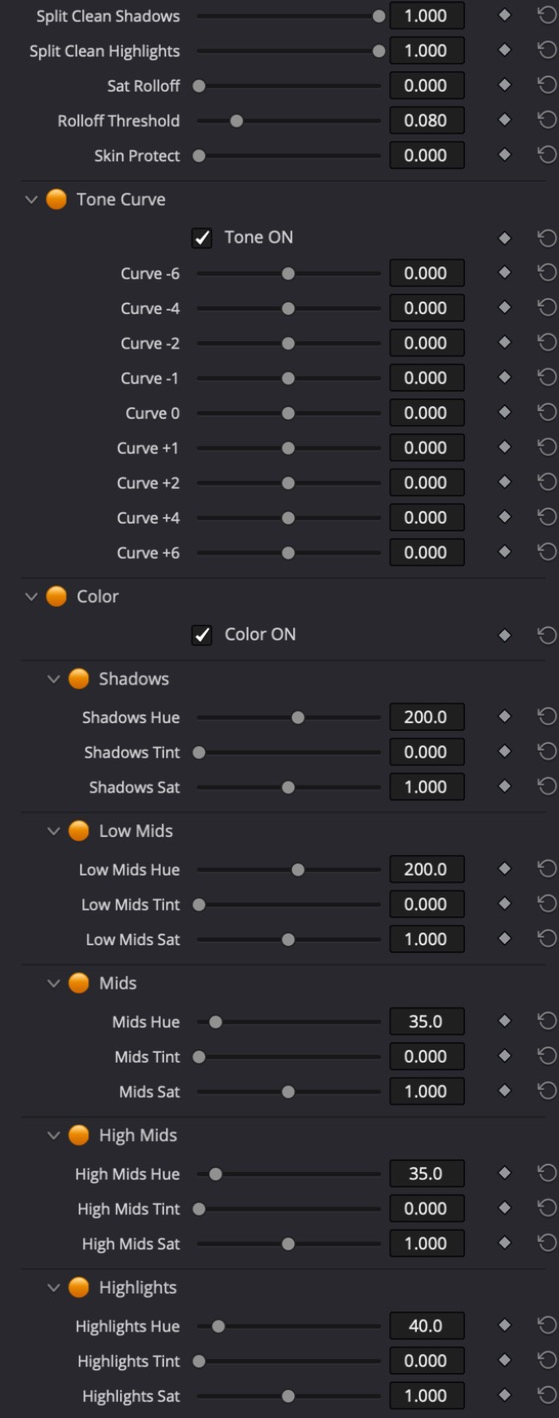
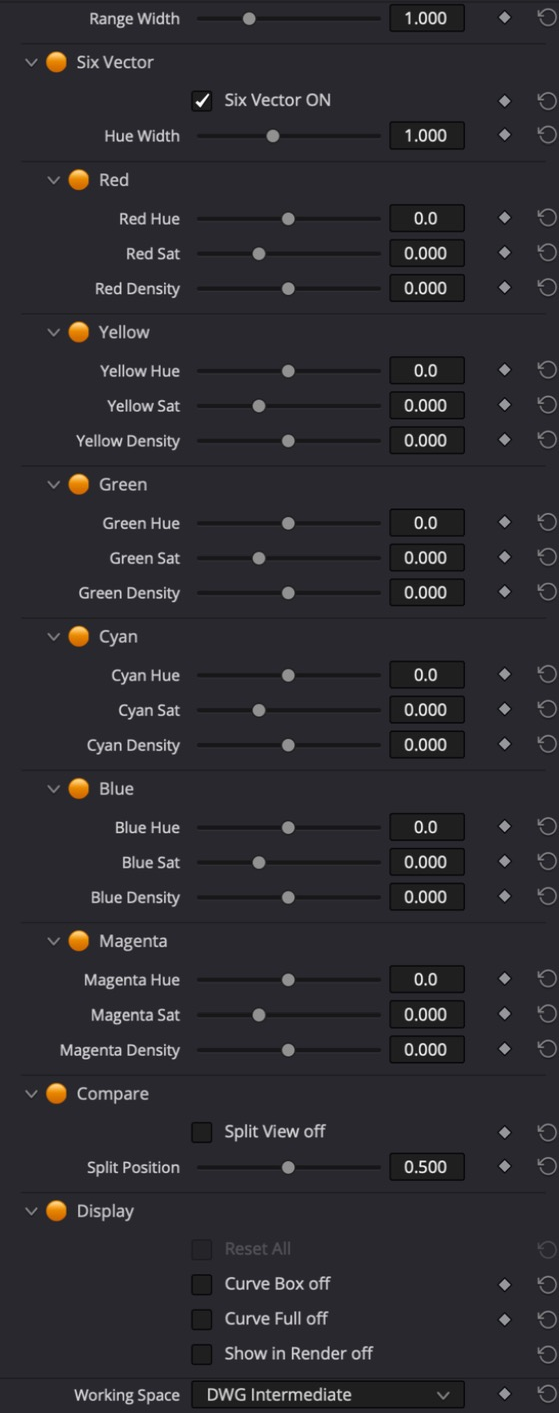
All controls
General
| Control | Range · Default | Effect |
|---|---|---|
| Mix with Preset | Off / presets | Second preset for blending (OFX only) |
| Preset Mix | 0 … 1 · 0 | 0 = the controls as set, 1 = fully the second preset. Sliders blend smoothly, menus and switches change at 50 percent (OFX only) |
| Look Contrast | 0 … 1.5 · 1 | Tone curve of the look: 0 = contrast as shot, 1 = full (OFX only) |
| Look Color | 0 … 1.5 · 1 | Colour of the look: 0 = colours as shot, 1 = full (OFX only) |
| Intensity | 0 … 2 · 1 | Overall strength: 0 = neutral, 1 = as set, 2 = double. Runs out softly near the control limits (OFX only) |
| Focus | −1 … 1 · 0 | Width of the effect: 0 = as set, positive = narrower and more targeted, negative = wider and softer (OFX only) |
Look from Reference
| Control | Range · Default | Effect |
|---|---|---|
| Match | Button | Rebuilds the look of the reference as controls |
| Reference from Frame | Button | The current frame becomes the reference (play or scrub once first) |
| Reference from Resolve | Button | Takes the newest still from the Shitsukan Reference scripts |
| Previous / Next Reference | Button | Steps through the reference folder and matches right away |
| Auto Pick Reference | Button | Picks the most similar image of the folder |
| Choose Image... | Button | Reference from an image file (JPG, PNG, TIFF, HEIC, EXR) |
| Reference from LUT... | Button | Sends the frame through a LUT and rebuilds its look as controls (approximation) |
| LUT Space | Auto / DWG Intermediate / Rec.709 (display) / Cineon Log to Rec.709 | Which signal the LUT expects; Auto reads name and file header |
| Reference Type | Graded still (display) / Log or linear frame | How the image file is read |
| Match Exposure | Switch · off | Also moves the brightness toward the reference, at most 1.5 stops |
| Match Tint Only | Switch · off | Only the tint per brightness range, for color cards |
| Narrow | 0 … 1 · 0.5 | How closely Match follows the reference |
| Choose Folder... | Button | Reference folder for Previous, Next and Auto Pick |
| Export Look LUT | Button | Freezes the look as a 33 point LUT for Hyō |
Look
| Control | Range · Default | Effect |
|---|---|---|
| Look On | Switch · on | Turns the look on or off, for comparison |
| Contrast | 0.5 … 2 · 1 | Slope around 18 percent grey on top of the curve, 1 = neutral. Runs out softly towards black and white |
| Tone Amount | 0 … 1.5 · 1 | How strongly the tone curve works: 0 = off, 1 = as set |
| Tint Amount | 0 … 1.5 · 1 | How strongly the tints of the five ranges work: 0 = off, 1 = as set |
| Sat Amount | 0 … 3 · 1 | Amplifies the saturation sliders of the five ranges: 0 = off, 1 = as set, 2 = twice as far from 1 (0.8 becomes 0.64), 3 = three times. Has no effect while all ranges are at 1 |
Density and Split
| Control | Range · Default | Effect |
|---|---|---|
| Density On | Switch · on | Switches Density and Sat Rolloff |
| Density | −1 … 1 · 0 | Saturated colors darker (plus) or brighter (minus), like the density of a negative: the more saturated, the stronger. Grey stays |
| Split Tone On | Switch · on | Switches the split toning |
| Split Shadows | 0 … 1 · 0 | Toning of the shadows, 1 = strong. Luminance stays. Transition to the highlights at Split Balance, width Split Softness |
| Split Highlights | 0 … 1 · 0 | Toning of the highlights, 1 = strong |
| Shadows Split Hue | 0 … 360 · 215 | Hue of the shadows (HSV degrees): 215 teal, 240 blue, 300 purple |
| Highlights Split Hue | 0 … 360 · 45 | Hue of the highlights (HSV degrees): 45 warm, 30 orange, 60 yellow |
| Split Balance | −3 … 3 · 0 | Where the transition between shadow and highlight toning sits, in stops around middle grey: 0 = middle grey, minus = the highlight toning reaches deeper |
| Split Softness | 0.5 … 4 · 2 | Width of the transition in stops (half width): 0.5 = hard, 4 = across the whole image |
| Split Clean Shadows | 0 … 1 · 1 | Fades the shadow toning softly to zero towards black (from -3 stops, neutral at -6): no cast in the deepest black. 1 = fully clean, 0 = toning reaches into black. Visible in the color strip of the Curve Box |
| Split Clean Highlights | 0 … 1 · 1 | Fades the highlight toning softly to zero towards white (above +2.5 stops): no cast in specular highlights. 1 = fully clean, 0 = toning reaches into white |
| Sat Rolloff | 0 … 1 · 0 | Softly pulls very saturated colors back; neon and tail lights keep detail. Starts at Rolloff Threshold |
| Rolloff Threshold | 0.02 … 0.3 · 0.08 | Chroma at which the rolloff starts (Intermediate units, 0.08 = strongly saturated) |
| Skin Protect | 0 … 1 · 0 | Protects skin tones (around 25 degrees) from tint, split, six vector and density: 1 = skin stays as it comes out of curve and saturation |
Tone Curve
| Control | Range · Default | Effect |
|---|---|---|
| Tone On | Switch · on | Turns the tone curve on or off |
| Curve -6 | −3 … 3 · 0 | Tone curve: change in stops for tones -6 stops from middle grey. Positive lifts, negative lowers |
| Curve -4 | −3 … 3 · 0 | Tone curve: change in stops for tones -4 stops from middle grey. Positive lifts, negative lowers |
| Curve -2 | −3 … 3 · 0 | Tone curve: change in stops for tones -2 stops from middle grey. Positive lifts, negative lowers |
| Curve -1 | −3 … 3 · 0 | Tone curve: change in stops for tones -1 stops from middle grey. Positive lifts, negative lowers |
| Curve 0 | −3 … 3 · 0 | Tone curve: change in stops for middle grey (18 percent), i.e. the exposure of the midtones |
| Curve +1 | −3 … 3 · 0 | Tone curve: change in stops for tones +1 stops from middle grey. Positive lifts, negative lowers |
| Curve +2 | −3 … 3 · 0 | Tone curve: change in stops for tones +2 stops from middle grey. Positive lifts, negative lowers |
| Curve +4 | −3 … 3 · 0 | Tone curve: change in stops for tones +4 stops from middle grey. Positive lifts, negative lowers |
| Curve +6 | −3 … 3 · 0 | Tone curve: change in stops for tones 6 stops above middle grey (specular highlights). Negative = soft shoulder |
Color
| Control | Range · Default | Effect |
|---|---|---|
| Color On | Switch · on | Turns tint and saturation of the five ranges on or off |
| Shadows Hue | 0 … 360 · 200 | Hue of the tint in the shadows (around -4 stops): 0 red, 30 orange, 60 yellow, 120 green, 180 cyan, 240 blue, 300 magenta |
| Shadows Tint | 0 … 1 · 0 | Strength of the tint in the shadows |
| Shadows Sat | 0 … 2 · 1 | Saturation in the shadows, 1 = neutral |
| Low Mids Hue | 0 … 360 · 200 | Hue of the tint in the lower mids (around -2 stops): 0 red, 30 orange, 60 yellow, 120 green, 180 cyan, 240 blue, 300 magenta |
| Low Mids Tint | 0 … 1 · 0 | Strength of the tint in the lower mids |
| Low Mids Sat | 0 … 2 · 1 | Saturation in the lower mids, 1 = neutral |
| Mids Hue | 0 … 360 · 35 | Hue of the tint in the mids (around 0 stops): 0 red, 30 orange, 60 yellow, 120 green, 180 cyan, 240 blue, 300 magenta |
| Mids Tint | 0 … 1 · 0 | Strength of the tint in the mids |
| Mids Sat | 0 … 2 · 1 | Saturation in the mids, 1 = neutral |
| High Mids Hue | 0 … 360 · 35 | Hue of the tint in the upper mids (around +2 stops): 0 red, 30 orange, 60 yellow, 120 green, 180 cyan, 240 blue, 300 magenta |
| High Mids Tint | 0 … 1 · 0 | Strength of the tint in the upper mids |
| High Mids Sat | 0 … 2 · 1 | Saturation in the upper mids, 1 = neutral |
| Highlights Hue | 0 … 360 · 40 | Hue of the tint in the highlights (around +4 stops): 0 red, 30 orange, 60 yellow, 120 green, 180 cyan, 240 blue, 300 magenta |
| Highlights Tint | 0 … 1 · 0 | Strength of the tint in the highlights |
| Highlights Sat | 0 … 2 · 1 | Saturation in the highlights, 1 = neutral |
| Range Width | 0.4 … 2.5 · 1 | Width of the five brightness ranges for tint and saturation: 1 = standard, smaller = clearly separated, larger = blending softly |
Six Vector
| Control | Range · Default | Effect |
|---|---|---|
| Six Vector On | Switch · on | Switches the six color corners |
| Hue Width | 0.3 … 2 · 1 | Width of each color corner: 1 = the six corners add up to a closed surface, smaller = only colors near the corner, larger = softer |
| Red Hue | −60 … 60 · 0 | Shifts the hue of the red corner in degrees, softly up to the neighbors (width: Hue Width) |
| Red Sat | −1 … 2 · 0 | Saturation of the red corner, 0 = unchanged, -1 = grey, +2 = triple |
| Red Density | −1.5 … 1.5 · 0 | Red darker (plus) or brighter (minus), the more saturated the stronger |
| Yellow Hue | −60 … 60 · 0 | Hue of the yellow corner |
| Yellow Sat | −1 … 2 · 0 | Saturation of the yellow corner |
| Yellow Density | −1.5 … 1.5 · 0 | Density of the yellow corner |
| Green Hue | −60 … 60 · 0 | Hue of the green corner (minus = towards yellow/olive) |
| Green Sat | −1 … 2 · 0 | Saturation of the green corner |
| Green Density | −1.5 … 1.5 · 0 | Density of the green corner |
| Cyan Hue | −60 … 60 · 0 | Hue of the cyan corner |
| Cyan Sat | −1 … 2 · 0 | Saturation of the cyan corner |
| Cyan Density | −1.5 … 1.5 · 0 | Density of the cyan corner |
| Blue Hue | −60 … 60 · 0 | Hue of the blue corner (minus = towards cyan) |
| Blue Sat | −1 … 2 · 0 | Saturation of the blue corner |
| Blue Density | −1.5 … 1.5 · 0 | Density of the blue corner (plus = deeper sky) |
| Magenta Hue | −60 … 60 · 0 | Hue of the magenta corner |
| Magenta Sat | −1 … 2 · 0 | Saturation of the magenta corner |
| Magenta Density | −1.5 … 1.5 · 0 | Density of the magenta corner |
Compare
| Control | Range · Default | Effect |
|---|---|---|
| Split View | Switch · off | Before and after side by side: original on the left, result on the right, a white line in between. Turn off before rendering (OFX only) |
| Split Position | 0 … 1 · 0.5 | Position of the split line, 0 = left, 1 = right (OFX only) |
Display
| Control | Range · Default | Effect |
|---|---|---|
| Curve Box | Switch · off | Tone curve as a box bottom left, input against output in stops around middle grey; dots = tint of the ranges |
| Curve Full | Switch · off | Tone curve over the whole image (Curve Box takes priority) |
22 Film Looks – Genzō 現像
Film looks from the lab and film history: bleach bypass, silver retention, cross process, push and pull, faded print, dye transfer, Kodachrome, Ektachrome, Eterna, two-strip, instant film, expired film.
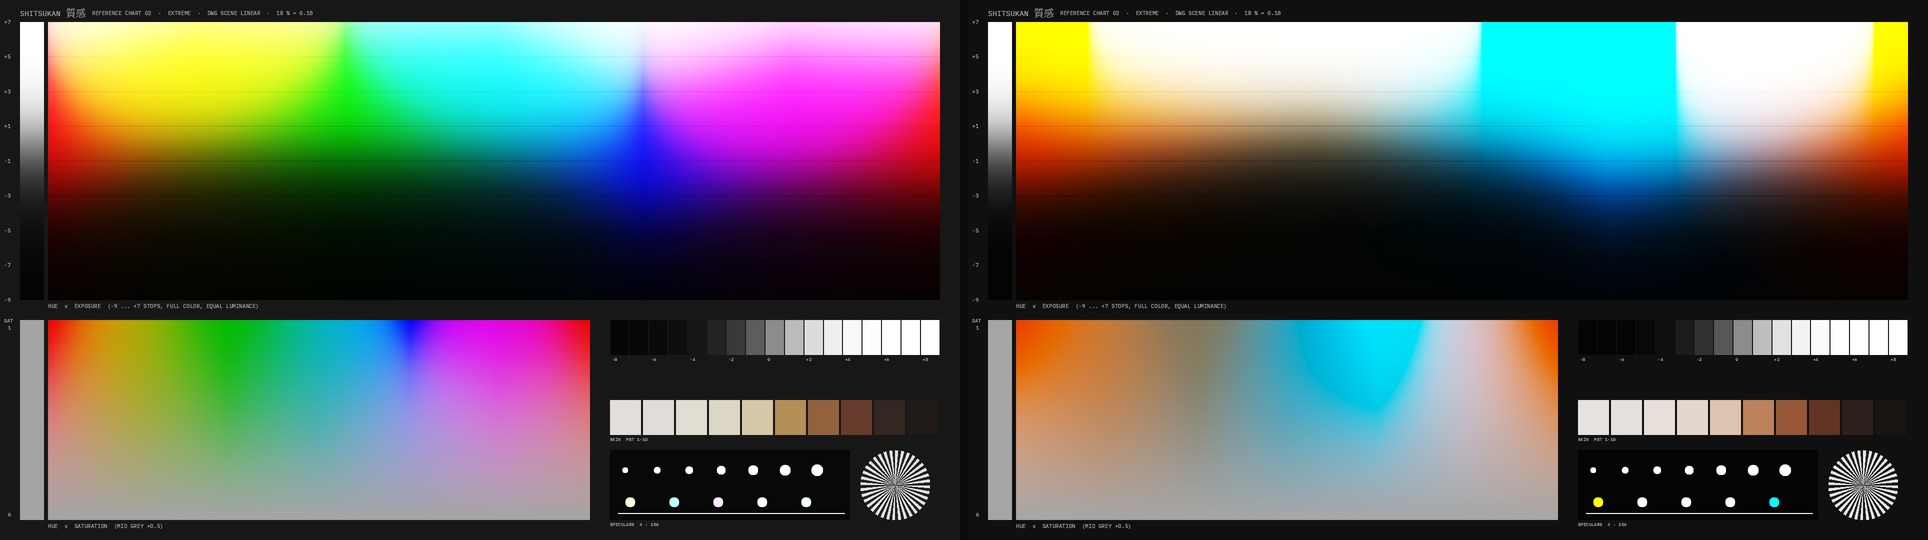
Genzō recreates what happens to film in the lab when you change the development. Bleach bypass keeps the silver in the film: color drops, contrast rises. Silver retention (ENR) mainly deepens the blacks. Cross process develops slide film in negative chemistry: hard contrast, cold shadows, yellow highlights. Push develops longer (more contrast), pull shorter. Faded print is the aged print with lifted blacks and a drift towards red-magenta, dye transfer the rich Technicolor print. On top come films with their own character: Kodachrome (bold, rich reds and blues, warm highlights), Ektachrome as slide film (hard, saturated, cool mids), Eterna as a soft cinema negative (flat, restrained, green towards cyan), two-strip as early two-color Technicolor (only red-orange against blue-green), instant film (lifted blacks, warm highlights, greenish shadows) and expired film (fog, opposing color drift in shadows and highlights). It works in density (log) around middle grey, middle grey stays neutral. Bleach bypass used to live in Iro; Iro remains only for old projects.
How to use it
- Pick a look and raise Amount, or take a preset.
- Character refines the look (the tooltip says what it does per look), for example bleach more in the highlights or the shadows.
- Saturation adjusts color afterwards, Skin Protect keeps skin tones out of the color part.
Display
Curve Box shows the RGB curves in stops with the input histogram: bleach and push get steeper, faded print lifts the black, cross process splits the channels.
Tips
- Film Contrast and Film Color (right below Intensity): only the curve of the look (Film Color 0) or only its colour (Film Contrast 0).
- For a classic bleach bypass place Genzō after Utsushi: first the look, then the lab process.
- Mix below 1 is like a partial bleach bypass in the lab (silver share).
Node structure
Mini Panel in Panel Mode
Presets
Highlighted: presets in the OFX version only.
In Resolve
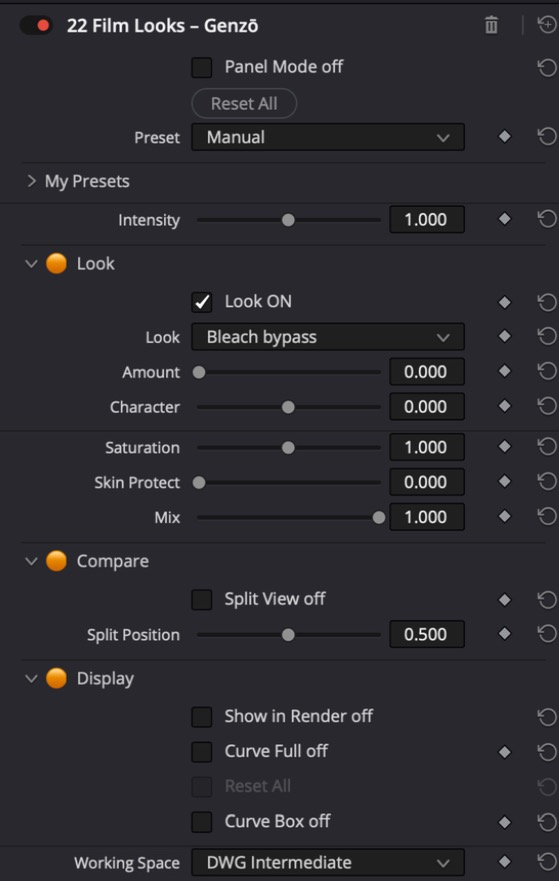
All controls
General
| Control | Range · Default | Effect |
|---|---|---|
| Intensity | 0 … 2 · 1 | Overall strength: 0 = neutral, 1 = as set, 2 = double. Runs out softly near the control limits (OFX only) |
| Film Contrast | 0 … 1.5 · 1 | Film Contrast: how much of the tone change of the look is used. 0 = contrast as shot, only the colours of the look, 1 = full, 1.5 = more |
| Film Color | 0 … 1.5 · 1 | Film Color: how much of the colour of the look is used (saturation, tints, hue turns). 0 = colours as shot, only the curve of the look, 1 = full, 1.5 = more |
Look
| Control | Range · Default | Effect |
|---|---|---|
| Look On | Switch · on | Turns the look on or off |
| Look | Bleach bypass / Silver retention / Cross process / Push / Faded print / Dye transfer / Kodachrome / Ektachrome / Eterna / Two-strip / Instant / Expired film | Which lab process or film: skip the bleach, keep the silver, slide film in negative chemistry, longer development, aged print, Technicolor print, Kodachrome, slide film (E-6), soft cinema negative (Eterna), two-color Technicolor, instant film, expired film. New looks are appended at the end |
| Amount | 0 … 1 · 0 | Strength of the look: 0 = off, 1 = full |
| Character | −1 … 1 · 0 | Fine control per look: Bleach highlights (+) or shadows (-), Silver Retention more desaturation, Cross Process green (+) or magenta (-), Push (+) or Pull (-), Faded Print direction of the drift, Dye Transfer density, Kodachrome warmer (+) or cooler (-), Ektachrome cooler (+) or neutral (-), Eterna more cyan (+), Two-Strip red-orange (+) or red-magenta (-), Instant warmer (+) or greener (-), Expired magenta (+) or cyan (-) |
General
| Control | Range · Default | Effect |
|---|---|---|
| Saturation | 0 … 2 · 1 | Saturation after the look |
| Skin Protect | 0 … 1 · 0 | Keeps skin tones out of the color part of the look (contrast still acts) |
| Mix | 0 … 1 · 1 | Mix with the original |
Compare
| Control | Range · Default | Effect |
|---|---|---|
| Split View | Switch · off | Before and after side by side: original on the left, result on the right, a white line in between. Turn off before rendering (OFX only) |
| Split Position | 0 … 1 · 0.5 | Position of the split line, 0 = left, 1 = right (OFX only) |
Display
| Control | Range · Default | Effect |
|---|---|---|
| Curve Box | Switch · off | Tone curve in stops bottom left, red, green and blue separately, with the input histogram |
| Curve Full | Switch · off | Tone curve over the whole image (Curve Box takes priority) |
23 Skin – Hada 肌
Select and protect skin softly, move the surroundings in six slices.
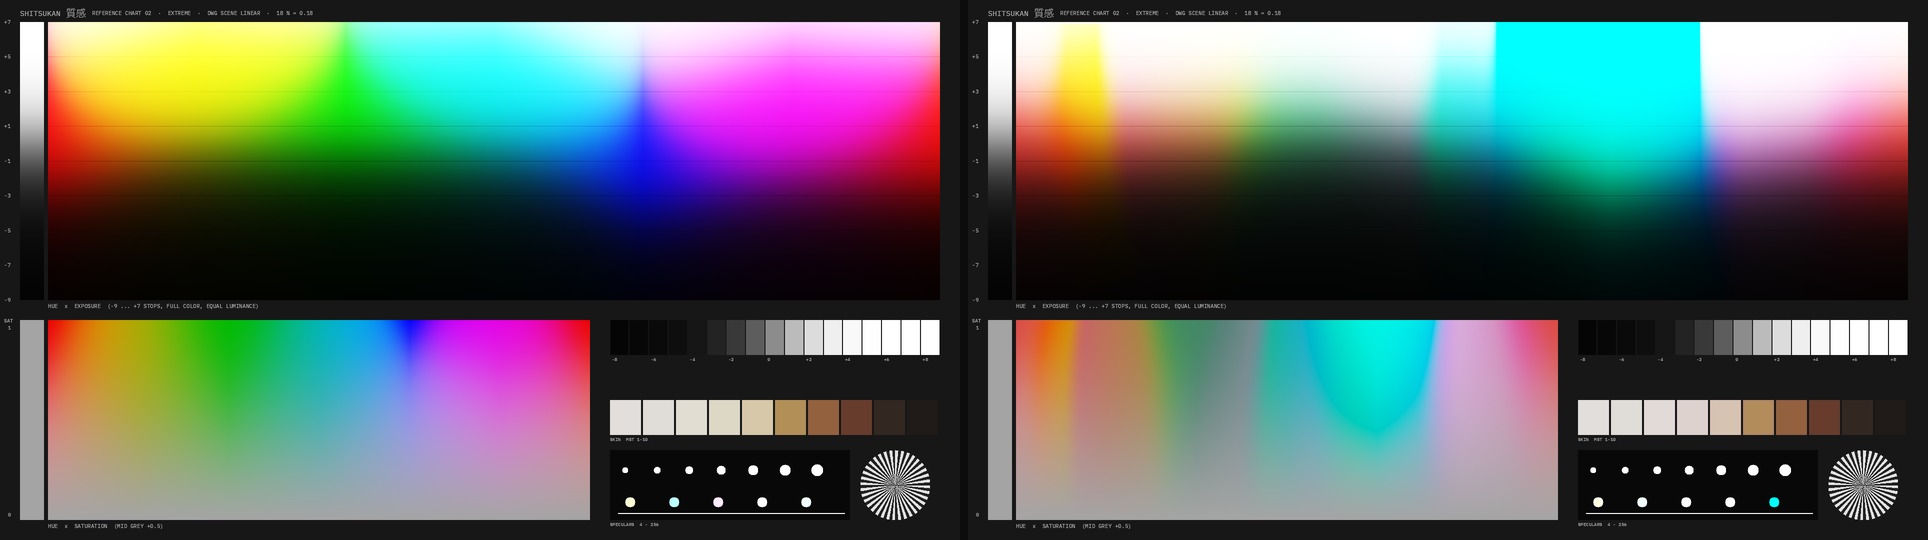
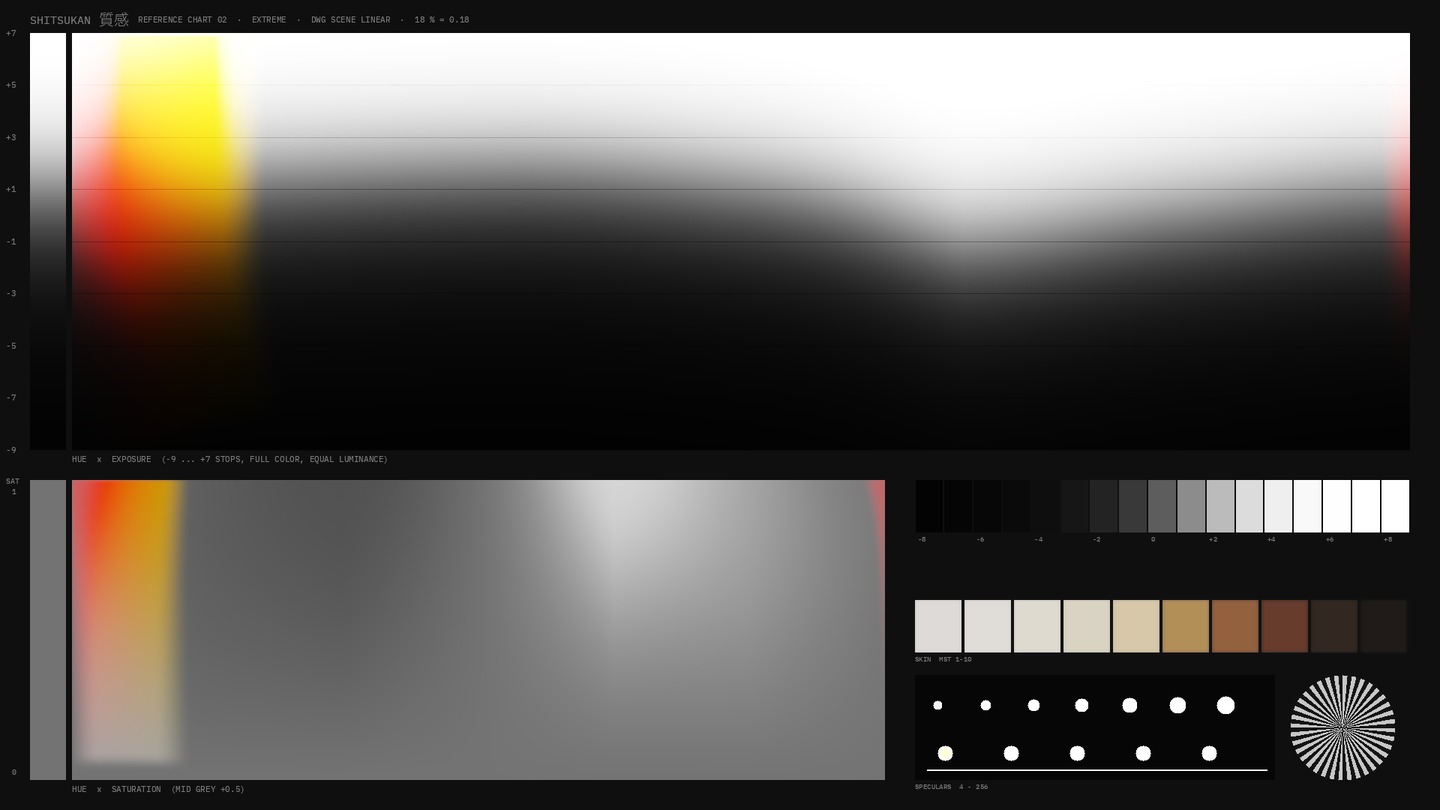
Hada finds skin tones softly, without a hard key, adjusts them only finely and can protect them while the surroundings are moved in six hue sectors. That way you get, for example, teal surroundings without faces shifting along.
How to use it
- Turn on Show Skin and check that the skin is selected cleanly.
- With Use Box, drag the measuring box onto a face: the skin hue is measured and the selection follows it.
- Adjust skin slightly; Skin Protect shields it from the slices.
- Move the slices for the surroundings.
Display
A color wheel with the skin sector in orange and the result in white.
Tips
- Selection Blur smooths the selection so it does not jump with noise.
- The box can be dragged in the viewer with the mouse.
Node structure
Mini Panel in Panel Mode
Presets
Highlighted: presets in the OFX version only.
In Resolve
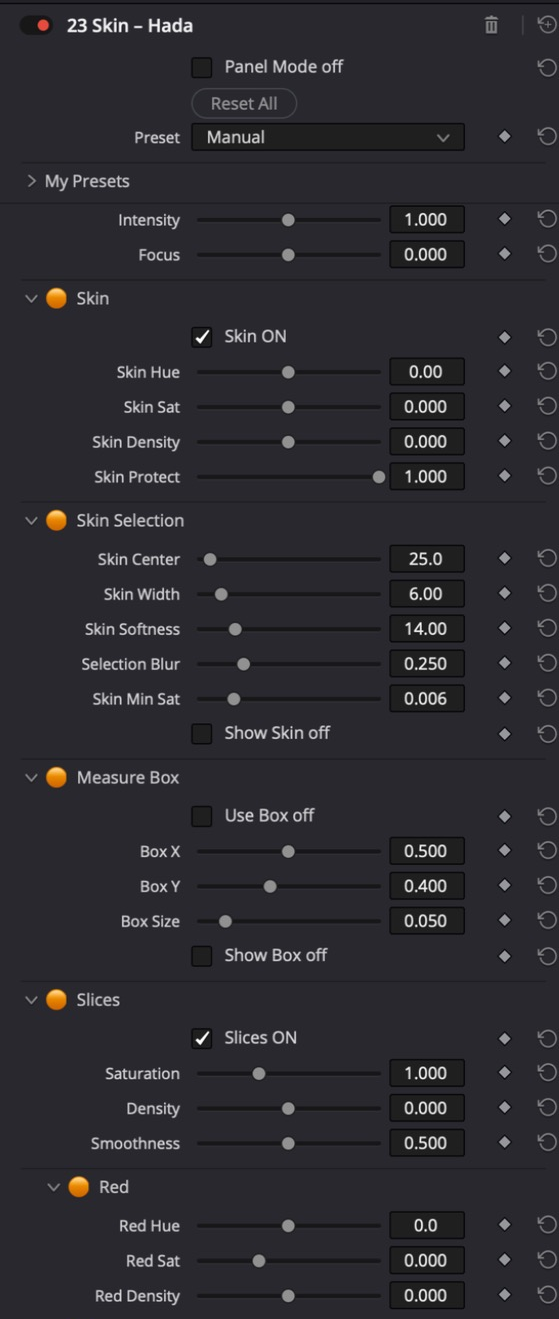
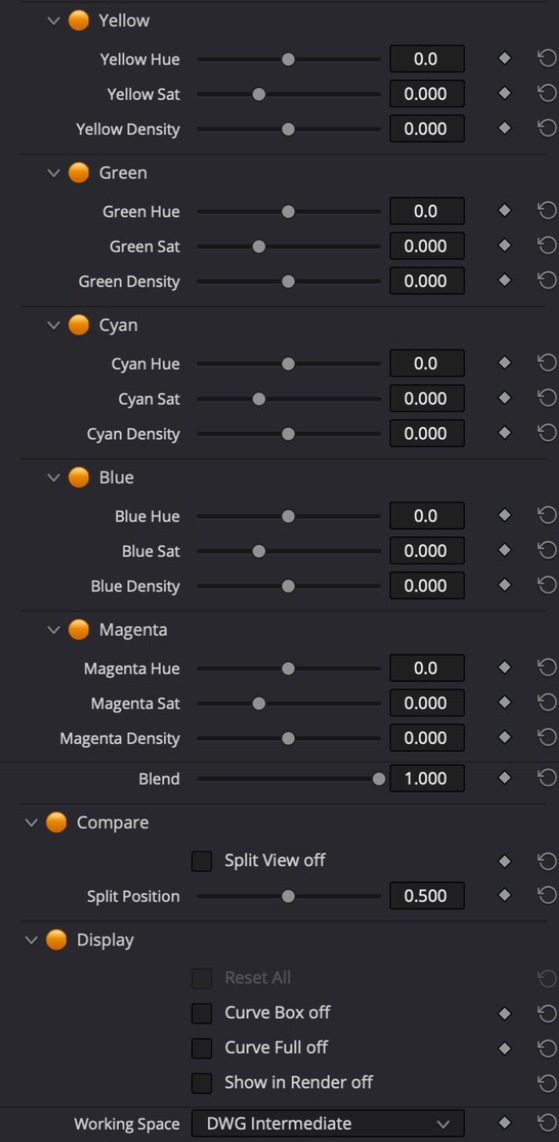
All controls
General
| Control | Range · Default | Effect |
|---|---|---|
| Intensity | 0 … 2 · 1 | Overall strength: 0 = neutral, 1 = as set, 2 = double. Runs out softly near the control limits (OFX only) |
| Focus | −1 … 1 · 0 | Width of the effect: 0 = as set, positive = narrower and more targeted, negative = wider and softer (OFX only) |
Skin
| Control | Range · Default | Effect |
|---|---|---|
| Skin On | Switch · on | Turns the skin controls and the soft skin selection on or off |
| Skin Hue | −20 … 20 · 0 | Fine hue correction of skin in degrees, positive towards yellow |
| Skin Sat | −1 … 1 · 0 | Fine saturation correction of skin |
| Skin Density | −1 … 1 · 0 | Positive makes skin denser (darker), negative brighter |
| Skin Protect | 0 … 1 · 1 | 1 = the slices and Saturation/Density leave skin untouched |
Skin Selection
| Control | Range · Default | Effect |
|---|---|---|
| Skin Center | 0 … 360 · 25 | Hue of the skin (HSV degrees), measured from the box with Use Box |
| Skin Width | 1 … 40 · 6 | Half width of the fully selected skin range in degrees |
| Skin Softness | 2 … 60 · 14 | Soft transition at the edge of the skin range in degrees |
| Selection Blur | 0 … 1 · 0.25 | Softens the skin selection so it does not jump with noise. 1 = 2 percent of the image height, 0 = off (OFX only) |
| Skin Min Sat | 0 … 0.03 · 0.006 | Below this saturation nothing counts as skin (protects grey) |
| Show Skin | Switch · off | Shows the skin range in color, the rest grey and darker |
Measure Box
| Control | Range · Default | Effect |
|---|---|---|
| Use Box | Switch · off | Measure Skin Center from the box average instead of the slider |
| Box X | 0 … 1 · 0.5 | Center of the measuring box, 0 = left, 1 = right |
| Box Y | 0 … 1 · 0.4 | Center of the measuring box, 0 = top, 1 = bottom |
| Box Size | 0.005 … 0.3 · 0.05 | Edge length of the measuring box relative to the image width |
| Show Box | Switch · off | Shows the measuring box |
Slices
| Control | Range · Default | Effect |
|---|---|---|
| Slices On | Switch · on | Turns the slices and the Saturation/Density of the surroundings on or off |
| Saturation | 0 … 3 · 1 | Saturation of all surroundings (skin stays protected with Skin Protect) |
| Density | −1.5 … 1.5 · 0 | Positive makes the surroundings denser (darker), negative brighter |
| Smoothness | 0 … 1 · 0.5 | Width of the transitions between the colour corners. At the centre of a corner the full value always applies (Red Hue +30 turns pure red by 30 degrees) |
| Red Hue | −60 … 60 · 0 | Shifts the hue of all red tones in the surroundings in degrees (skin stays protected with Skin Protect) |
| Red Sat | −1 … 2 · 0 | Saturation of the red tones in the surroundings |
| Red Density | −1.5 … 1.5 · 0 | Positive makes the red tones in the surroundings denser (darker), negative brighter |
| Yellow Hue | −60 … 60 · 0 | Shifts the hue of all yellow tones in the surroundings in degrees (skin stays protected with Skin Protect) |
| Yellow Sat | −1 … 2 · 0 | Saturation of the yellow tones in the surroundings |
| Yellow Density | −1.5 … 1.5 · 0 | Positive makes the yellow tones in the surroundings denser (darker), negative brighter |
| Green Hue | −60 … 60 · 0 | Shifts the hue of all green tones in the surroundings in degrees (skin stays protected with Skin Protect) |
| Green Sat | −1 … 2 · 0 | Saturation of the green tones in the surroundings |
| Green Density | −1.5 … 1.5 · 0 | Positive makes the green tones in the surroundings denser (darker), negative brighter |
| Cyan Hue | −60 … 60 · 0 | Shifts the hue of all cyan tones in the surroundings in degrees (skin stays protected with Skin Protect) |
| Cyan Sat | −1 … 2 · 0 | Saturation of the cyan tones in the surroundings |
| Cyan Density | −1.5 … 1.5 · 0 | Positive makes the cyan tones in the surroundings denser (darker), negative brighter |
| Blue Hue | −60 … 60 · 0 | Shifts the hue of all blue tones in the surroundings in degrees (skin stays protected with Skin Protect) |
| Blue Sat | −1 … 2 · 0 | Saturation of the blue tones in the surroundings |
| Blue Density | −1.5 … 1.5 · 0 | Positive makes the blue tones in the surroundings denser (darker), negative brighter |
| Magenta Hue | −60 … 60 · 0 | Shifts the hue of all magenta tones in the surroundings in degrees (skin stays protected with Skin Protect) |
| Magenta Sat | −1 … 2 · 0 | Saturation of the magenta tones in the surroundings |
| Magenta Density | −1.5 … 1.5 · 0 | Positive makes the magenta tones in the surroundings denser (darker), negative brighter |
General
| Control | Range · Default | Effect |
|---|---|---|
| Blend | 0 … 1 · 1 | Mix with the original image |
Compare
| Control | Range · Default | Effect |
|---|---|---|
| Split View | Switch · off | Before and after side by side: original on the left, result on the right, a white line in between. Turn off before rendering (OFX only) |
| Split Position | 0 … 1 · 0.5 | Position of the split line, 0 = left, 1 = right (OFX only) |
Display
| Control | Range · Default | Effect |
|---|---|---|
| Curve Box | Switch · off | Color wheel as a box bottom center, skin range marked orange |
| Curve Full | Switch · off | Color wheel over the whole image (Curve Box takes priority) |
24 Palette – Haishoku 配色
Push all colors towards a reduced palette with one slider; palette from image, frame or eyedropper.
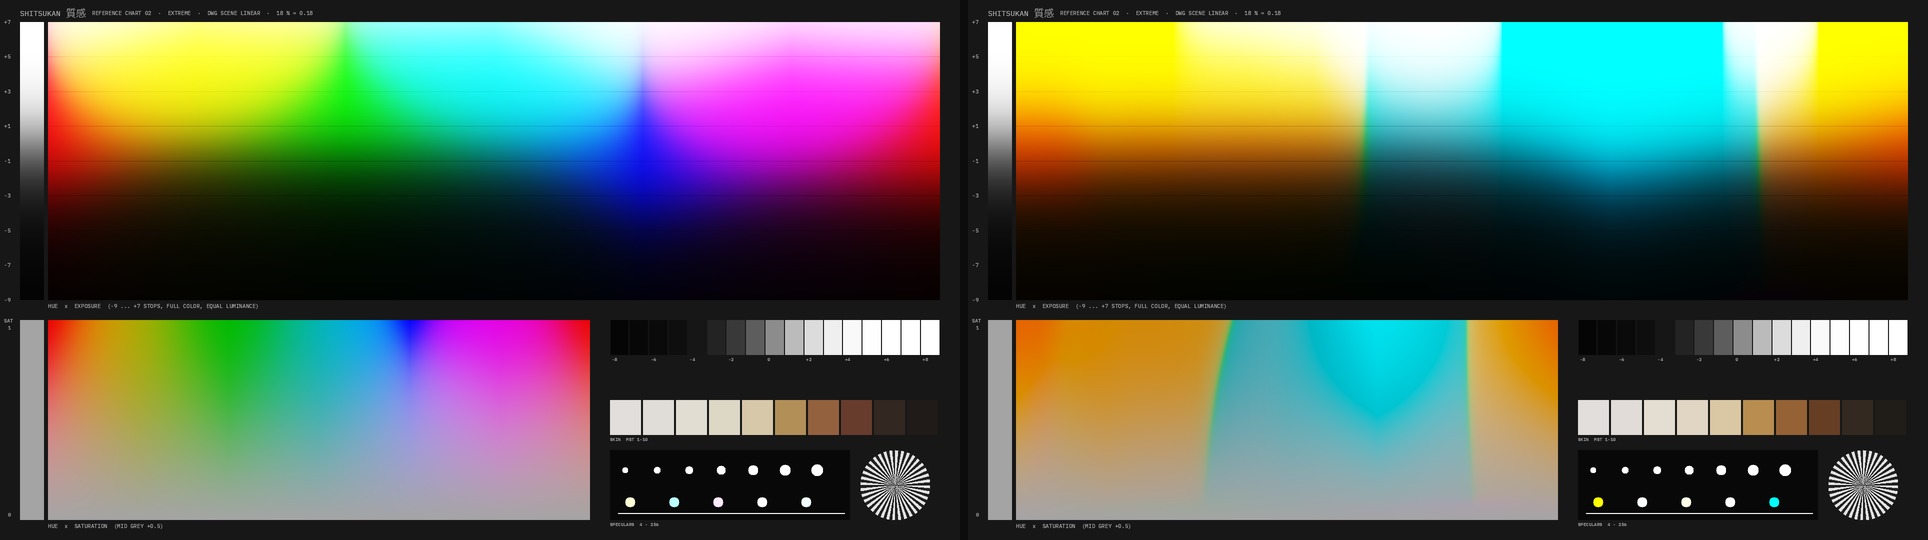
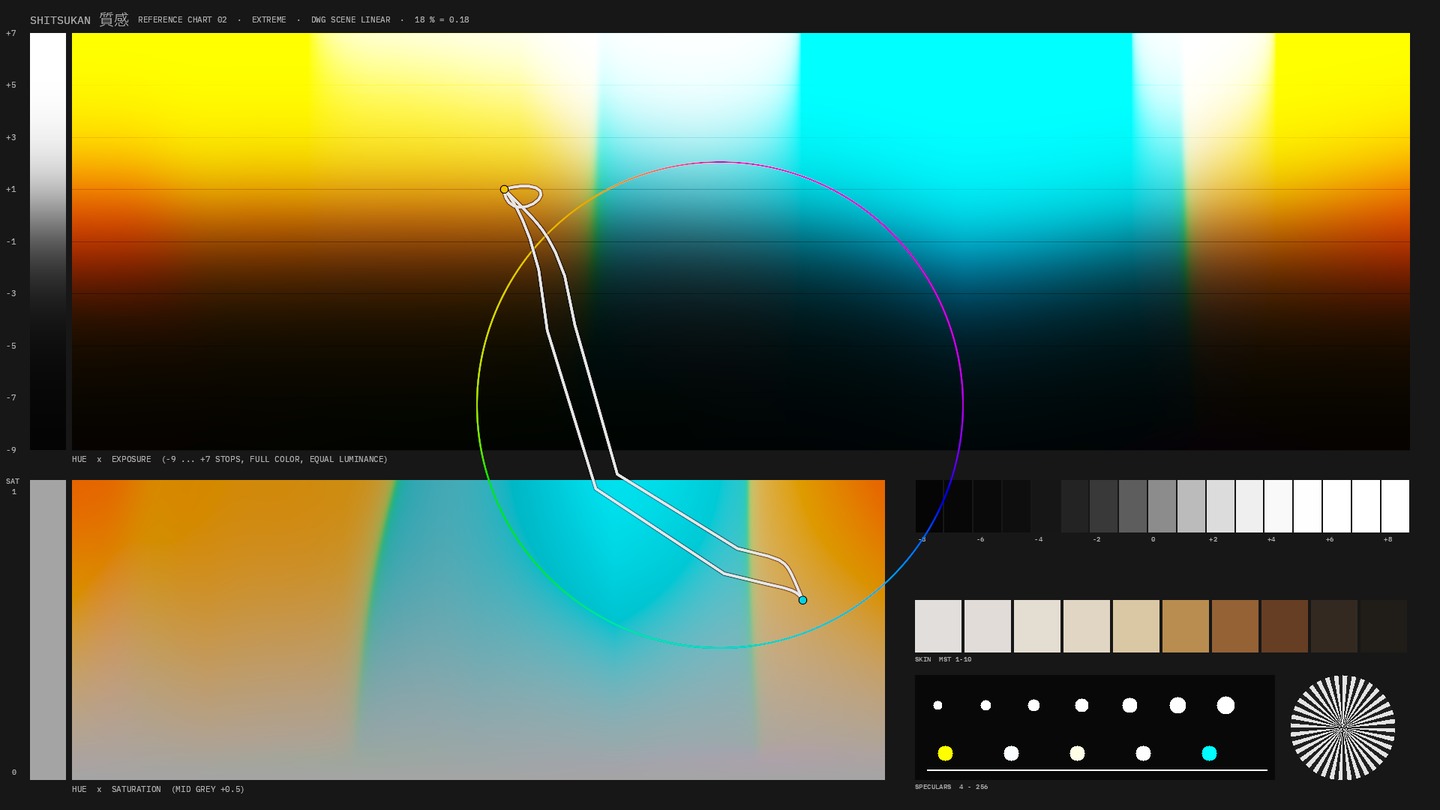
Haishoku (配色, color scheme) takes a palette of up to five colors, each with hue and saturation, and moves every color in the image towards the nearest palette color. Amount sets how far. Softness sets how hard the assignment is: low gives a few clear colors, high a soft blend of neighboring palette colors. Average brightness stays; Keep Luma also restores luminance. For colors far away from every palette color, Off Palette decides: rotate them anyway or desaturate them towards grey. Neutral tones and skin can be protected. There is no jump anywhere: a color exactly between two opposite palette colors becomes paler instead of flipping. The palette comes from four sources: a genre preset, a reference image, the current frame or the eyedropper.
How to use it
- Add it after Hada 肌 (Skin), once the individual colors sit right.
- Choose a palette: a genre preset, Palette from Frame (the dominant colors of the current image), Choose Image… for a reference image, or Pick from Box per color with the yellow measuring box from the Pick group.
- Fine-tune: pick a color in a palette color’s swatch, use the Hue and Sat sliders or drag the dots in the color wheel in the viewer (angle = hue, distance = saturation).
- Set Amount and Softness. Intensity scales everything together; above 1 the palette colors also get stronger.
- Set Skin Protect and Neutral Protect to taste, Off Palette for colors that do not fit the palette.
Display
Curve Box shows a color wheel bottom center, as in a vectorscope: the colored ring is before, the white line after, the colored dots are the palette colors (distance from the center = Sat), draggable in the viewer.
Tips
- A single palette color with Off Palette 0 tints the whole image; that is how the Sepia preset works.
- Use Palette from Frame on a key shot, then copy the node to the other shots: the whole scene gets the same color world.
- Image Path is a text field: paste a path (in Finder, Option-Command-C copies it) and press Make Palette; Resolve does not accept files dragged from Finder.
- Very low Softness can band visibly in fine color gradients. Detail Protect helps to keep grain and skin calm.
- A genre preset sets palette, Off Palette, Amount and Softness. The contrast and density of the genre are not part of it.
Node structure
Mini Panel in Panel Mode
Presets
Highlighted: presets in the OFX version only.
In Resolve
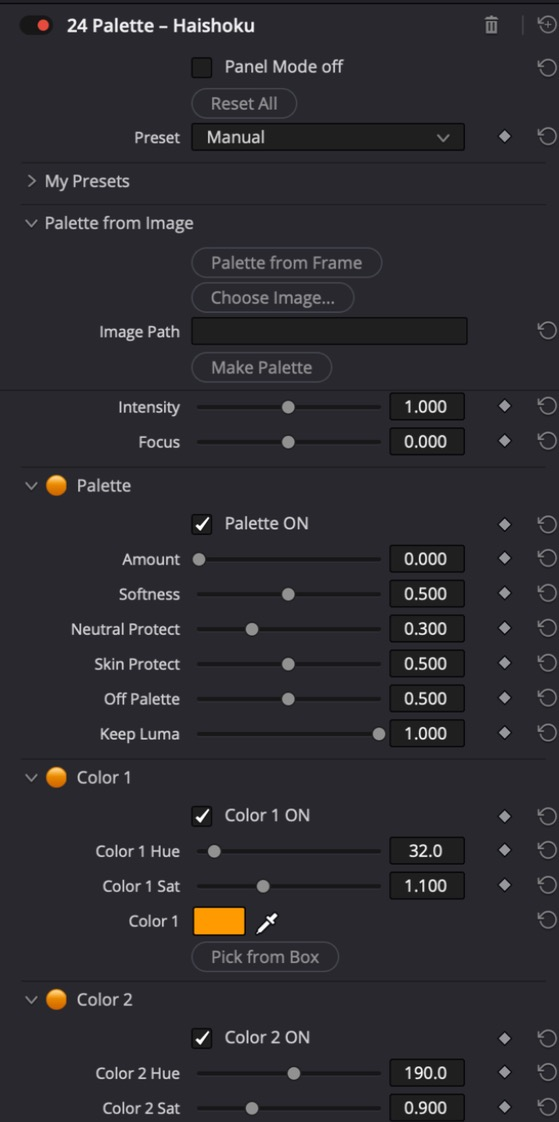
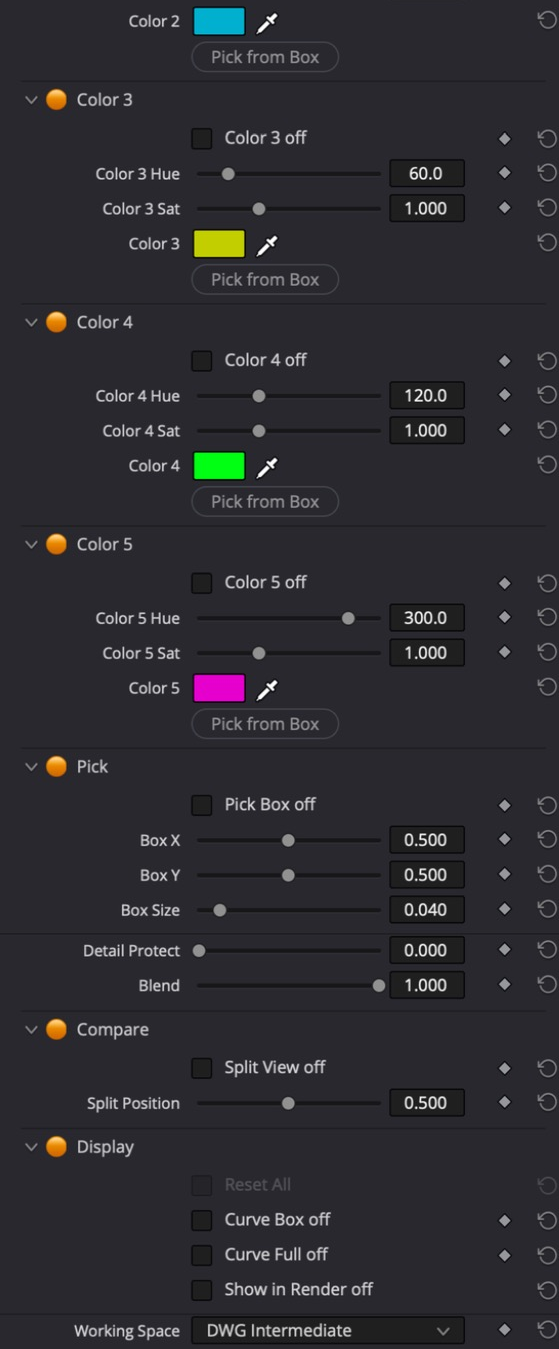
All controls
General
| Control | Range · Default | Effect |
|---|---|---|
| Intensity | 0 … 2 · 1 | Overall strength: 0 = neutral, 1 = as set, 2 = double. Runs out softly near the control limits (OFX only) |
| Focus | −1 … 1 · 0 | Width of the effect: 0 = as set, positive = narrower and more targeted, negative = wider and softer (OFX only) |
Palette
| Control | Range · Default | Effect |
|---|---|---|
| Palette On | Switch · on | Turns the palette on or off, for comparison |
| Amount | 0 … 1 · 0 | How far each color moves towards the palette: 0 = unchanged, 1 = fully onto the palette. Default 0: the tool stays neutral until a preset or a palette from image or frame sets Amount |
| Softness | 0 … 1 · 0.5 | Transition between the palette colors: low = hard assignment to the nearest color (few clear colors, may band in gradients), high = soft blend |
| Neutral Protect | 0 … 1 · 0.3 | Spares weakly saturated tones so grey stays grey. 0 = all colors equally |
| Skin Protect | 0 … 1 · 0.5 | Spares skin tones (around orange). 1 = skin stays almost unchanged |
| Off Palette | 0 … 1 · 0.5 | Colors far away from every palette color: 0 = they still rotate to the nearest palette color, 1 = they are desaturated towards grey instead |
| Keep Luma | 0 … 1 · 1 | Restores brightness after the color change: 1 = every color keeps its luminance, 0 = brightness follows the new hue |
Color 1
| Control | Range · Default | Effect |
|---|---|---|
| Color 1 On | Switch · on | Adds color 1 to the palette |
| Color 1 Hue | 0 … 360 · 32 | Hue of the palette color in degrees: 0 red, 30 orange, 60 yellow, 120 green, 180 cyan, 240 blue, 300 magenta |
| Color 1 Sat | 0 … 3 · 1.1 | Saturation that colors moving towards this palette color receive: 1 = unchanged, lower = paler, higher = stronger |
Color 2
| Control | Range · Default | Effect |
|---|---|---|
| Color 2 On | Switch · on | Adds color 2 to the palette |
| Color 2 Hue | 0 … 360 · 190 | Hue of the palette color in degrees: 0 red, 30 orange, 60 yellow, 120 green, 180 cyan, 240 blue, 300 magenta |
| Color 2 Sat | 0 … 3 · 0.9 | Saturation that colors moving towards this palette color receive: 1 = unchanged, lower = paler, higher = stronger |
Color 3
| Control | Range · Default | Effect |
|---|---|---|
| Color 3 On | Switch · off | Adds color 3 to the palette |
| Color 3 Hue | 0 … 360 · 60 | Hue of the palette color in degrees: 0 red, 30 orange, 60 yellow, 120 green, 180 cyan, 240 blue, 300 magenta |
| Color 3 Sat | 0 … 3 · 1 | Saturation that colors moving towards this palette color receive: 1 = unchanged, lower = paler, higher = stronger |
Color 4
| Control | Range · Default | Effect |
|---|---|---|
| Color 4 On | Switch · off | Adds color 4 to the palette |
| Color 4 Hue | 0 … 360 · 120 | Hue of the palette color in degrees: 0 red, 30 orange, 60 yellow, 120 green, 180 cyan, 240 blue, 300 magenta |
| Color 4 Sat | 0 … 3 · 1 | Saturation that colors moving towards this palette color receive: 1 = unchanged, lower = paler, higher = stronger |
Color 5
| Control | Range · Default | Effect |
|---|---|---|
| Color 5 On | Switch · off | Adds color 5 to the palette |
| Color 5 Hue | 0 … 360 · 300 | Hue of the palette color in degrees: 0 red, 30 orange, 60 yellow, 120 green, 180 cyan, 240 blue, 300 magenta |
| Color 5 Sat | 0 … 3 · 1 | Saturation that colors moving towards this palette color receive: 1 = unchanged, lower = paler, higher = stronger |
Pick
| Control | Range · Default | Effect |
|---|---|---|
| Pick Box | Switch · off | Shows the yellow measuring box in the viewer (drag it there). Pick from Box on a palette color copies hue and saturation from it (OFX only) |
| Box X | 0 … 1 · 0.5 | Center of the measuring box, 0 = left, 1 = right |
| Box Y | 0 … 1 · 0.5 | Center of the measuring box, 0 = top, 1 = bottom |
| Box Size | 0.005 … 0.3 · 0.04 | Edge length of the measuring box relative to the image width |
General
| Control | Range · Default | Effect |
|---|---|---|
| Detail Protect | 0 … 1 · 0 | Works only on the large image areas, detail and grain stay as they are. Value = radius (1 = 1 percent of the image height), 0 = off (OFX only) |
| Blend | 0 … 1 · 1 | Mix with the original image |
Compare
| Control | Range · Default | Effect |
|---|---|---|
| Split View | Switch · off | Before and after side by side: original on the left, result on the right, a white line in between. Turn off before rendering (OFX only) |
| Split Position | 0 … 1 · 0.5 | Position of the split line, 0 = left, 1 = right (OFX only) |
Display
| Control | Range · Default | Effect |
|---|---|---|
| Curve Box | Switch · off | Color wheel as a box bottom center: ring = before, white line = after, dots = palette |
| Curve Full | Switch · off | Color wheel over the whole image (Curve Box takes priority) |
25 Black and White – Shirokuro 白黒
Black and white like on film: channel mix, glass filters, stock character, tone, toning.
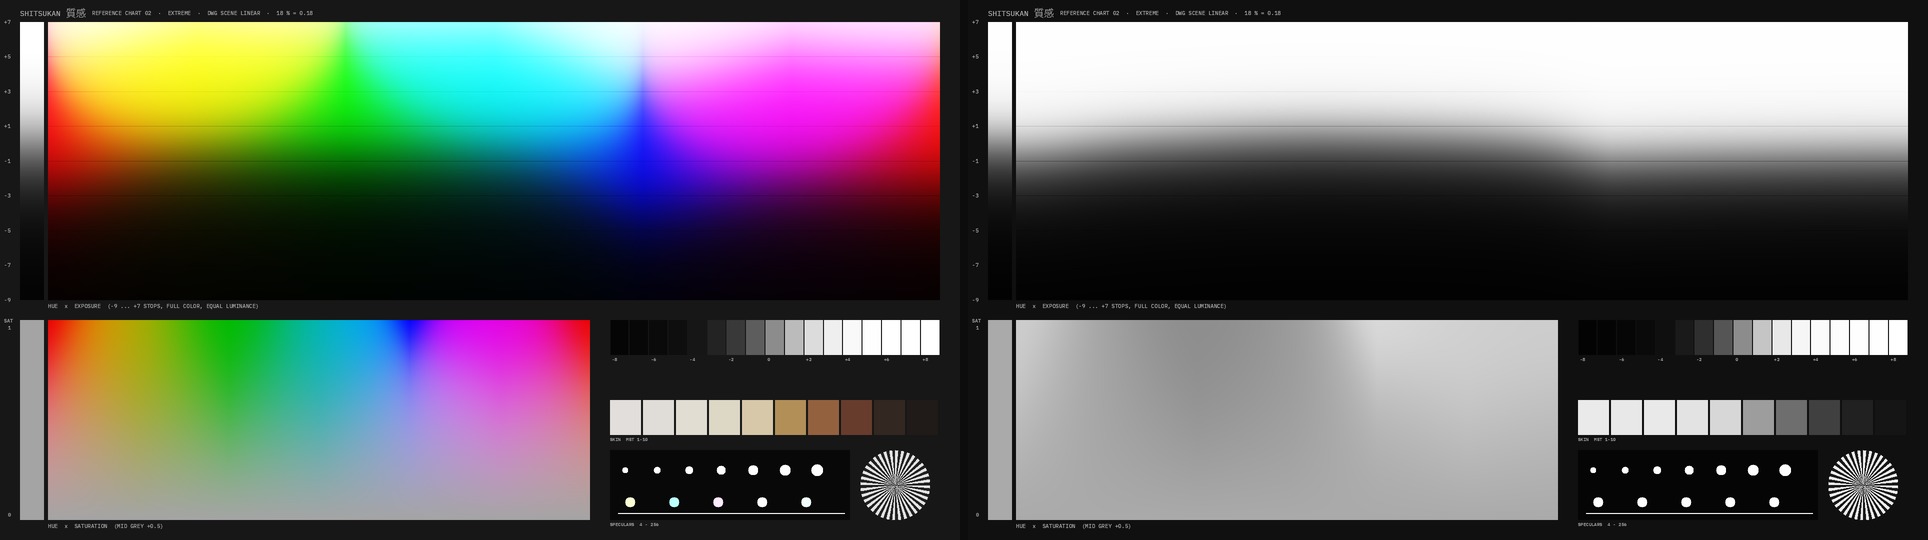
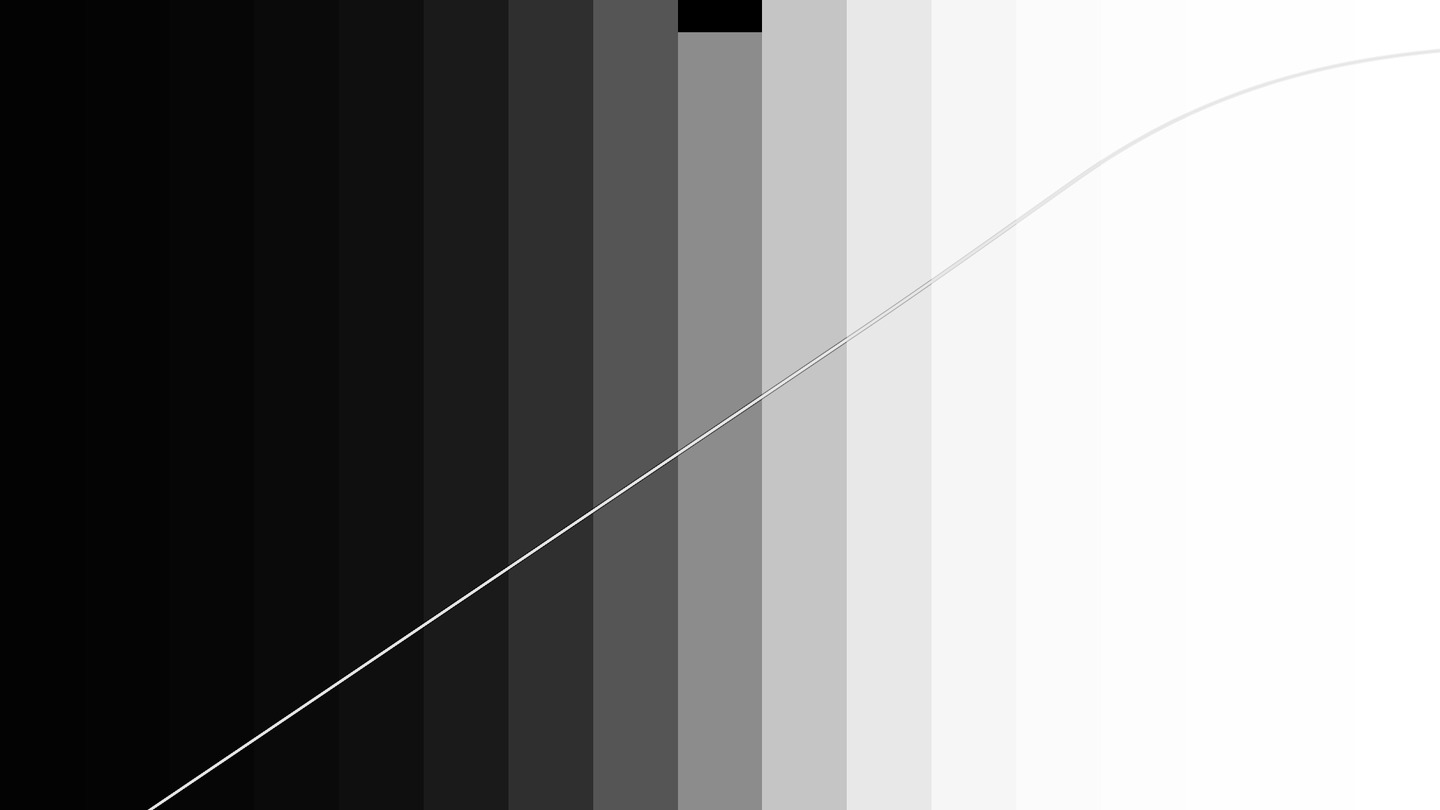
Shirokuro (白黒, white and black) works scene-referred in linear light. Luminance comes from the three channels with the Rec.2020 weights, times Red, Green, Blue, times the glass filter in front of the lens (Yellow 8 to Blue 47 after Wratten), times the stock character (panchromatic, orthochromatic, near infrared). The weights are normalized to middle grey: a filter only changes how colors turn into grey, not the exposure. Then tone in stops around middle grey (Contrast, Shadows, Highlights, shoulder) and separate toning for shadows and highlights, like selenium or sepia. Mix lets some color stand.
How to use it
- Put Shirokuro after the base grade, before the output transform. Pick a preset: Classic yellow, Dramatic red, Portrait ortho, Infrared, Selenium, Sepia or Split tone.
- Pick a filter and dose it with Filter Strength: yellow darkens the sky slightly, orange more, red dramatically (sky almost black, skin bright), green brightens foliage and renders skin darker, blue lifts haze.
- Film Stock for the character: orthochromatic is red-blind like film before 1930 (lips and freckles dark, sky bright), near infrared renders foliage white and skies black.
- Red, Green, Blue for the fine channel mix, then Contrast, Shadows, Highlights and Highlight Rolloff.
- Tint: Shadow Tone and Highlight Tone with their hues. 220 is selenium blue, 40 sepia.
Display
Curve Box shows a hue strip on top and right below it which grey each hue gets through the tool. So while turning filter and channels you see at once whether red ends up brighter or darker than green. Below that the tone curve in stops.
Tips
- Without a filter and with all channels at 1, every hue falls onto the same grey as its middle grey. Only the filter separates them.
- BW On off keeps the image in color and uses only tone and toning, for example as a contrast tool in stops.
- For grain, put Resolve's Film Grain after Shirokuro. Grain belongs on the finished black and white, not before it.
- Mix 0.7 lets the color show through slightly, like a strongly desaturated look.
Node structure
Mini Panel in Panel Mode
Presets
Highlighted: presets in the OFX version only.
In Resolve
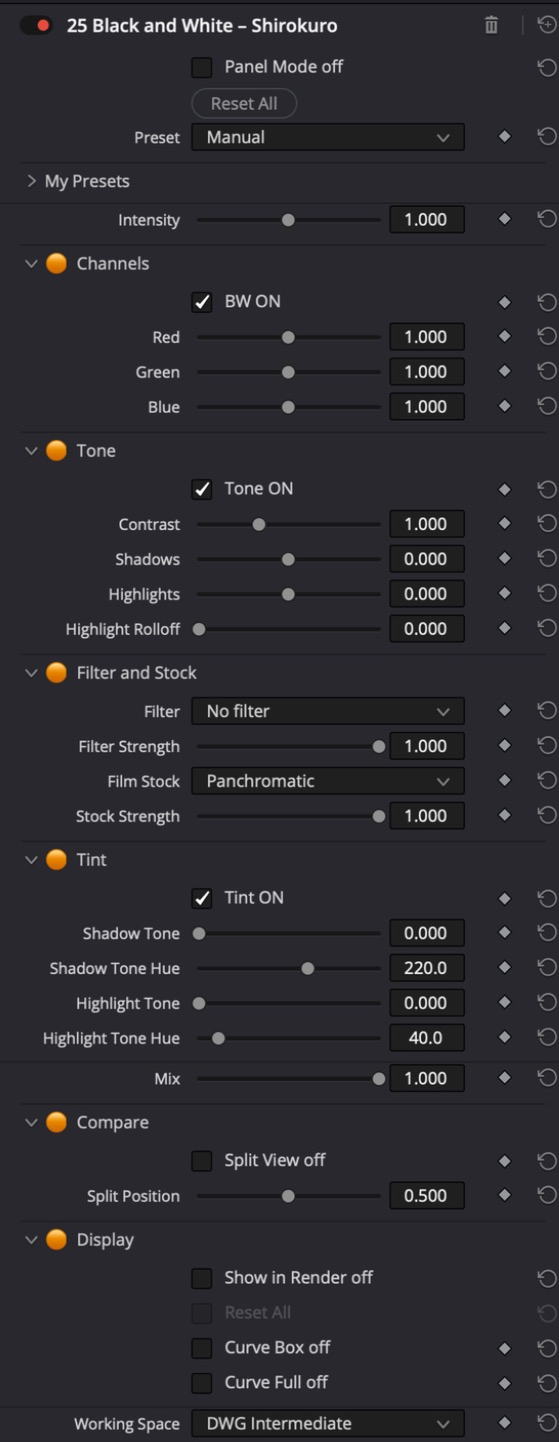
All controls
General
| Control | Range · Default | Effect |
|---|---|---|
| Intensity | 0 … 2 · 1 | Overall strength: 0 = neutral, 1 = as set, 2 = double. Runs out softly near the control limits (OFX only) |
Channels
| Control | Range · Default | Effect |
|---|---|---|
| BW On | Switch · on | Off: channel mix, filter and stock have no effect, the image stays in color (tone and tint still act) |
| Red | 0 … 2 · 1 | Share of the red channel in the luminance (1 = Rec.2020 weighting). More red brightens skin and lips and darkens skies. The three shares are normalized to middle grey |
| Green | 0 … 2 · 1 | Share of the green channel. More green brightens foliage, less makes it dark |
| Blue | 0 … 2 · 1 | Share of the blue channel. More blue brightens skies and renders skin darker and rougher |
Tone
| Control | Range · Default | Effect |
|---|---|---|
| Tone On | Switch · on | Switches contrast, shadows, highlights and rolloff |
| Contrast | 0.5 … 2 · 1 | Contrast around middle grey (0.18) in stops: 1 = unchanged, 2 = twice as steep |
| Shadows | −1 … 1 · 0 | Lifts (plus) or lowers (minus) the shadows, up to one stop, easing in below middle grey |
| Highlights | −1 … 1 · 0 | Lifts (plus) or lowers (minus) the highlights, up to one stop, easing in above middle grey |
| Highlight Rolloff | 0 … 1 · 0 | Soft shoulder above 1.0 linear (about 2.5 stops over grey): 0 = off, 1 = highlights roll towards 5.0, like negative film |
Filter and Stock
| Control | Range · Default | Effect |
|---|---|---|
| Filter | No filter / Yellow 8 / Yellow 12 / Orange 16 / Orange 21 / Red 25 / Red 29 / Green 11 / Green 58 / Blue 47 | Glass filter in front of the lens, transmission per channel like the Wratten glasses: yellow darkens skies slightly, orange more, red dramatically (sky almost black, skin bright), green brightens foliage and renders skin darker, blue lifts haze and darkens skin. New filters are appended at the end |
| Filter Strength | 0 … 1 · 1 | How strongly the chosen glass filter acts, 1 = like the glass in front of the lens, 0 = off |
| Film Stock | Panchromatic / Orthochromatic / Near infrared / Old pan | Character of the stock: panchromatic sees all colors, orthochromatic is red-blind (lips and freckles dark, skies bright, as before 1930), near-infrared renders foliage white and skies black, old pan is a little more blue-sensitive than modern stock |
| Stock Strength | 0 … 1 · 1 | How strongly the film stock character acts, 0 = panchromatic |
Tint
| Control | Range · Default | Effect |
|---|---|---|
| Tint On | Switch · on | Switches the toning |
| Shadow Tone | 0 … 1 · 0 | Toning of the shadows, 1 = strong. Luminance stays |
| Shadow Tone Hue | 0 … 360 · 220 | Hue of the shadows (HSV degrees): 220 blue like selenium, 200 cold, 30 sepia, 300 purple |
| Highlight Tone | 0 … 1 · 0 | Toning of the highlights, 1 = strong |
| Highlight Tone Hue | 0 … 360 · 40 | Hue of the highlights (HSV degrees): 40 warm like sepia, 50 yellowish, 200 cold |
General
| Control | Range · Default | Effect |
|---|---|---|
| Mix | 0 … 1 · 1 | Mix with the color image: 1 = fully black and white, 0.7 = the color shows through slightly |
Compare
| Control | Range · Default | Effect |
|---|---|---|
| Split View | Switch · off | Before and after side by side: original on the left, result on the right, a white line in between. Turn off before rendering (OFX only) |
| Split Position | 0 … 1 · 0.5 | Position of the split line, 0 = left, 1 = right (OFX only) |
Display
| Control | Range · Default | Effect |
|---|---|---|
| Curve Box | Switch · off | Box bottom left: a hue strip on top with its grey value below (shows how red, green and blue fall into grey), below that the tone curve in stops |
| Curve Full | Switch · off | Tone curve over the whole image (Curve Box takes priority) |
26 LUT – Hyō 表
Load LUTs in any color space, with Intensity, Look Only and a cube view.
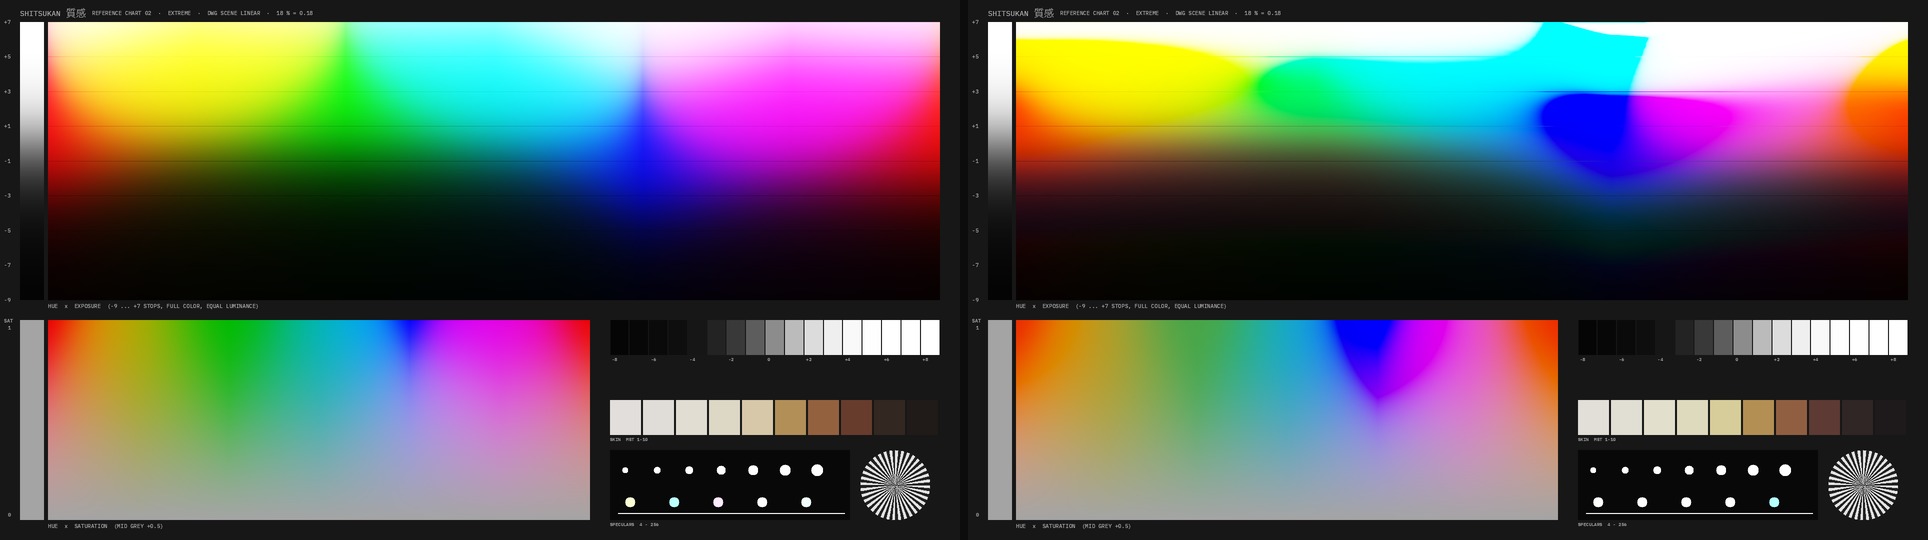
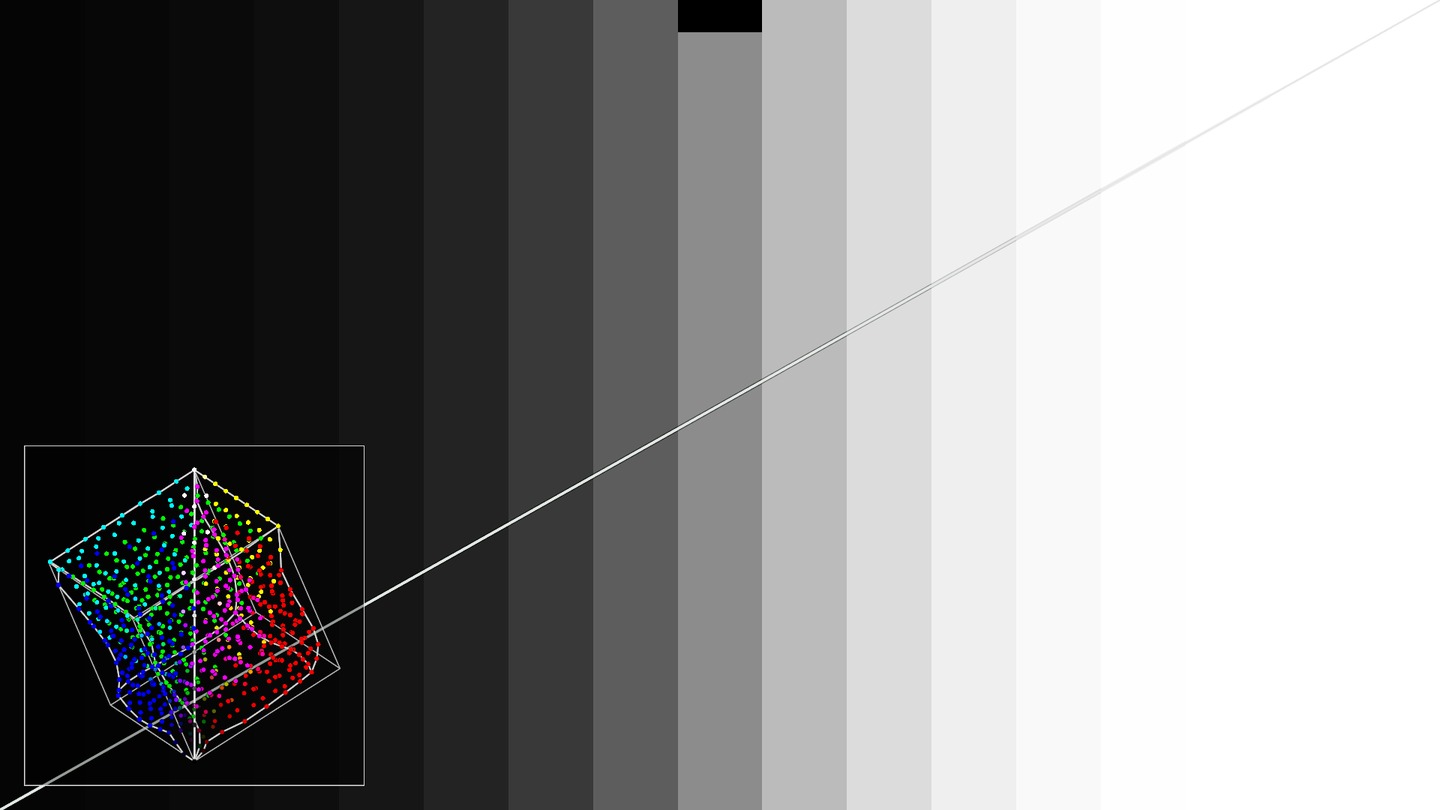
Hyō (表, the table) loads .cube, .3dl and Hald images and tells the LUT which color space it thinks in: LUT Input is the space the LUT expects, LUT Output the space it delivers. The image is converted there from the working space and back afterwards; the LUT itself stays as it is. Look Only takes the tone curve out of a camera or print LUT and keeps only color, saturation and cast; grey and exposure stay, your output transform still does the display. Intensity mixes the LUT in DaVinci Intermediate, evenly over all brightness levels. The cube view shows what the LUT does to colors.
How to use it
- Put Hyō after the look, before the output transform.
- Press Choose LUT… and pick the file. Hyō usually recognises the kind of LUT from the file name and sets LUT Type, Input and Output. Otherwise by hand: look LUT (log in, log out) to Same as Input, camera or print LUT to Rec709 to the display space.
- Look Only is on: only the look of the LUT remains (color, saturation, cast), its own grey curve is taken out, with any output, Same as Input included. For camera and print LUTs the tone curve is still done by your output transform. LUT Contrast brings some of the LUT curve back. For a LUT that should do the display itself as the last node, set LUT Output to Display direct.
- Dose with Intensity. Above 1 the LUT is strengthened.
- Export Cube writes the LUT as a .cube next to the original, also converted from .3dl or Hald, on request with 17, 33 or 65 points.
Display
Curve Box shows the tone curve of the LUT bottom left. Cube View draws the LUT as a cube next to it: 9 x 9 x 9 colors, each as a dot in its source color where the LUT moves it. Thin lines are the unchanged cube, bright lines the deformed edges and the grey axis. Where the dots crowd together, the LUT compresses colors. Cube Angle and Cube Tilt rotate the view, Cube Raw LUT shows the table itself instead of what reaches the image.
Tips
- Only the curve of a LUT: LUT Color at 0, colours stay as shot. Only its colour: Look Only on and LUT Contrast at 0. Both controls sit right below Intensity.
- LUT Path is a text field: paste a path (in Finder, Option-Command-C copies it) and press Reload; Resolve does not accept files dragged from Finder.
- Tetrahedral is the interpolation Resolve uses and is more accurate at color transitions. Trilinear only for comparison with older systems.
- With LogC3 or ACEScct as working space, Hyō also converts the gamut (AWG3, AP1) into the LUT space, not just the curve.
- A look LUT built for another log space can still be used correctly with LUT Input: Hyō converts there and back.
Node structure
Mini Panel in Panel Mode
Presets
Highlighted: presets in the OFX version only.
In Resolve
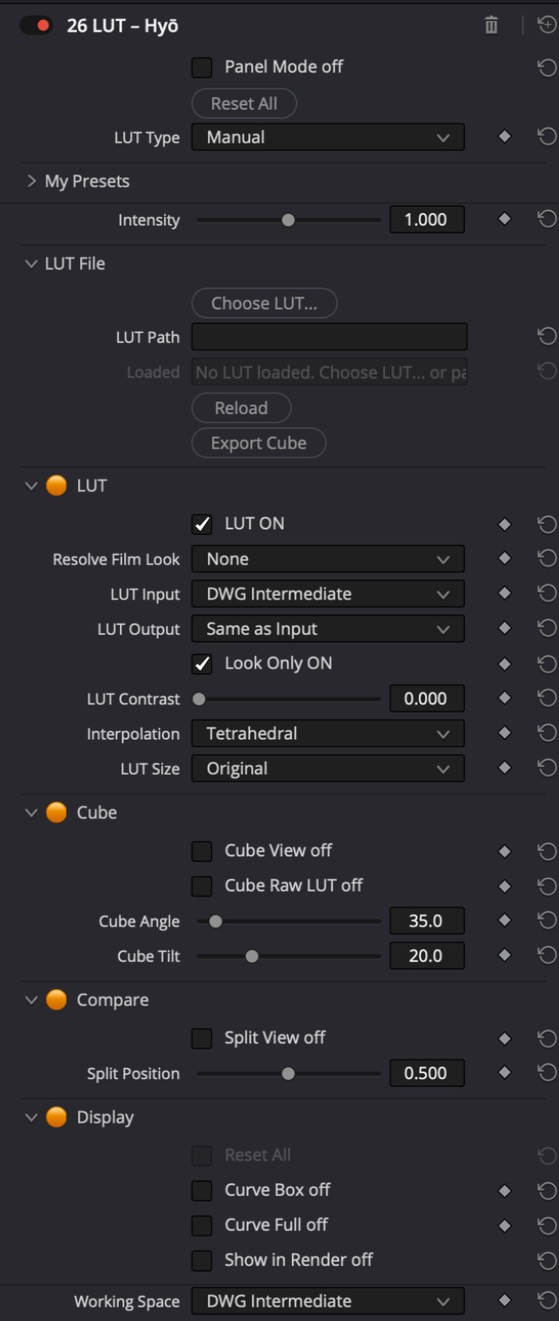
All controls
General
| Control | Range · Default | Effect |
|---|---|---|
| Intensity | 0 … 2 · 1 | Strength of the LUT: 0 = off, 1 = as the LUT, 2 = double. Mixed in DaVinci Intermediate, so evenly over all brightness levels |
| LUT Contrast | 0 … 1 · 0 | LUT Contrast, only with Look Only: 0 = without the tone curve of the LUT, 1 = with its full curve (doubled with your output). In between some of the contrast of the LUT |
| LUT Color | 0 … 1.5 · 1 | LUT Color: how much of the colour of the LUT is used (deviation from grey of the same brightness through the same LUT). 0 = only the curve of the LUT, colours as shot, 1 = full, 1.5 = more |
LUT
| Control | Range · Default | Effect |
|---|---|---|
| LUT On | Switch · on | Turns the LUT on or off, for comparison |
| Resolve Film Look | None / Kodak 2383 D65 Rec709 / Kodak 2383 D60 Rec709 / Kodak 2383 D55 Rec709 / Fujifilm 3513DI D65 Rec709 / Fujifilm 3513DI D60 Rec709 / Fujifilm 3513DI D55 Rec709 / Kodak 2383 D65 DCI-P3 / Fujifilm 3513DI D65 DCI-P3 | Loads one of the print film LUTs that ship with Resolve (folder LUT/Film Looks), with input Cineon and output for the monitor. Belongs at the end of the chain |
| LUT Input | DWG Intermediate / DWG Linear / ARRI LogC3 AWG3 / ARRI LogC4 AWG4 / ACEScct AP1 / ACEScg AP1 Linear / Sony S-Log3 S-Gamut3.Cine / RED Log3G10 RWG / Panasonic V-Log V-Gamut / Cineon Log Rec709 / Rec709 Gamma 2.4 / sRGB / Rec2020 Gamma 2.4 / P3-D65 gamma 2.6 / Sony S-Log3 S-Gamut3 / Canon Log 2 Cinema Gamut / Canon Log 3 Cinema Gamut / Blackmagic Film Gen5 BMD Wide Gamut / Fujifilm F-Log2 F-Gamut / DJI D-Log D-Gamut | Color space the LUT expects at its input (usually in the name or description of the LUT). The image is converted there from the working space |
| LUT Output | Same as Input / Display direct (last node) / DWG Intermediate / DWG Linear / ARRI LogC3 AWG3 / ARRI LogC4 AWG4 / ACEScct AP1 / ACEScg AP1 Linear / Sony S-Log3 S-Gamut3.Cine / RED Log3G10 RWG / Panasonic V-Log V-Gamut / Cineon Log Rec709 / Rec709 Gamma 2.4 / sRGB / Rec2020 Gamma 2.4 / P3-D65 gamma 2.6 / Sony S-Log3 S-Gamut3 / Canon Log 2 Cinema Gamut / Canon Log 3 Cinema Gamut / Blackmagic Film Gen5 BMD Wide Gamut / Fujifilm F-Log2 F-Gamut / DJI D-Log D-Gamut | Color space the LUT puts out. Same as Input for look LUTs (log in, log out). For a camera or print LUT to Rec709 choose the display space; the result is converted back to the working space (a CST without tone mapping at the end then shows it exactly). Display direct: output without conversion, only as the last node with no output transform after it |
| Look Only | Switch · on | Only the look of the LUT (color, saturation, cast); its own tone curve for grey is taken out. Works with any output, display (Rec709, P3) or log. Grey and exposure stay, your output transform (e.g. Genesis) still does the conversion to the display. Highlights and shadows the LUT would clip fade out softly |
| Interpolation | Tetrahedral / Trilinear | Tetrahedral as in Resolve, more accurate at color transitions. Trilinear for comparison with older systems |
| LUT Size | Original / 17 / 33 / 65 | Original uses the LUT as loaded. 17, 33 or 65 resamples it to that grid size (with the interpolation set), Export Cube writes the result |
Cube
| Control | Range · Default | Effect |
|---|---|---|
| Cube View | Switch · off | Shows the LUT as a 3D cube (bottom left): 9 x 9 x 9 colors, each drawn as a dot in its source color where the LUT moves it. Thin lines = unchanged cube, bright lines = deformed edges and grey axis. Squeezed areas show where the LUT compresses colors. Also shown in the render while on |
| Cube Raw LUT | Switch · off | Off = what reaches the image (with Intensity, Look Only, LUT Contrast, shown in DaVinci Intermediate). On = the LUT table itself, input against output values |
| Cube Angle | 0 … 360 · 35 | Rotates the cube around the grey axis |
| Cube Tilt | −10 … 90 · 20 | View angle from above: 0 = from the side, 90 = along the grey axis from white |
Compare
| Control | Range · Default | Effect |
|---|---|---|
| Split View | Switch · off | Before and after side by side: original on the left, result on the right, a white line in between. Turn off before rendering (OFX only) |
| Split Position | 0 … 1 · 0.5 | Position of the split line, 0 = left, 1 = right (OFX only) |
Display
| Control | Range · Default | Effect |
|---|---|---|
| Curve Box | Switch · off | LUT curve for grey as a box bottom left, per channel, image darkened inside |
| Curve Full | Switch · off | LUT curve over the whole image (Curve Box takes priority) |
27 Color Palette – Irodori 彩り
Colour palette from the image as a sheet inside the frame: image, rows Light, Medium, Dark and a spectrum, for mood boards and look references.
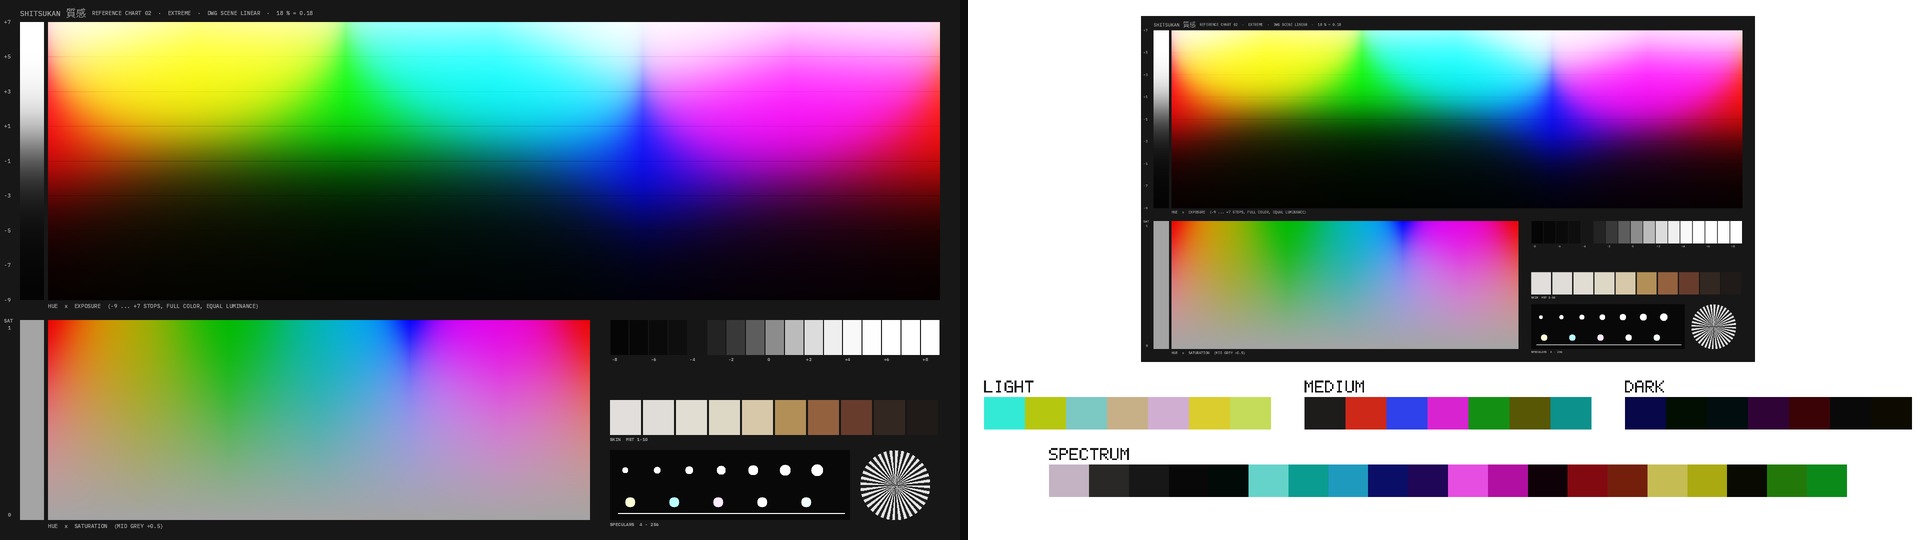
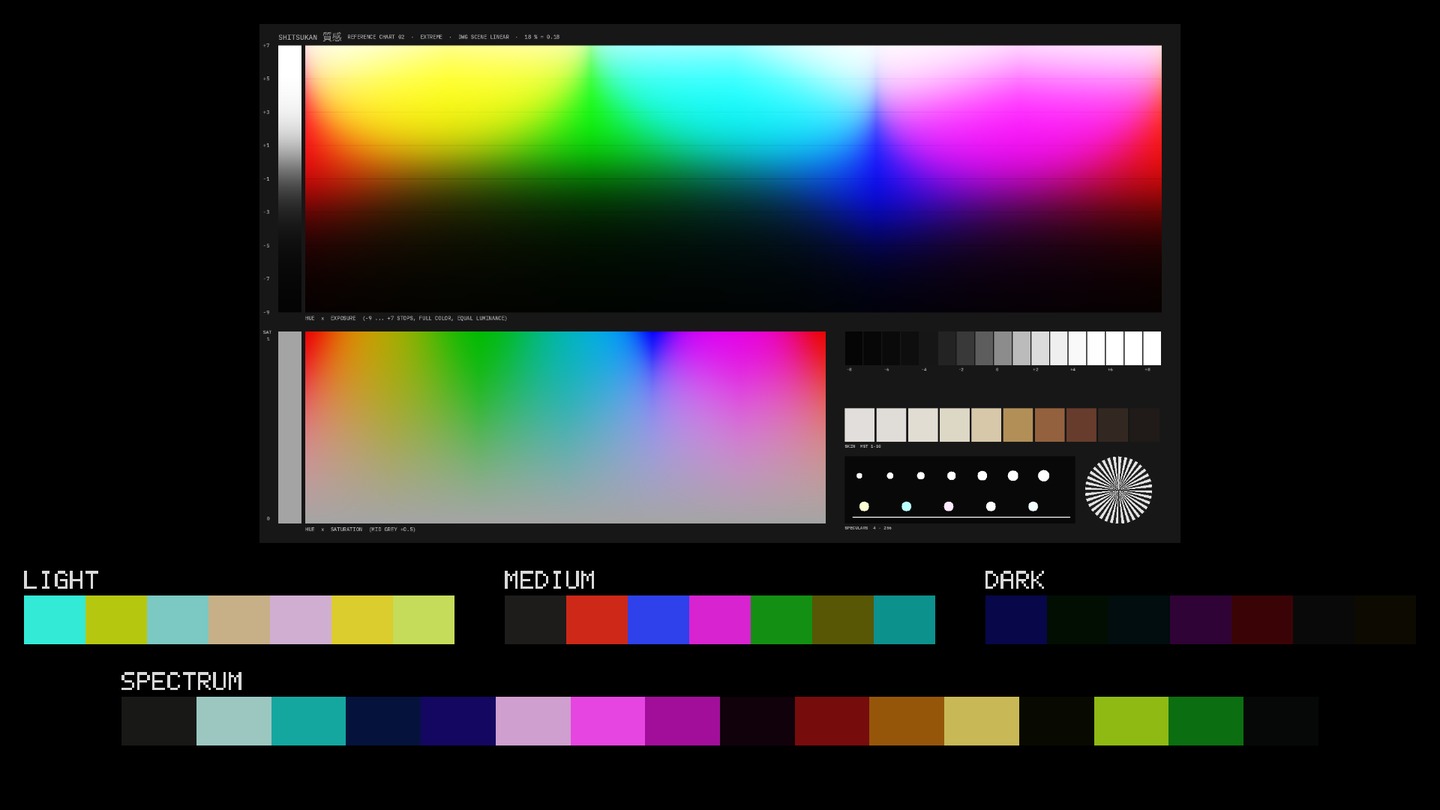
Irodori (彩り, colouring) turns every frame into a palette sheet as known from mood boards: the image on top, below it three rows with the light, medium and dark colours and a spectrum over the whole image. The colours are not sampled but clustered: once per frame Irodori reads 48 × 27 points, groups them in a perceptual space (lightness and two colour axes) and shows the mean code value of every group. So hex values and colours match the image exactly, and rare accents (the red dress, the orange lamp) get a swatch of their own, because the spectrum seeds its clusters with the most colourful point of every hue sector. The rows follow the brightness distribution of the image (adaptive) or fixed limits. The sheet is rendered inside the frame; a still from the gallery is the finished mood board sheet.
How to use it
- Irodori as the last node on the clip (or in the timeline), after the output transform, so the palette shows the display image. Working Space stays on Auto.
- Choose a preset: Sheet light, Sheet dark, Sheet with hex, Strip (full-frame image, spectrum as a band along the bottom edge) or Rows only.
- Swatches per Row and Spectrum Swatches set the number of swatches; Color Weight high for more colour accents, low for more brightness steps. Width by Share makes the swatches as wide as their share of the image.
- Spectrum Order: by hue (neutrals first), by share or by lightness. Hex Values shows the values, Text Size scales the type.
- Grab a still (gallery), export as PNG; switch the node off before rendering.
Display
The sheet itself is the display. Image Size and Swatch Height set the division, Gap separates the swatches, Background chooses white, dark or black.
Tips
- Mood board and storyboard: Format crops the image to 16:9, 1.85, 2:1, 2.39, 1:1, 4:5 or 9:16 and writes the format above it. Plus four layouts: Sidebar (color column on the right, height by share), Dots (circles, size by share), Letterbox (image in its format, palette in the bar) and Gradient (from dark to light). They show as many colors as Swatches per Row. Export as a still from the gallery.
- For a whole timeline: Irodori as a timeline node, then grab a still from every clip. The stills side by side are the colour timeline of the film.
- Adaptive zones give three filled rows for every image; Fixed compares images against the same brightness limits, then the Light row of a dark image can be almost empty (it is widened inwards then).
- The swatches show code values of the input. If Irodori sits before the output transform, the hex values are log values; for a mood board the node belongs at the end.
- With motion the swatches jitter slightly because every frame is clustered anew. Irrelevant for stills; for a video overlay use Spectrum Order Lightness, which is the calmest.
Node structure
Mini Panel in Panel Mode
Presets
Highlighted: presets in the OFX version only.
In Resolve
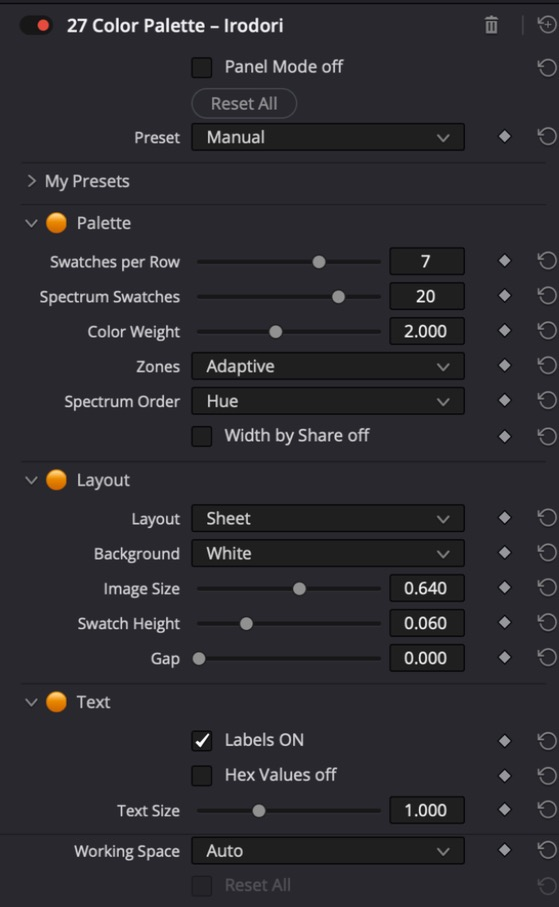
All controls
Palette
| Control | Range · Default | Effect |
|---|---|---|
| Swatches per Row | 3 … 9 · 7 | Swatches per row Light, Medium, Dark |
| Spectrum Swatches | 6 … 24 · 20 | Swatches in the spectrum over the whole image |
| Color Weight | 0.5 … 4 · 2 | Weight of colour against brightness when clustering: high = more colour accents, low = more brightness steps |
| Zones | Adaptive / Fixed | Adaptive: Light, Medium and Dark as thirds of the brightness distribution of the image. Fixed: fixed limits at 33 and 66 percent of the code value |
| Spectrum Order | Hue / Share / Lightness | Hue: neutrals first (light to dark), then by hue. Share: most frequent colour first. Lightness: light to dark |
| Width by Share | Switch · off | Swatch width by the share of the colour in the image instead of equal widths |
Layout
| Control | Range · Default | Effect |
|---|---|---|
| Layout | Sheet / Rows / Spectrum / Strip / Sidebar / Dots / Letterbox / Gradient | Sheet: image, three rows and spectrum. Rows: without spectrum. Spectrum: spectrum only. Strip: full image, spectrum as a strip at the bottom. Sidebar: image and a color column on the right, height by share. Dots: circles below the image, size by share. Letterbox: image in its format, palette in the bar. Gradient: a soft gradient from dark to light. The new layouts show as many colors as Swatches per Row |
| Format | As source / 16:9 / 1.85:1 / 2:1 / 2.39:1 / 1:1 / 4:5 / 9:16 | Crops the image on the sheet to an aspect ratio (centered) and writes it above (with Labels). As source: unchanged |
| Background | White / Dark / Black | Background of the sheet |
| Image Size | 0.3 … 0.9 · 0.64 | Height of the image on the sheet, fraction of the frame height |
| Swatch Height | 0.03 … 0.14 · 0.06 | Height of the swatches, fraction of the frame height |
| Gap | 0 … 0.3 · 0 | Space between the swatches, fraction of the swatch height |
Text
| Control | Range · Default | Effect |
|---|---|---|
| Labels | Switch · on | LIGHT, MEDIUM, DARK, SPECTRUM above the rows (the Strip layout has no labels, Hex Values sit inside the swatches there) |
| Hex Values | Switch · off | Hex value (8 bit) below every swatch, inside the swatch in the Strip layout; hidden when the swatches get too narrow |
| Text Size | 0.5 … 2 · 1 | Size of the labels |
31 Texture – Shitsukan 質感
The surface of the image in one node: grain, halation, diffusion, micro contrast, print grain.
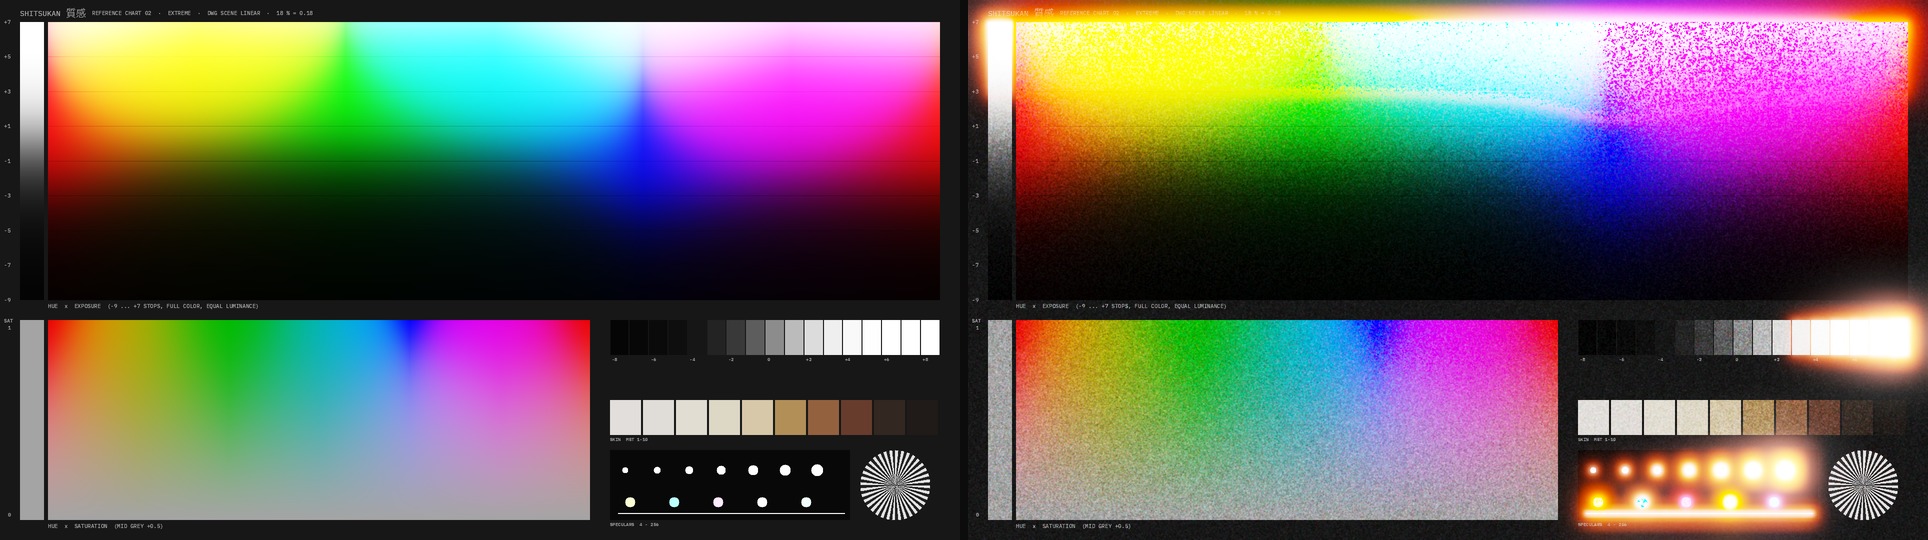
Shitsukan is the main tool for texture. The chain follows film: first the crispness of the surface (Micro Contrast), then the grain in the negative, then light that scatters (Diffusion) and reflects off the film base back into the red layer (Halation), and at the very end the fine grain of the print. Important: by default the grain sits BEFORE the diffusion, so the glow softens it as with real film. With Grain After Diffusion it sits behind it like a grain overlay and stays crisp on the highlights. Kiri and Boke remain as sub-tools for veil, Mist and the lens edge.
How to use it
- Pick a preset, for example 35mm 500T or 16mm 500T.
- Grain and Grain Size for amount and size, Grain Color for color grain (1) or black-and-white grain (0). Show Grain shows the grain on a grey ramp from -6 to +4 stops.
- Halation and Halation Size for the red halos. Show Highlights shows from which brightness they appear (Threshold).
- Micro Contrast positive for more bite, negative for a soft look. Print Grain for the second, fine grain of the print.
Display
Show Grain shows only the grain across the exposure, Show Highlights the highlights that scatter and form halation. Turn both off before rendering.
Tips
- Grain before or after the diffusion: before (default) is physically right, highlights turn soft and milky. After looks more digital, the grain stays on bright areas too.
- Grain Size refers to the image height: the grain looks the same size in HD and 4K.
- Grain Animated off gives static grain, for example for stills.
- Halation Size follows the diffusion radius: a larger radius also grows the halos.
Node structure
Mini Panel in Panel Mode
Presets
Highlighted: presets in the OFX version only.
In Resolve
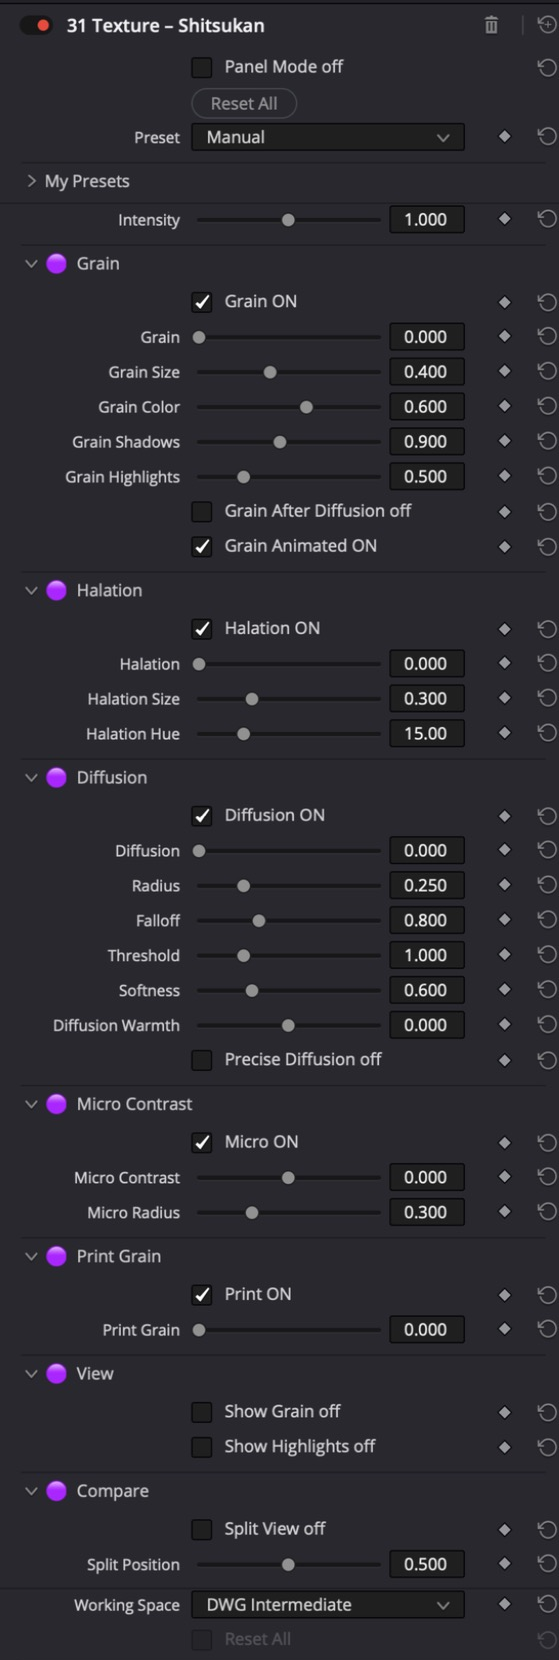
All controls
General
| Control | Range · Default | Effect |
|---|---|---|
| Intensity | 0 … 2 · 1 | Overall strength: 0 = neutral, 1 = as set, 2 = double. Runs out softly near the control limits (OFX only) |
Grain
| Control | Range · Default | Effect |
|---|---|---|
| Grain On | Switch · on | Turns the grain on or off |
| Grain | 0 … 2 · 0 | Strength of the film grain, 0 = off. Sits in density (log), like on the negative |
| Grain Size | 0 … 1 · 0.4 | Grain size: 0 = fine like 35 mm at 4K, 1 = coarse like Super 8. Blue is always a little coarser than red and green. Scales with the image height |
| Grain Color | 0 … 1 · 0.6 | 0 = black-and-white grain (all layers the same), 1 = each color layer its own grain like color negative |
| Grain Shadows | 0 … 2 · 0.9 | Grain in the shadows (around -4 stops) relative to middle grey |
| Grain Highlights | 0 … 2 · 0.5 | Grain in the highlights (around +3 stops) relative to middle grey |
| Grain After Diffusion | Switch · off | Off (default, like film) = grain before diffusion and halation, the glow softens it. On = grain after them, stays crisp on the highlights too |
| Grain Animated | Switch · on | On = new grain every frame (film). Off = static grain |
Halation
| Control | Range · Default | Effect |
|---|---|---|
| Halation On | Switch · on | Turns the halation on or off |
| Halation | 0 … 2 · 0 | Red halos around bright edges, as when light reflects off the film base back into the red layer |
| Halation Size | 0 … 1 · 0.3 | Size of the halos, relative to the diffusion radius |
| Halation Hue | 0 … 60 · 15 | Color of the halos: 0 = red, 15 = red-orange, 60 = orange-yellow |
Diffusion
| Control | Range · Default | Effect |
|---|---|---|
| Diffusion On | Switch · on | Turns the diffusion on or off |
| Diffusion | 0 … 2 · 0 | Scattered light around the highlights (like Kiri, without veil). For Black Mist and veil use Kiri as its own node |
| Radius | 0 … 1 · 0.25 | Size of the scatter. 1 = first stage 1 percent of the image height, the fifth 16 times larger. Also sets the size of the halation |
| Falloff | 0.2 … 2 · 0.8 | Falloff over the stages: small = wide glow, large = tight sheen |
| Threshold | 0 … 4 · 1 | Linear brightness from which light scatters and forms halation (middle grey = 0.18) |
| Softness | 0.01 … 2 · 0.6 | Width of the transition at the threshold |
| Diffusion Warmth | −1 … 1 · 0 | Color of the scattered light: positive warmer, negative cooler |
| Precise Diffusion | Switch · off | Off (default) = fast scatter pyramid for diffusion and halation. On = precise scatter like Kiri, about half as fast |
Micro Contrast
| Control | Range · Default | Effect |
|---|---|---|
| Micro On | Switch · on | Turns Micro Contrast on or off |
| Micro Contrast | −1 … 1 · 0 | Fine contrast of the surface on luminance: positive crisper, negative softer (like a soft-focus lens). Colors stay |
| Micro Radius | 0 … 1 · 0.3 | Size of the details Micro Contrast acts on: 0 = finest structure, 1 = coarser forms |
Print Grain
| Control | Range · Default | Effect |
|---|---|---|
| Print On | Switch · on | Turns the print grain on or off |
| Print Grain | 0 … 1 · 0 | Second, fine grain of the print, always at the very end (after diffusion and halation) |
View
| Control | Range · Default | Effect |
|---|---|---|
| Show Grain | Switch · off | Shows only the grain on a grey ramp from -6 stops (left) to +4 stops (right), so you see how it spreads over the exposure. Turn off before rendering |
| Show Highlights | Switch · off | Shows only the highlights that scatter and form halation (set the threshold). Turn off before rendering |
Compare
| Control | Range · Default | Effect |
|---|---|---|
| Split View | Switch · off | Before and after side by side: original on the left, result on the right, a white line in between. Turn off before rendering (OFX only) |
| Split Position | 0 … 1 · 0.5 | Position of the split line, 0 = left, 1 = right (OFX only) |
32 Diffusion – Kiri 霧
Optical diffusion like a black mist filter, in one node.
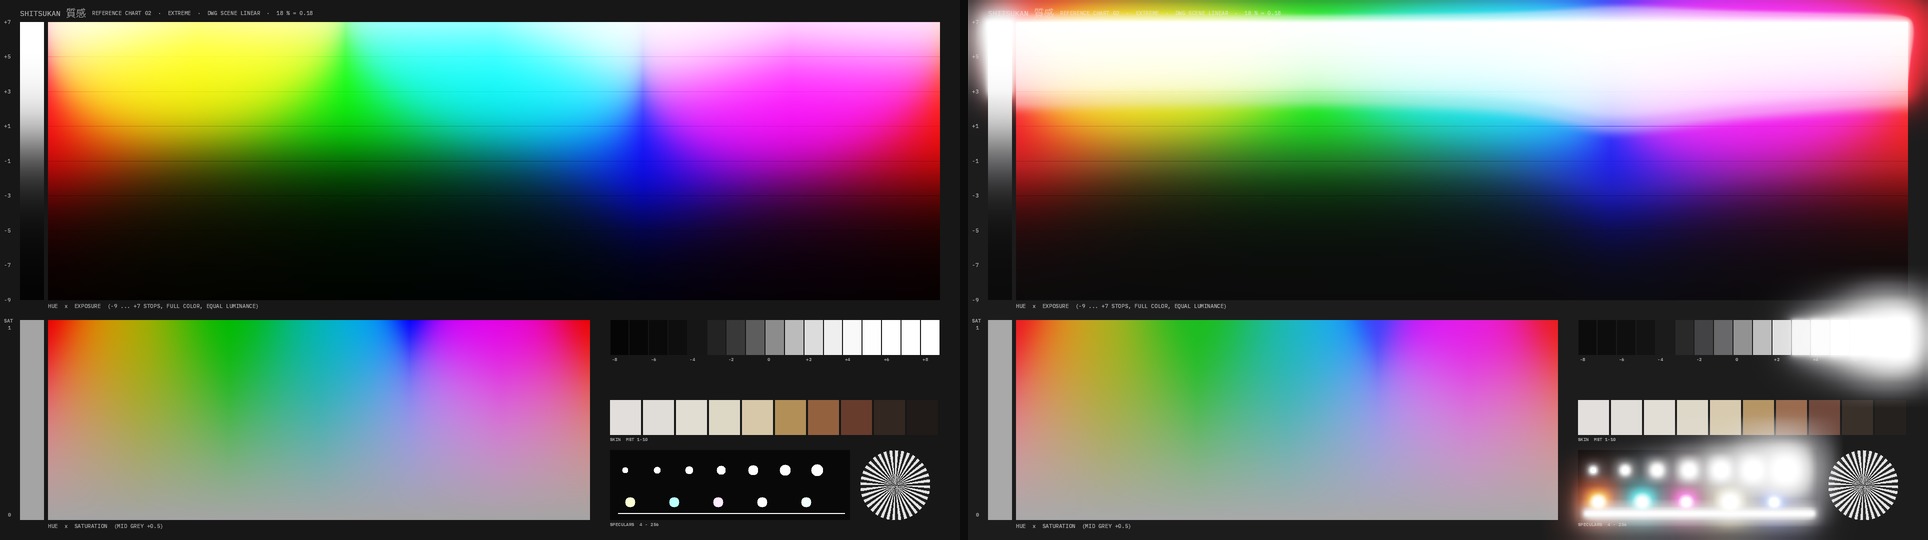
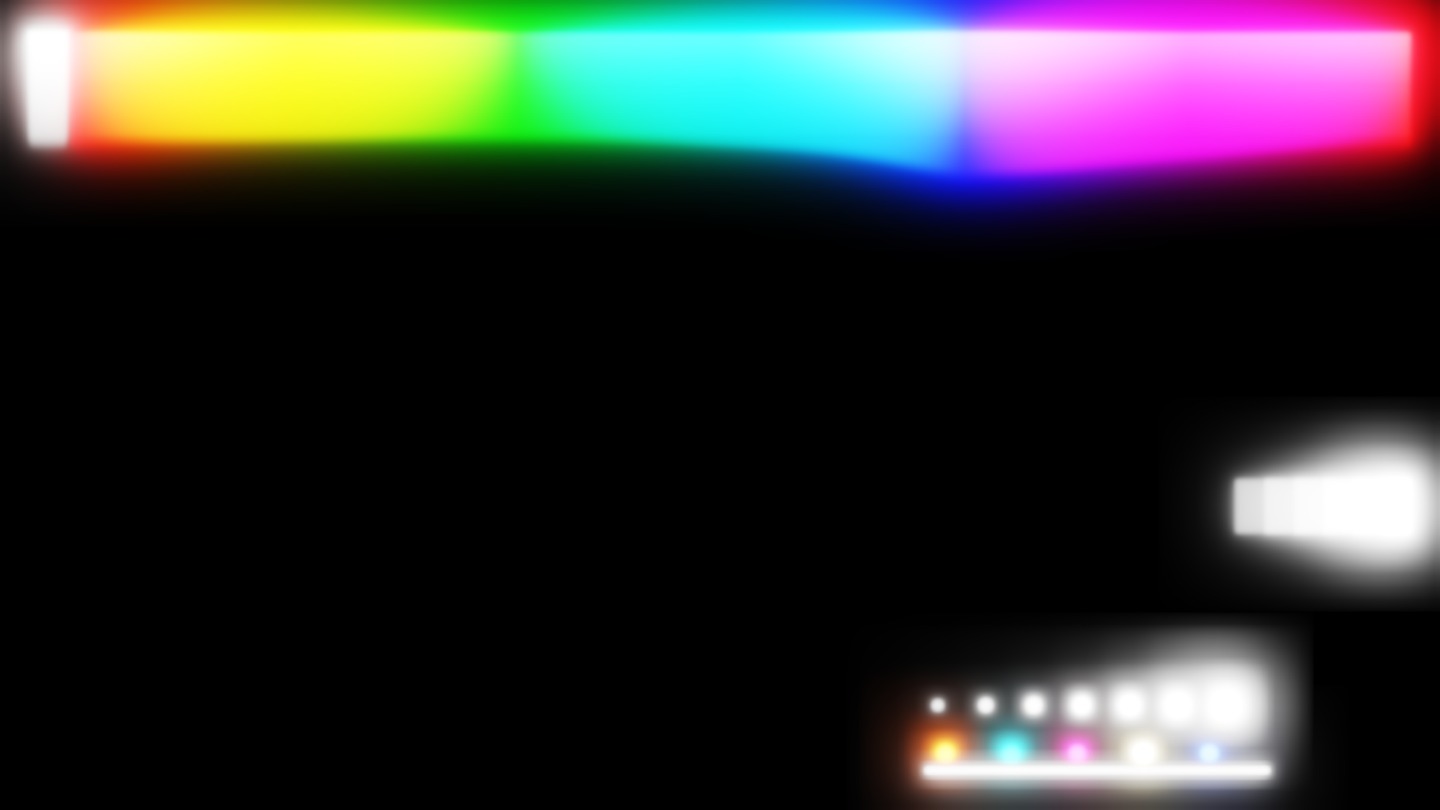
Kiri isolates the highlights, scatters them in five stages with growing radius in linear light and mixes them back. On top come a veil over the whole image, Black Suppress and highlight desaturation. It replaces the usual setup of extract, blur nodes and layer mixer.
How to use it
- Pick a preset, for example Black Mist 1-4.
- Threshold and Softness decide what scatters. Show Extract shows it.
- Bloom, Radius and Falloff for size and character of the halo.
- Veil for the fine haze, Black Suppress protects the blacks.
Display
Show Extract and Show Bloom show what is being scattered.
Tips
- Filter case: fine glimmer (1/8 to 1), classic soft, black shimmer, fog, double fog and low contrast as additional presets, in strengths like the glass filters. Kiri builds its highlight mask itself, in linear light (Threshold, Softness, Show Extract). To limit the filter to part of the image, put a window or a qualifier on the Kiri node: the scattered light stays physically right, Resolve only limits where it shows.
- Radius 1 means 1 % of the image height for the first stage, so the result is resolution independent.
- Halo Warmth tints the scattered light slightly warm, like many real filters.
Node structure
Mini Panel in Panel Mode
Presets
Highlighted: presets in the OFX version only.
In Resolve
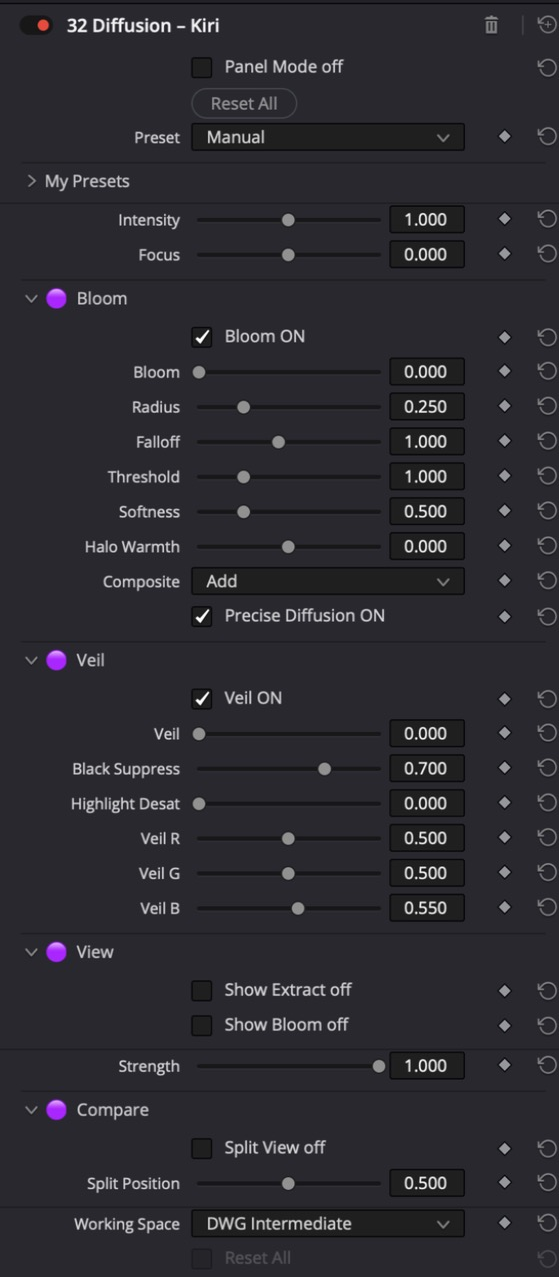
All controls
General
| Control | Range · Default | Effect |
|---|---|---|
| Intensity | 0 … 2 · 1 | Overall strength: 0 = neutral, 1 = as set, 2 = double. Runs out softly near the control limits (OFX only) |
| Focus | −1 … 1 · 0 | Width of the effect: 0 = as set, positive = narrower and more targeted, negative = wider and softer (OFX only) |
Bloom
| Control | Range · Default | Effect |
|---|---|---|
| Bloom On | Switch · on | Turns the scattered light on or off |
| Bloom | 0 … 2 · 0 | Amount of scattered light. Default 0: a new node is neutral, the presets set Bloom and Veil |
| Radius | 0 … 1 · 0.25 | Size of the scatter. 1 = first stage 1 percent of the image height, the fifth 16 times larger |
| Falloff | 0.2 … 2 · 1 | Falloff across the stages: low = milky veil (0.6 Black Mist), high = tight glow (1.5 Glimmer) |
| Threshold | 0 … 4 · 1 | Linear brightness above which light scatters (middle grey = 0.18) |
| Softness | 0.01 … 2 · 0.5 | Width of the transition at the threshold |
| Halo Warmth | −1 … 1 · 0 | Color of the scattered light: positive warmer, negative cooler |
| Composite | Add / Screen | Add = physically correct in linear light, Screen = softer in the brightest highlights |
| Precise Diffusion | Switch · on | On = precise scatter (as before). Off = about twice as fast, the scatter is computed more coarsely and looks almost the same |
Veil
| Control | Range · Default | Effect |
|---|---|---|
| Veil On | Switch · on | Turns the veil on or off |
| Veil | 0 … 0.2 · 0 | Milky veil (veiling glare), lifts mainly the shadows |
| Black Suppress | 0 … 1 · 0.7 | 0 = full veil in the blacks (classic mist), 1 = clean blacks (Black Mist) |
| Highlight Desat | 0 … 1 · 0 | Diffusion washes out the highlights |
| Veil R | 0 … 1 · 0.5 | Red share of the veil color (0.5 = neutral) |
| Veil G | 0 … 1 · 0.5 | Green share of the veil color (0.5 = neutral) |
| Veil B | 0 … 1 · 0.55 | Blue share of the veil color (0.5 = neutral) |
View
| Control | Range · Default | Effect |
|---|---|---|
| Show Extract | Switch · off | Shows only the highlights that scatter |
| Show Bloom | Switch · off | Shows only the scattered light |
General
| Control | Range · Default | Effect |
|---|---|---|
| Strength | 0 … 1 · 1 | Overall mix against the original |
Compare
| Control | Range · Default | Effect |
|---|---|---|
| Split View | Switch · off | Before and after side by side: original on the left, result on the right, a white line in between. Turn off before rendering (OFX only) |
| Split Position | 0 … 1 · 0.5 | Position of the split line, 0 = left, 1 = right (OFX only) |
33 Lens – Boke ボケ
Natural lens character towards the frame edge.
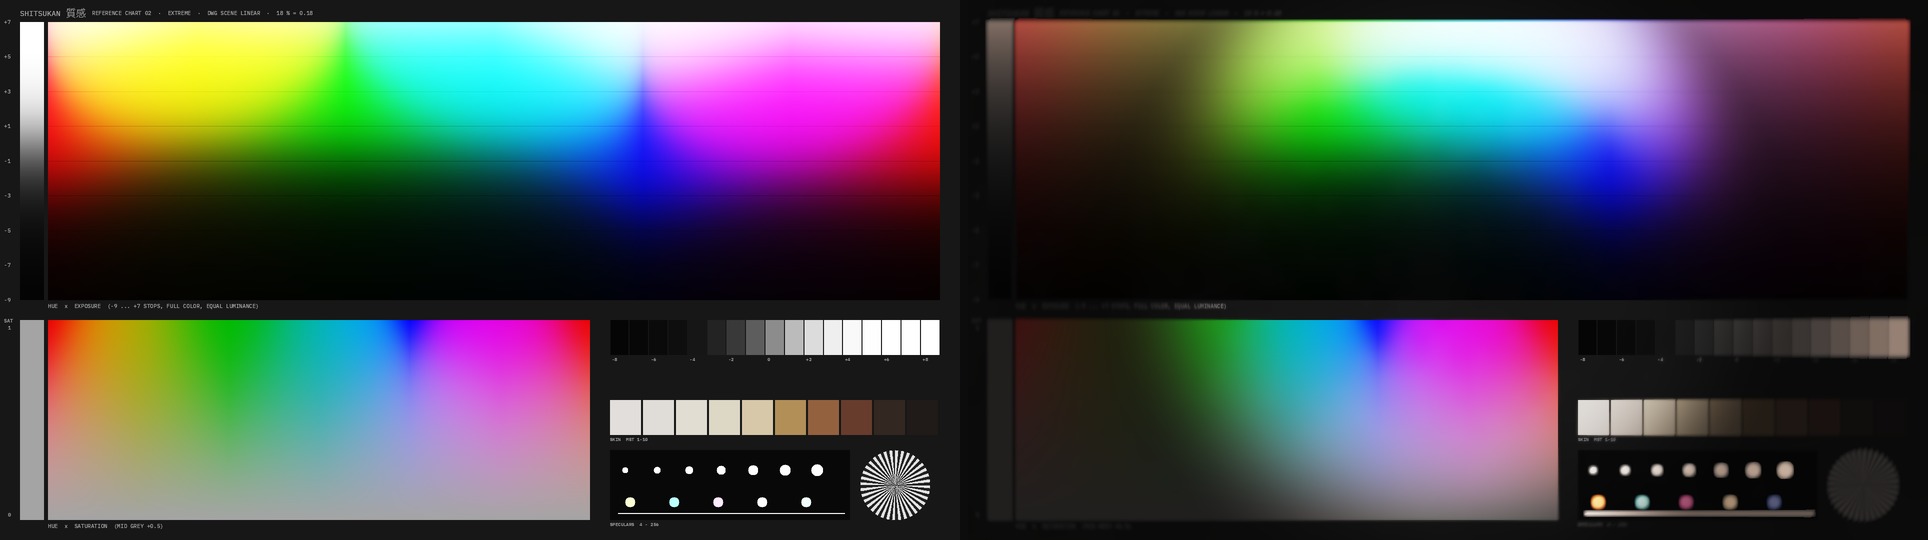

Boke gives the image the character of a special lens towards the edge: vignette, real edge blur, a paler edge, color fringing and a glow in the highlights. Inspired by a famous trick lens. A focus circle defines which area stays clear.
How to use it
- Pick a preset: Gentle, Vintage, Anamorphic, Strong, Petzval Swirl, Tilt Shift, Dirty front element, Broken glass or Lomo.
- Drag the focus circle in the viewer: the center moves the circle, the solid ring changes the radius.
- Edge Blur and Blur Size for the edge blur, Vignette and Edge Desat for brightness and color at the edge.
Display
The focus circle appears in the viewer. The dashed ring shows where the transition ends. Show Field shows the mask.
Tips
- Glass: Swirl rotates the blur towards the edge like a Petzval lens. Dirty Glass lays a blotchy veil with soft spots and more glow over the image. Broken Glass breaks the image into slightly offset shards with bright fracture edges; Shard Size sets their size.
- Focus Shape Band turns the sharp circle into a strip like tilt-shift; Band Angle tilts it.
- Anamorphic Bias stretches the focus circle horizontally (positive) or vertically (negative).
- Midtone Protection weakens the edge character in the midtones so faces at the edge stay natural.
Node structure
Mini Panel in Panel Mode
Presets
Highlighted: presets in the OFX version only.
In Resolve
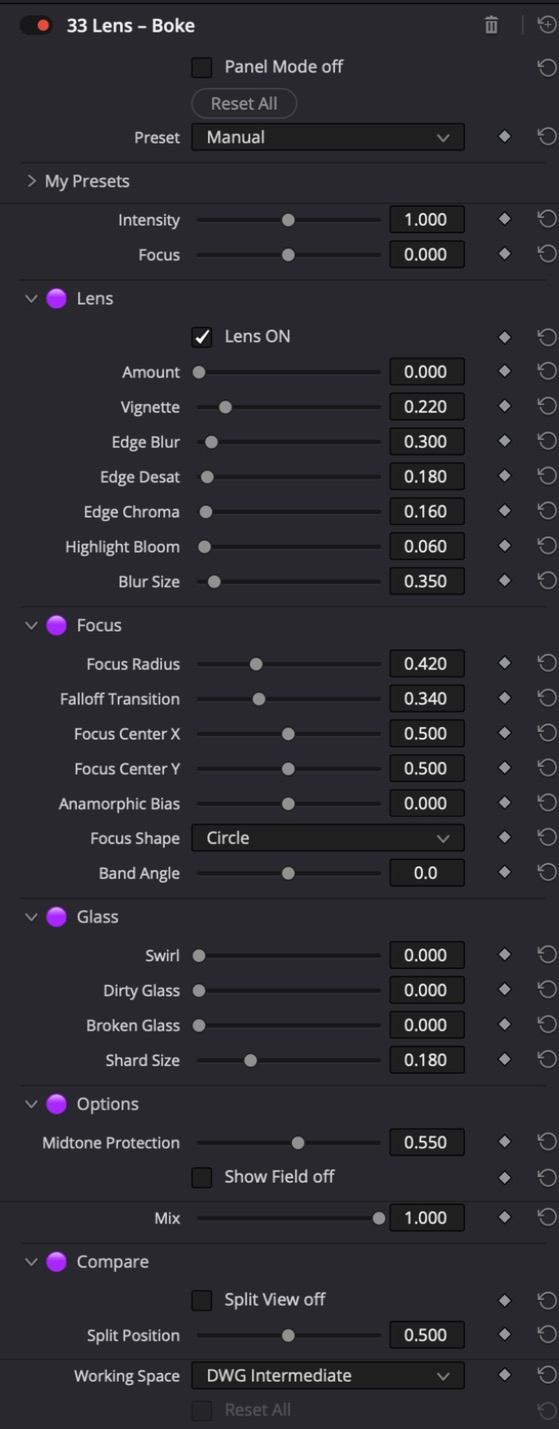
All controls
General
| Control | Range · Default | Effect |
|---|---|---|
| Intensity | 0 … 2 · 1 | Overall strength: 0 = neutral, 1 = as set, 2 = double. Runs out softly near the control limits (OFX only) |
| Focus | −1 … 1 · 0 | Width of the effect: 0 = as set, positive = narrower and more targeted, negative = wider and softer (OFX only) |
Lens
| Control | Range · Default | Effect |
|---|---|---|
| Lens On | Switch · on | Turns the whole edge character on or off, for comparison |
| Amount | 0 … 1 · 0 | Overall strength of the edge character (vignette, edge blur, fringing, glow, swirl), 0 = off. Dirty Glass and Broken Glass work independently on the whole image |
| Vignette | 0 … 1.5 · 0.22 | Darkening towards the edge |
| Edge Blur | 0 … 4 · 0.3 | Real blur towards the edge (OFX only) |
| Edge Desat | 0 … 3.2 · 0.18 | Paler edge (pulls towards luminance) |
| Edge Chroma | 0 … 4 · 0.16 | Color fringing towards the edge (lateral chromatic aberration) |
| Highlight Bloom | 0 … 2 · 0.06 | Glow around bright highlights towards the edge |
| Blur Size | 0 … 4 · 0.35 | Strength of the edge blur, 1 = 1.5 percent of the image height (OFX only) |
Focus
| Control | Range · Default | Effect |
|---|---|---|
| Focus Radius | 0.05 … 1.2 · 0.42 | Radius of the sharp area in image heights |
| Falloff Transition | 0.01 … 1 · 0.34 | Width of the transition to the edge |
| Focus Center X | 0 … 1 · 0.5 | Center of the sharp area, 0 = left, 1 = right (draggable in the viewer) |
| Focus Center Y | 0 … 1 · 0.5 | Center of the sharp area, 0 = top, 1 = bottom (draggable in the viewer) |
| Anamorphic Bias | −0.75 … 0.75 · 0 | Stretches the sharp area horizontally (positive) or vertically (negative) |
| Focus Shape | Circle / Band | Circle = sharp area around the center, Band = sharp strip like tilt-shift |
| Band Angle | −90 … 90 · 0 | Tilt of the sharp band in degrees (Band only) |
Glass
| Control | Range · Default | Effect |
|---|---|---|
| Swirl | 0 … 1 · 0 | Rotates the blur around the image center towards the edge, like a Petzval lens |
| Dirty Glass | 0 … 4 · 0 | Greasy, smeared front element: uneven veil and more glow around highlights |
| Broken Glass | 0 … 4 · 0 | Cracked glass: the image breaks into slightly offset shards with bright fracture edges and color fringes |
| Shard Size | 0.05 … 0.5 · 0.18 | Size of the shards relative to the image height |
Options
| Control | Range · Default | Effect |
|---|---|---|
| Midtone Protection | 0 … 1 · 0.55 | Weakens the edge character in the midtones so faces at the edge stay natural |
| Show Field | Switch · off | Shows the edge mask as a grey image |
General
| Control | Range · Default | Effect |
|---|---|---|
| Mix | 0 … 1 · 1 | Mix with the original image |
Compare
| Control | Range · Default | Effect |
|---|---|---|
| Split View | Switch · off | Before and after side by side: original on the left, result on the right, a white line in between. Turn off before rendering (OFX only) |
| Split Position | 0 … 1 · 0.5 | Position of the split line, 0 = left, 1 = right (OFX only) |
41 Scope – Hakari 計り
Waveform, parade, vectorscope, histogram, CIE, RGB cube, color volume 3D, Hue Sat, zones and spot meter right in the image, with a camera input for camera tests.
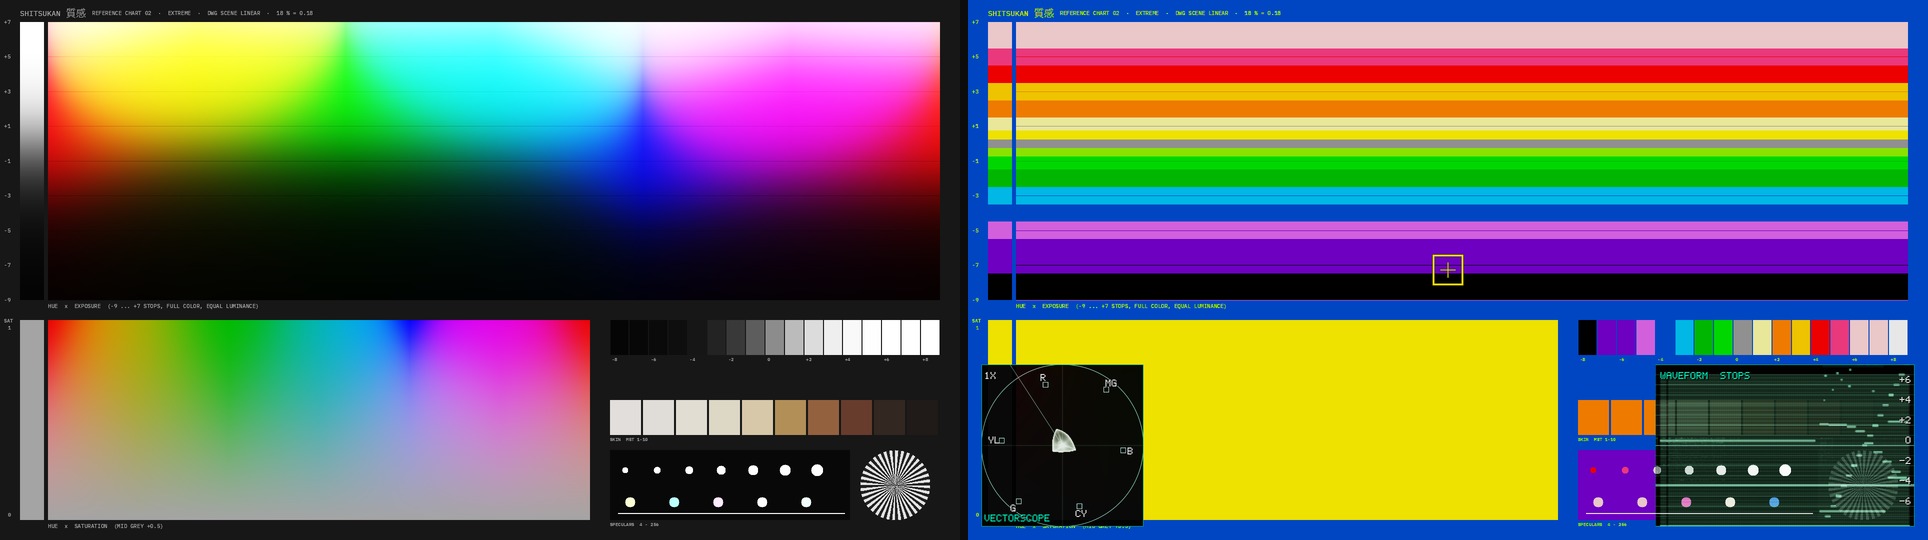
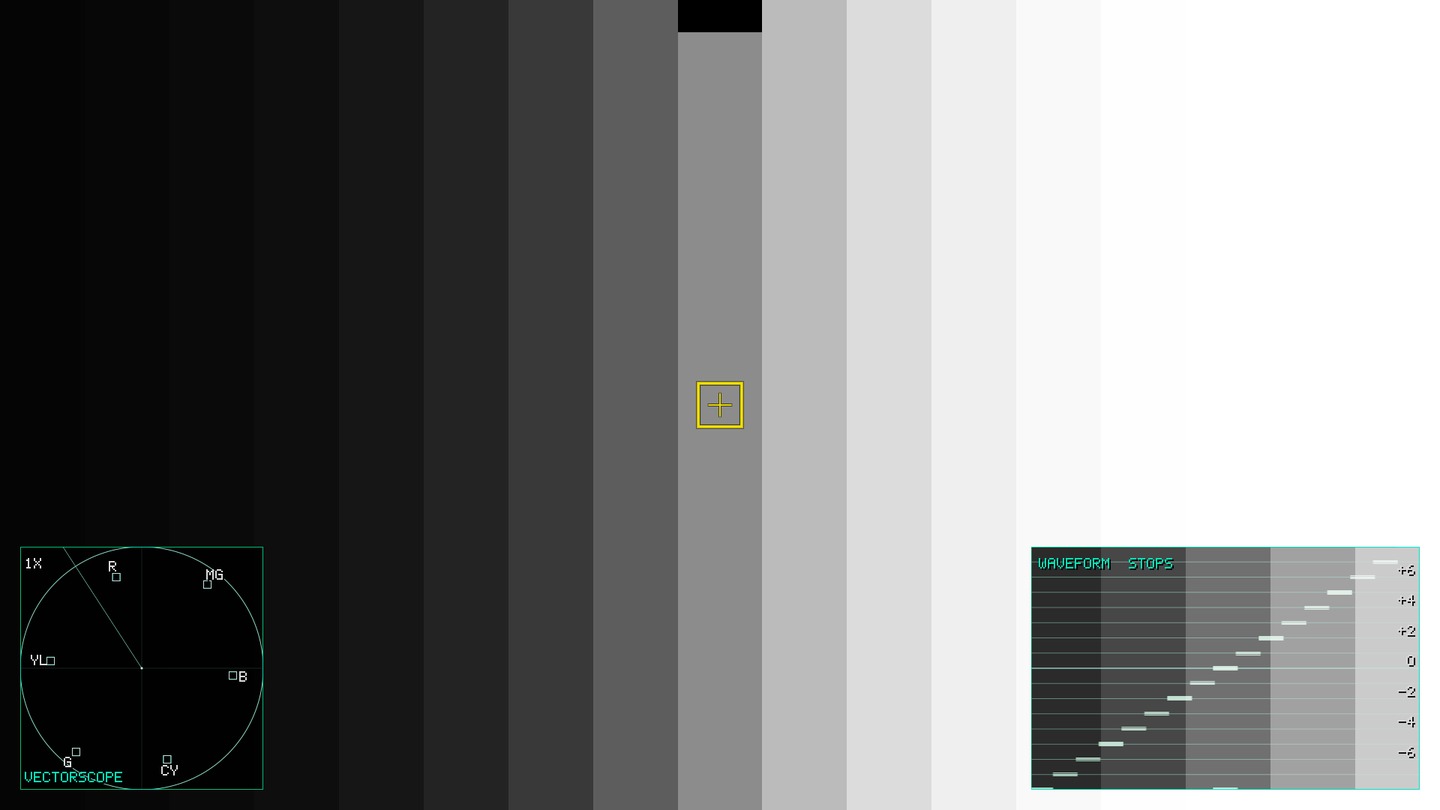
Hakari shows up to four instruments (Scope A to D) as boxes in the image, each in a corner, large in the center or as an overlay across the whole image. You get the scopes right in the viewer, even on the client monitor. Signal sets how the values are read: Scene reads from the working space and shows the scale in stops around 18 % grey (Zone V), Rec.709 and HLG in percent, PQ in nits with the 203-nit reference. Scale switches the scale (stops, percent, 10 bit, 12 bit, nits), Legal Range maps it to 64–940. False Color colors the rest of the image by stops or nits.
How to use it
- Important: in the Color page viewer, set the on-screen controls menu at the bottom left to "Open FX Overlay". Only then do you see the yellow spot and the measuring region as draggable frames and can move them with the mouse. Without the overlay Hakari shows spot and region only as marks in the image (Show Spot, Show Region); you can then move them only with the Spot X and Spot Y sliders.
- Add Hakari 計り (Scope) as the last node so it measures the finished image. It only sees what comes before it: on the clip level not the timeline grade, before the output transform not the display signal. For all clips at once: as the last node in the timeline node graph of the Color page.
- Pick the signal: Scene in a scene-referred tree, Rec.709, PQ or HLG after an output transform. For PQ and HLG on an SDR monitor set Graphics to SDR Viewer: the readings stay HDR, only the drawing is made for SDR.
- For each box pick Scope A to D and the position, Size, Brightness and Background to taste.
- Turn the node off for the final render: the boxes are rendered into the image.
Display
Traces and labels (title, scale values, color targets, gamut names, zone percentages) are rendered into the image. They are always visible in the viewer, even when another node is selected. Graticule switches grid and labels together. Spot and measuring region are marked in the image; the frames for dragging come from the OpenFX overlay and appear only when it is switched on in the viewer.
Tips
- Camera tests and test images: Camera Input (group Signal and Scale) reads the image as camera log, e.g. S-Log3, LogC3, LogC4, Log3G10, C-Log3, V-Log or BMD Film Gen5. Hakari then measures the untouched clip in stops, zones and Kelvin like a light meter on set, without a color space transform in the node tree first. Ideal for camera tests, grey card shots and test charts: with correct exposure middle grey reads 0.0 EV and Zone V. The image itself stays unchanged. In a graded tree leave Camera Input off, otherwise it converts twice.
- Spot Meter measures like a light meter: drag the spot in the viewer (with Open FX Overlay) onto a spot. Spot Readout shows stops (EV around 18 % grey), zone, percent and, with PQ and HLG, nits in large type next to it. Readout switches to color temperature in Kelvin and Duv, or both.
- Spot B is a second spot in cyan. The readout then shows the difference between both in stops, e.g. key to fill or face to background.
- Noise: on an even surface (grey card, wall) the readout shows under NOISE the spread around the spot in stops. Values below 0.05 EV are clean. On texture the value measures the structure, not the noise.
- Measure limits the measurement to a region, its inverse or the alpha. That way you measure only the face or only the sky.
- Color Volume 3D shows the color space as a spatial lattice: each lattice point grows with the number of image colors near it. Volume Grid picks 9 × 9 × 9 or finer 13 × 13 × 13. Cube Angle and Cube Tilt rotate and tilt it.
- RGB Cube shows all colors of the image as a point cloud in the cube, grey axis vertical.
- Hue Sat shows the saturation of every hue over a hue strip, with lines for the six primaries and the skin line in orange.
- Zones shows eleven columns, one per zone from 0 to X, with their share of the image in percent. Zone V is green.
- Luma Sat shows saturation over brightness, so you see right away whether highlights or shadows get too colorful.
- False Color: Stops and Nits as before, Skin colors all hues near the skin line orange, Gamut 709 shows colors outside Rec.709 in magenta. Plus ARRI (the six classic camera colors), EL Zone (Ed Lachman's 15 zones in stops around middle grey) and Sweet Spot (only the skin range and the ends). See the False Color chapter.
- In the vectorscope small squares mark the 75 % bar targets; the diagonal line is the skin line.
- The CIE diagram shows the spectral locus, Rec.709 and Rec.2020, so you see right away whether colors leave the output gamut.
- False Color Stops: green is Zone V (18 % grey), pink one stop above (typical for skin), yellow to red the highlights.
Node structure
Mini Panel in Panel Mode
In Resolve
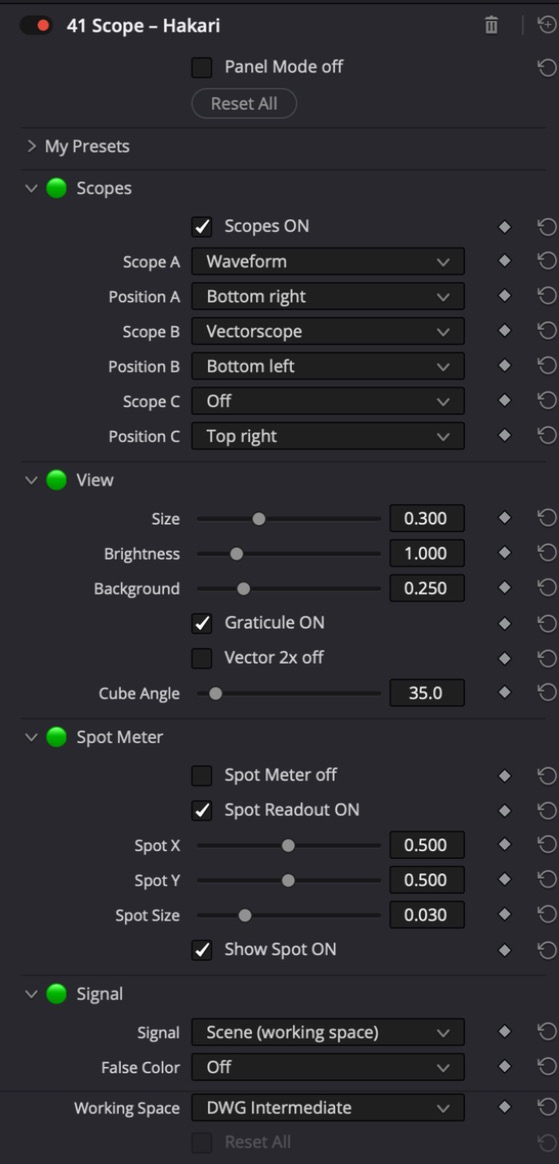
All controls
Scopes
| Control | Range · Default | Effect |
|---|---|---|
| Scopes On | Switch · on | Turns all boxes on or off (False Color stays) |
| Scope A | Off / Waveform / RGB Parade / Vectorscope / Histogram / CIE xy / RGB Cube / Luma Sat / Hue Sat / Zones / Color Volume 3D | Instrument in box A: Waveform, RGB Parade, Vectorscope, Histogram, CIE xy, RGB Cube (density cloud), Luma Sat, Hue Sat, Zones or Color Volume 3D (9 x 9 x 9 lattice like the Cube View in Hyo: every lattice point in its color, sized by its share of the image) |
| Position A | Top left / Top right / Bottom left / Bottom right / Large center / Overlay | Where box A sits: one of the four corners, large in the center, or as an overlay semi-transparent over the image |
| Scope B | Off / Waveform / RGB Parade / Vectorscope / Histogram / CIE xy / RGB Cube / Luma Sat / Hue Sat / Zones / Color Volume 3D | Instrument in box B |
| Position B | Top left / Top right / Bottom left / Bottom right / Large center / Overlay | Where box B sits |
| Scope C | Off / Waveform / RGB Parade / Vectorscope / Histogram / CIE xy / RGB Cube / Luma Sat / Hue Sat / Zones / Color Volume 3D | Instrument in box C |
| Position C | Top left / Top right / Bottom left / Bottom right / Large center / Overlay | Where box C sits |
| Scope D | Off / Waveform / RGB Parade / Vectorscope / Histogram / CIE xy / RGB Cube / Luma Sat / Hue Sat / Zones / Color Volume 3D | Instrument in box D |
| Position D | Top left / Top right / Bottom left / Bottom right / Large center / Overlay | Where box D sits: one of the four corners, large in the center, or as an overlay semi-transparent over the image |
View
| Control | Range · Default | Effect |
|---|---|---|
| Size | 0.15 … 0.6 · 0.3 | Height of the small boxes relative to the image height |
| Brightness | 0.2 … 4 · 1 | Brightness of the traces |
| Background | 0 … 1 · 0.25 | How bright the image behind the boxes stays, 0 = black |
| Overlay Opacity | 0.1 … 1 · 0.6 | Opacity of boxes set to position Overlay |
| Overlay Size | 0.3 … 1 · 0.8 | Size of the overlays relative to the image height (waveform, parade, histogram: full width) |
| Graticule On | Switch · on | Graticule, targets and labels in the boxes |
| Vector 2x | Switch · off | Vectorscope zoomed 2x, for low-saturation images |
| Cube Angle | 0 … 360 · 35 | Rotation of the RGB cube around the grey axis |
| Cube Tilt | 0 … 60 · 20 | Tilt of the RGB cube: 0 = from the side, 60 = steeply from above |
| Volume Grid | 9 x 9 x 9 / 13 x 13 x 13 | Lattice of Color Volume 3D: 9 x 9 x 9 (like the Cube View in Hyo) or finer 13 x 13 x 13 |
Spot Meter
| Control | Range · Default | Effect |
|---|---|---|
| Spot Meter | Switch · off | Measures the area in the yellow box like a spot meter: stops, zone, percent and, with PQ and HLG, nits. The box can be dragged in the viewer |
| Show Spot | Switch · on | Draws the spot box into the image |
| Spot Readout | Switch · on | Large readout next to the spot boxes: stops (EV around middle grey: 18 percent scene, 41 percent Rec.709 signal, 26 nits for PQ and HLG per BT.2408), zone, signal and, with PQ and HLG, nits; with Readout also kelvin and tint |
| Readout | Exposure / Color temperature / Exposure + color | What appears next to the spots: exposure (stop, zone, signal, nits with HDR, noise as the spread of the stop inside the box, measured on a flat area such as a grey card), color temperature (kelvin and tint as Duv x 1000, plus = greenish, minus = magenta) or both |
| Spot X | 0 … 1 · 0.5 | Center of the spot box, 0 = left, 1 = right (draggable in the viewer) |
| Spot Y | 0 … 1 · 0.5 | Center of the spot box, 0 = top, 1 = bottom (draggable in the viewer) |
| Spot Size | 0.005 … 0.1 · 0.03 | Edge length of the spot box relative to the image width |
| Spot B | Switch · off | Second spot box: measures like spot A and shows the lighting ratio A to B in stops and as a ratio, e.g. key to fill |
| Spot B X | 0 … 1 · 0.7 | Center of spot B, 0 = left, 1 = right (draggable in the viewer) |
| Spot B Y | 0 … 1 · 0.5 | Center of spot B, 0 = top, 1 = bottom (draggable in the viewer) |
Measure Area
| Control | Range · Default | Effect |
|---|---|---|
| Measure | Whole frame / Region / Outside region / Alpha | What the scopes measure: the whole frame, only the region, everything outside the region, or the alpha the host passes into the node (e.g. a matte). The spots always measure their box |
| Show Region | Switch · on | Draws the measure region as a dashed frame |
| Region X | 0 … 1 · 0.5 | Center of the measure region, 0 = left, 1 = right (draggable in the viewer) |
| Region Y | 0 … 1 · 0.5 | Center of the measure region, 0 = top, 1 = bottom (draggable in the viewer) |
| Region Width | 0.02 … 1 · 0.4 | Width of the measure region relative to the image width |
| Region Height | 0.02 … 1 · 0.4 | Height of the measure region relative to the image height |
Signal and Scale
| Control | Range · Default | Effect |
|---|---|---|
| Signal | Scene (working space) / Rec.709 gamma 2.4 / PQ Rec.2020 / HLG Rec.2020 | How values are read: Scene = working space, scale in stops and zones. Rec.709, PQ and HLG = signal after an output transform, scale in percent or nits |
| Camera Input | Off (working space) / Sony S-Log3 S-Gamut3.Cine / Sony S-Log3 S-Gamut3 / ARRI LogC3 AWG3 / ARRI LogC4 AWG4 / RED Log3G10 RWG / Canon Log 3 Cinema Gamut / Panasonic V-Log V-Gamut / BMD Film Gen5 | Measure camera log straight after the clip, with no CST before it: Hakari converts the camera curve and gamut itself. Stop, zone and kelvin then read as on the camera (middle grey at the rated EI), e.g. for camera tests. Scene signal only; the image itself stays unchanged |
| Scale | Auto / Stops / Percent / 10 bit / 12 bit / Nits | Labels of the vertical axis and of the spot signal: Auto (scene = stops, Rec.709 and HLG = percent, PQ = nits), stops around middle grey, percent, 10 bit (0 to 1023), 12 bit (0 to 4095) or nits. 10 and 12 bit are code values of the same signal, not a different measurement |
| Legal Range | Switch · off | With 10 and 12 bit: map the signal as legal range (64 to 940 or 256 to 3760); values above and below stay visible |
| Graphics | As signal / SDR viewer | How Hakari draws boxes and text with PQ and HLG: As Signal (for an HDR monitor and HDR output) or SDR Viewer (bright on a normal monitor when a PQ signal is viewed without HDR display) |
| False Color | Off / Stops / Nits / Skin / Gamut 709 / ARRI / EL Zone / Sweet Spot | Colors the image outside the boxes: stops around 18 percent grey (green = Zone V, pink = one stop above), nits for HDR, skin (hues near the skin line orange), Gamut 709 (colors outside Rec.709 magenta), ARRI (classic six colors: purple black clip, blue, green 18 percent, pink skin +1, yellow, red white clip), EL Zone (Ed Lachman: one color per stop as in the original chart, violet to pink, +-1/2 around grey for skin, black and white = clipping) or Sweet Spot (Cullen Kelly: -1/2 to +1 stop around grey stays image, the rest falls off grey). All in stops of scene luminance, independent of the working space. Note: Hakari measures the image at its point in the node tree. For the finished image put it as the last node on the timeline level, after the output transform, and set Signal accordingly (e.g. Rec.709 gamma 2.4) |
42 Test Pattern – Kijun 基準
Test patterns for monitor, pipeline and HDR.
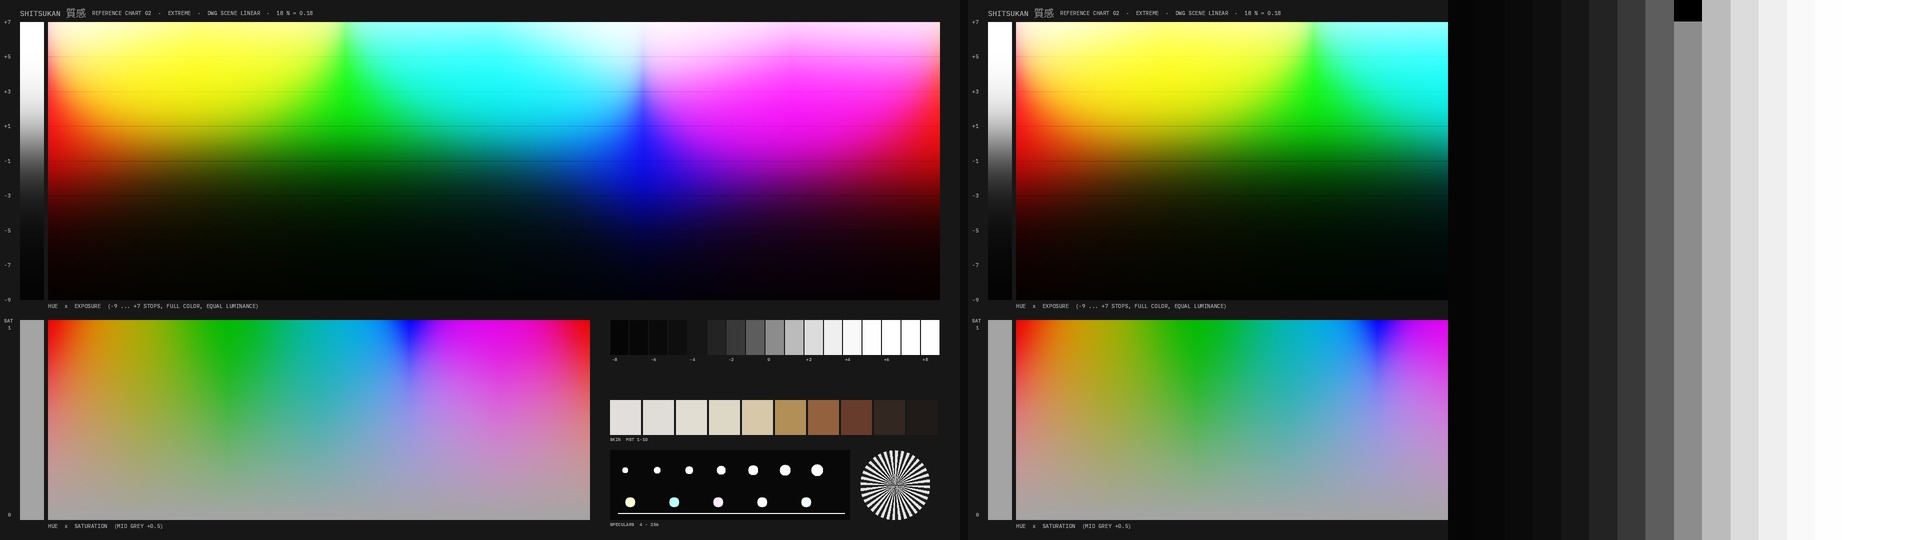
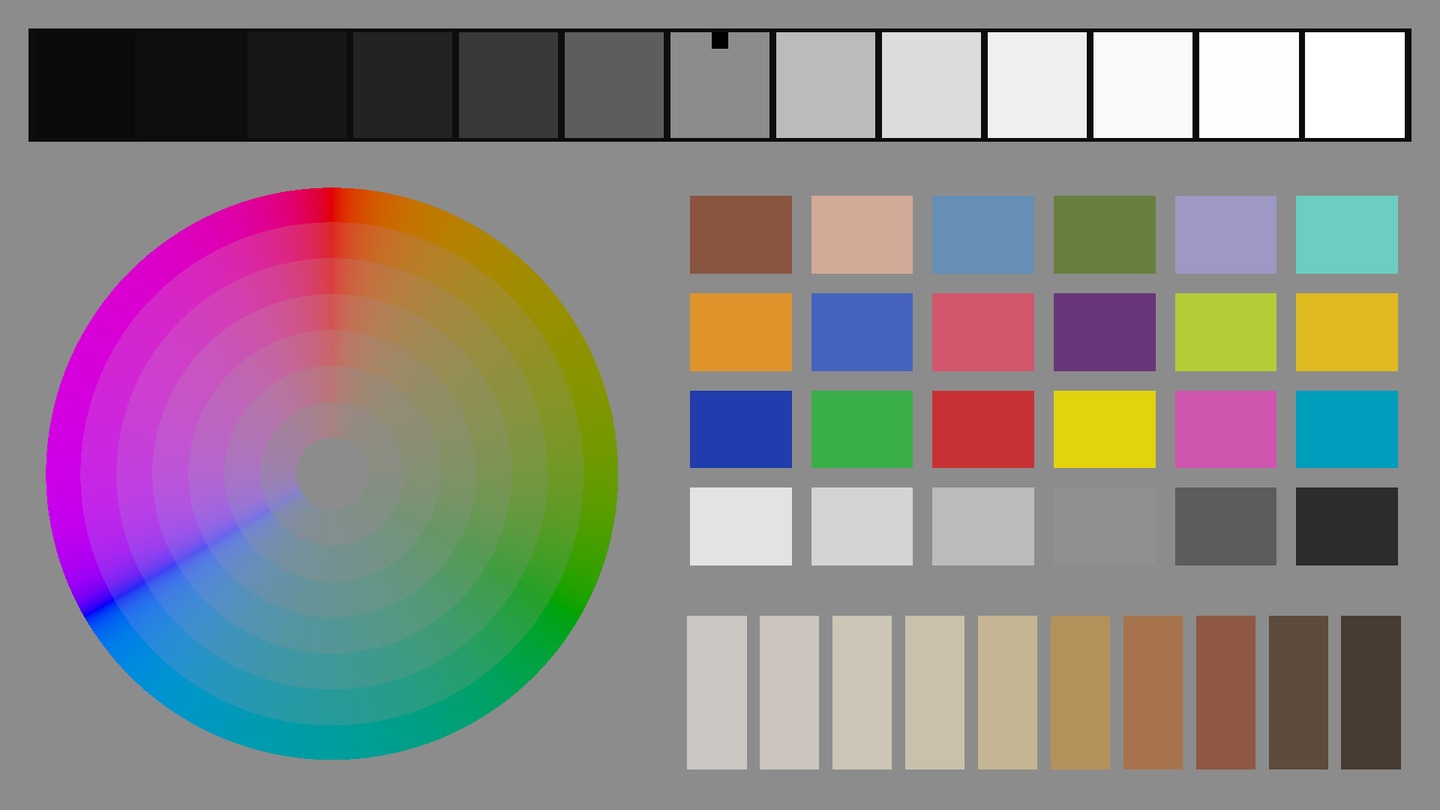
Kijun generates the usual test patterns and a neutral middle grey: SMPTE bars with PLUGE, full bars, PLUGE on its own, grey ramp, grey wedge, zone plate, PQ reference patches from 0.1 to 10,000 nits with Rec.2020 colors and a PQ ramp with markers. The signal test patterns write code values directly. The stop wedge is a scene test pattern: 17 steps around 18 % grey, encoded in the working space, ideal for judging an output transform or a look.
How to use it
- Pick the pattern.
- Check signal test patterns at the end of the chain, after the output transform or in a project without color management.
- Put the stop wedge in the scene-referred tree in front of your looks and see how they shape the steps.
- Mix blends a test pattern over the image.
Display
No display; the test pattern is the result. Together with Hakari ideal for checking the measuring chain.
Tips
- Look chart scene: stop wedge from −6 to +6 stops, a color wheel at constant brightness (the Rec.709 primaries on the outside), 24 color patches with the measured values of the Macbeth chart and ten skin tones from light to dark (Monk scale, as reflectance 45 to 5 %). All scene-referred in the working space, gamut included. Put in front of your looks, the chart shows at a glance what a look does to contrast, colors and skin, and makes good comparison stills.
- Area puts the test pattern on part of the image only: left or right half, top or bottom half, a box in the center or a strip at the bottom. Your grade stays next to it for a direct comparison.
- Middle grey 18 percent fills the image with neutral grey in the working space, to reset the eye between two scenes. Grey border puts a middle-grey frame around the image as a calm reference while grading (width with Border Width).
- PLUGE: on a correctly set monitor the −2 % bars must be invisible and the +2 % bars just visible.
- The PQ ramp has markers at 1, 10, 100, 203, 1000, 4000 and 10,000 nits.
Node structure
Mini Panel in Panel Mode
In Resolve
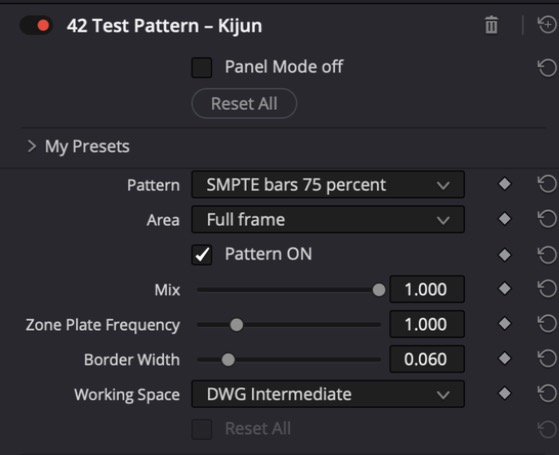
All controls
General
| Control | Range · Default | Effect |
|---|---|---|
| Pattern | SMPTE bars 75 percent / Full bars 100 percent / PLUGE / Grey ramp / Grey wedge 11 steps / Stop wedge scene / Zone plate / PQ reference / PQ ramp / Middle grey 18 percent / Grey border / Look chart scene | Signal test patterns write code values directly, for checking after the output transform. Stop wedge, middle grey and look chart are encoded in the working space. The look chart shows a stop wedge, color wheel, 24 color patches and ten skin tones as a scene, the way the camera would see them |
| Area | Full frame / Left half / Right half / Top half / Bottom half / Center box / Bottom strip | Where the pattern sits: full frame or only part of it; your grade stays next to it for a direct comparison |
| Pattern On | Switch · on | Turns the test pattern off and leaves the image below. Turn off before rendering |
| Mix | 0 … 1 · 1 | Mix with the image below, 1 = test pattern only |
| Zone Plate Frequency | 0.2 … 4 · 1 | Density of the zone plate rings |
| Border Width | 0.01 … 0.3 · 0.06 | Width of the grey border relative to the image height |
51 Finish – Shiage 仕上げ
The last word: set black and white on the finished display signal, desaturate and tint.
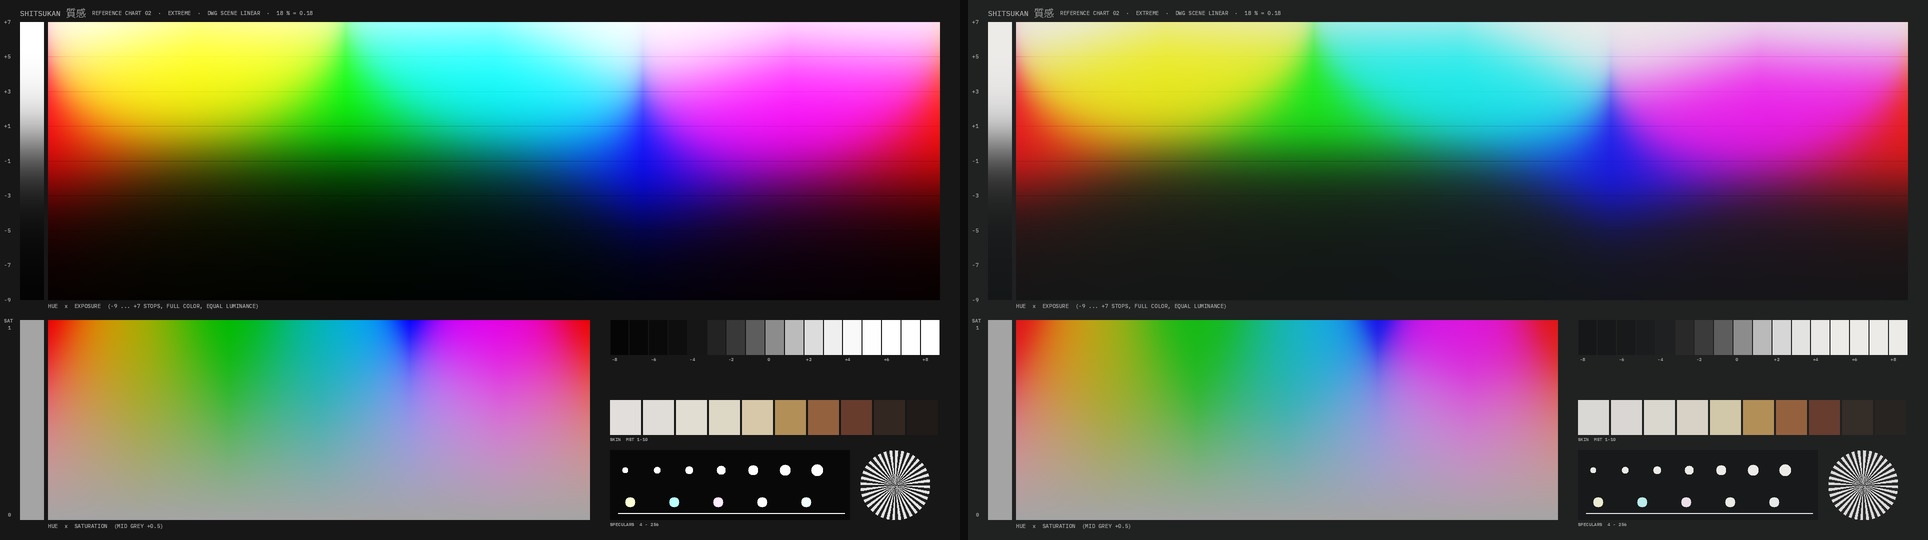
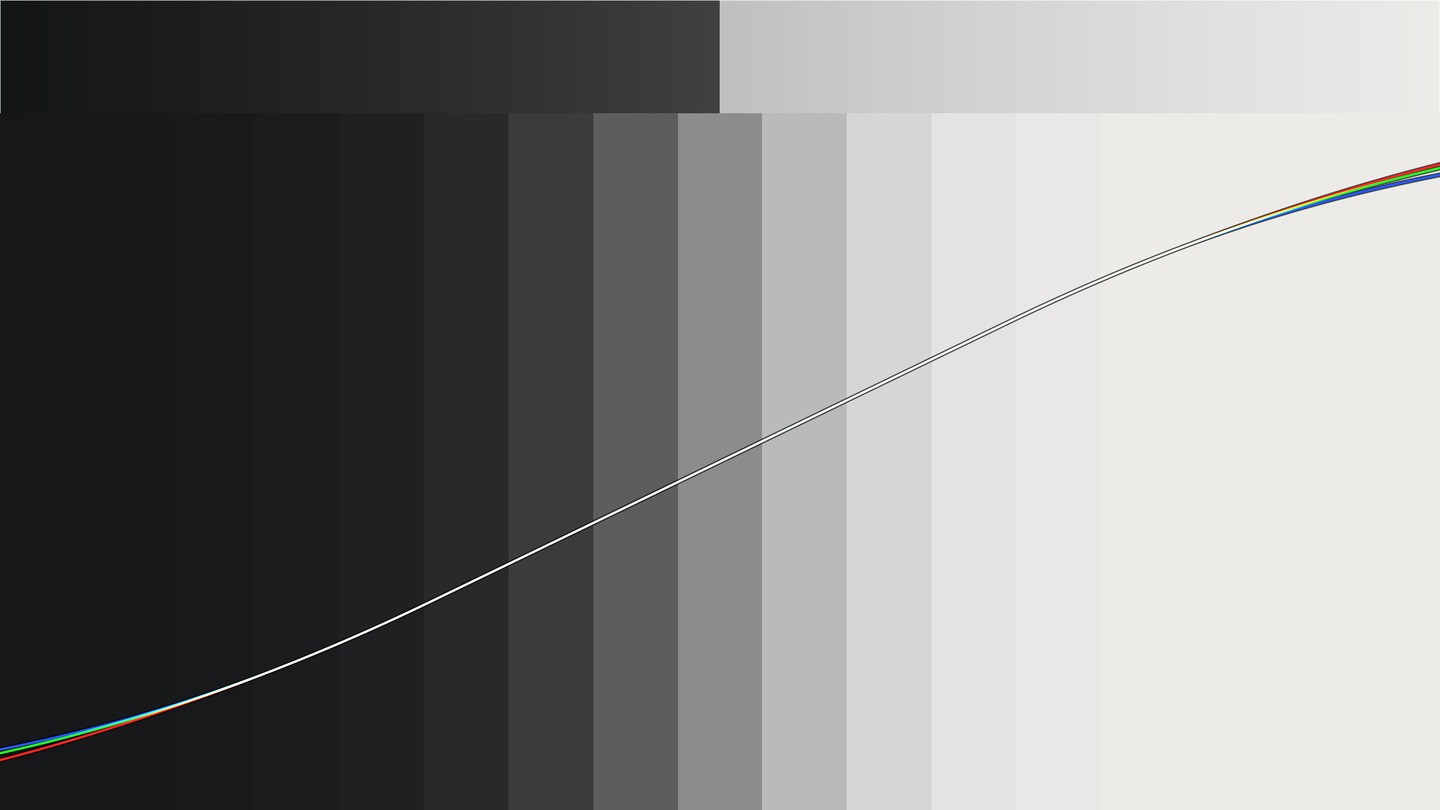
Shiage (仕上げ, the finishing) works after the output transform on the finished signal, in percent from 0 to 100. Black Point sets black deeper or higher, White Point sets white; both run out softly up to Black Range and White Range, the middle stays bit-exact. Black Desat and Highlight Desat take the color cast out of the ends, Black Tint and White Tint put a slight cast in, as in a print. All in the language of the lab: a printer black, not a curve in light.
How to use it
- Put Shiage on the timeline level, as the last node after the output transform (Genesis, Rec709 DRT). That is why it has no Working Space.
- Black Point minus sets black richer, plus lifts it. Black Range says how far up that acts.
- White Point minus pulls the highlights back, plus makes white brighter. White Range accordingly.
- Black Desat and Highlight Desat against casts in the ends, then Black Tint and White Tint with their hues for the print character.
- Clip to Legal clips to 0 to 100 percent. Off if the pipeline clips later.
Display
Curve Box shows input against output in percent per channel, and a wedge of the ends on top: the lower 25 percent stretched on the left, the upper on the right. False Color reads the signal as Rec709 with gamma 2.4 and shows stops around middle grey (41 percent signal, as on the camera monitor).
Tips
- The Print preset is a good start: black 2 percent deeper, white 1 percent higher, both ends slightly desaturated and tinted.
- The black point can be at most 0.45 x Black Range, otherwise the curve would fold. With a range of 25 that is 11 percent.
- Shiage is built for SDR (Rec709, sRGB, P3). An HDR mode will follow.
- In Panel Mode, Black Point, Black Desat, White Point and Highlight Desat sit in front: the four knobs you still need at the end.
Node structure
Mini Panel in Panel Mode
Presets
Highlighted: presets in the OFX version only.
In Resolve
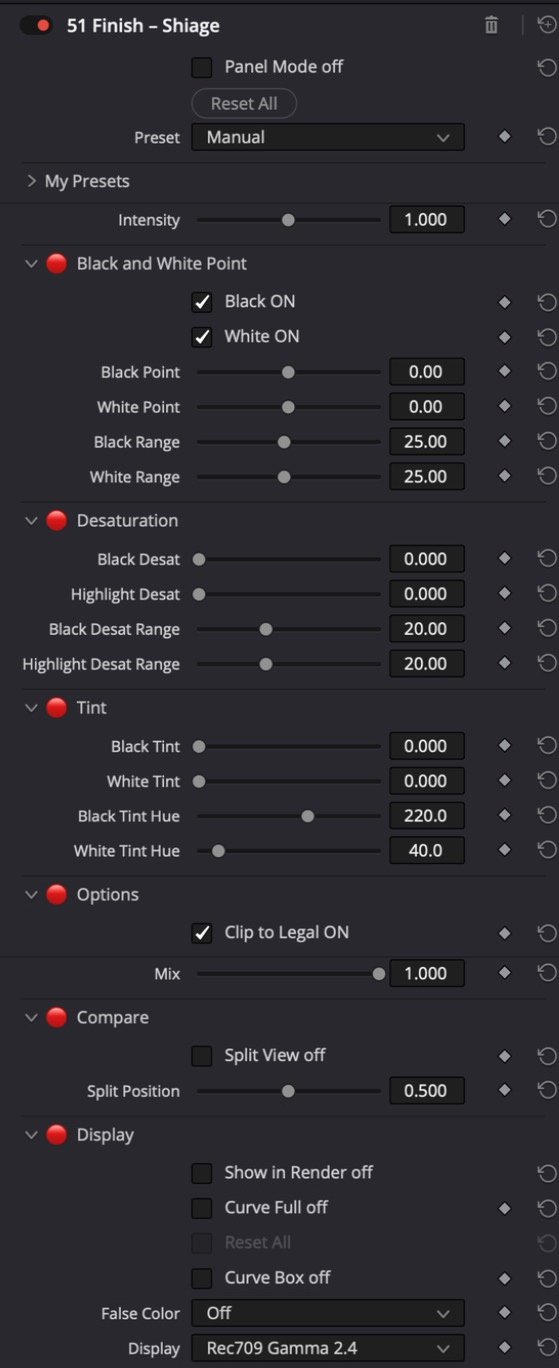
All controls
General
| Control | Range · Default | Effect |
|---|---|---|
| Intensity | 0 … 2 · 1 | Overall strength: 0 = neutral, 1 = as set, 2 = double. Runs out softly near the control limits (OFX only) |
Black and White Point
| Control | Range · Default | Effect |
|---|---|---|
| Black On | Switch · on | Turns the black group on or off |
| White On | Switch · on | Turns the white group on or off |
| Black Point | −10 … 10 · 0 | Where black is set, in percent of the signal: minus = deeper (below 0 is clipped, black fills in), plus = lifted. Runs out softly up to Black Range, above that nothing changes |
| White Point | −10 … 10 · 0 | Where white is set, in percent: plus = brighter (above 100 is clipped), minus = highlights pulled back. Runs out softly downwards over White Range |
| Black Range | 2 … 50 · 25 | Up to which signal value (percent) the black point acts. The middle stays untouched. The black point can be at most 0.45 x range (at 25: 11), otherwise the curve would fold |
| White Range | 2 … 50 · 25 | How far below white (percent) the white point acts. The white point can be at most 0.45 x range |
Desaturation
| Control | Range · Default | Effect |
|---|---|---|
| Black Desat | 0 … 1 · 0 | Takes the color cast out of the deepest tones, 1 = fully neutral at black, running out softly up to Black Desat Range |
| Highlight Desat | 0 … 1 · 0 | Desaturates the brightest tones towards white, 1 = fully neutral at white |
| Black Desat Range | 2 … 50 · 20 | Up to which signal value (percent) the desaturation reaches |
| Highlight Desat Range | 2 … 50 · 20 | How far below white (percent) the desaturation reaches |
Tint
| Control | Range · Default | Effect |
|---|---|---|
| Black Tint | 0 … 1 · 0 | Slight cast in the blacks, as in a print (after the desaturation). 1 = about 3 percent signal at black |
| White Tint | 0 … 1 · 0 | Slight cast in the highlights (after the desaturation). 1 = about 3 percent signal at white |
| Black Tint Hue | 0 … 360 · 220 | Hue of the cast in the blacks (HSV degrees: 220 blue, 180 cyan, 300 magenta, 40 warm) |
| White Tint Hue | 0 … 360 · 40 | Hue of the cast in the highlights (HSV degrees: 40 warm, 200 cool) |
Options
| Control | Range · Default | Effect |
|---|---|---|
| Clip to Legal | Switch · on | Clips the result to 0 to 100 percent. Off = values may run above and below (for pipelines that clip later) |
General
| Control | Range · Default | Effect |
|---|---|---|
| Mix | 0 … 1 · 1 | Mix with the untouched image |
Compare
| Control | Range · Default | Effect |
|---|---|---|
| Split View | Switch · off | Before and after side by side: original on the left, result on the right, a white line in between. Turn off before rendering (OFX only) |
| Split Position | 0 … 1 · 0.5 | Position of the split line, 0 = left, 1 = right (OFX only) |
Display
| Control | Range · Default | Effect |
|---|---|---|
| Curve Box | Switch · off | Signal curve input against output (0 to 100 percent) as a box bottom left, per channel, plus a wedge of the ends |
| Curve Full | Switch · off | Curve over the whole image (Curve Box takes priority) |
| False Color | Off / ARRI / EL Zone / Sweet Spot | Exposure aid on the result: ARRI, EL Zone or Sweet Spot, in stops around middle grey of the display signal (41 percent signal as on the camera monitor, Rec709 gamma 2.4 assumed). Rendered while on. Note: shows the image at this point of the node tree. Anything after it (further nodes, timeline grade, output transform) is not seen. For the finished image put Hakari as the last node on the timeline level |
| Display | Rec709 Gamma 2.4 / sRGB / P3-D65 gamma 2.6 | Encoding of the display signal this node receives (after the output transform). Sets how False Color reads the signal (middle grey at 41 percent for Rec709 2.4) and the luma weights of the desaturation. Black and White Point work in percent regardless |
License and support
The licence terms are at shitsukan.de/tools/license.html, packages and prices at shitsukan.de/tools. One key covers all projects and all nodes on the number of Macs stated at purchase (Hakari up to three, Kantan Easy two). Several keys can be active side by side, for example a package now and an extension later.
- Trial mode
- Without a key all tools run in full, with diagonal hatched bands across the image. The image can still be judged, the export cannot.
- Hakari free
- Hakari is free for good. Get the free key at shitsukan.de/tools (email only, no expiry, up to three Macs); activate it like any other key.
- Activate
- In any tool open the License group at the very bottom, paste the key, Activate. Needs internet once. The status line shows which packages are unlocked on this Mac. The key is then stored in
~/Library/Application Support/Shitsukan/licenses.json. - Offline
- Every 14 days the plugin checks the key quietly in the background. Without a network it stays valid for 60 days from the last check, then trial mode until the next connection. On set or in an edit suite without internet, a connection every two months is enough.
- New Mac
- Activate the same key there. How many machines a key covers is stated with the package.
- Remove
- Delete the license file and the plugin runs in trial mode again.
Contact and updates: shitsukan.de